Monday, December 30, 2013

Camp Stitchalot - An Overdue Weekend in Review.

My 241 Tote accidentally matches my wallet!
It's been a bit of a whirlwind in the past two several weeks since I returned home from Camp Stitchalot. It's hard to find a moment to sit down and review.

Our teachers: Jeni, Anna, and Debbie
First of all I have to say a great big "Thank You!" to Rossie, who picked me up and dropped me off at the MegaBus stop! Thanks so much Rossie - (and Mr. Rossie who made us delicious soup after camp on Sunday!) you really made it possible for me to attend camp!

All the finished stuff I made on retreat! 
Next I'll say that it was a really spectacular weekend!

Oh yeah, and I made a zillion of these flying geese - thanks to the die cutters on hand!
I was lucky enough to be able to rent a Bernina for the weekend - I couldn't risk traveling by bus with my Juki! The Bernina was nice, not fast fast - but not super slow either. The machine operated nicely and had a decent stitch quality - I missed Juki just a little. :)

AMH Flying geese and Kona Curry! My fave!
Over the course of the weekend we enjoyed three classes from our "camp counselors" Jeni, Anna, and Debbie. We made a pillow, a purse, and potholders. I also spent some time working on zip pouches and a zillion flying geese. 

The weekend was a real breath of fresh air in my busy schedule, and I'd love to go again. I really recommend it if you're looking for a fun and low-key retreat!


Wednesday, December 18, 2013

Christmas Half Square Triangle Zip Pouch Tutorial!


As a part of Pellon's Handmade Holiday series, my brand new tutorial is available for download on Pellon's projects page! I'm pretty excited about this one. The colors are just perfect - and I just adore adding tiny piecing on projects! 


Everyone could use a pretty little zip pouch so head on over and get the download!

Saturday, December 7, 2013

What I'm working on...


Pellon's Quilter's Grid, Fusible Fleece, and Wonder-Under tape. I sense a fantastic Pellon project in the making!!! It's time to go pick out fabric to add to this pile of pretty interfacing! 

While I'm at it check out my Pellon artist page. I'm living my fourth grade dream of being an "artist." 

Monday, December 2, 2013

Hey Quilty!

Clearly I had to black-Friday shop at Joann's - Batting and Quilty were purchased!
Heading to Joann's? Pick up a copy of Quilty! I'm super excited to say that for the first time my name is in print! My "gift card pockets" made it into the November / December issue of Quilty! 


It's pretty cool seeing my project in there - professionally photographed and everything! You can see the video for this project on Quilty's youtube channel (shown below). 

I hope to have the opportunity to film / write for Quilty again soon!!

Friday, November 29, 2013

Priscilla's Quilt - Quilt-In-A-Weekend style.

These fabrics are so hard to photograph! The green looks too lime here, but not lime enough below! Also, shadows... Chicago fall/winter is the worst for photos!

So life keeps moving forward. People are always having babies. This time I'm pretty ok with it. My cousin Jordan's girlfriend is pregnant - and due right after Christmas. The baby is a girl, and she will be named Priscilla. I got it into my head that I'd make her a quick little quilt. 


I pulled the fabrics from my stash - based on the colors they have picked out for the nursery, green, teal, and orange. I think the colors are just great! 

This is Priscilla's room - thanks to Facebook it's easy to keep in touch!

I went straight to my pinterest boards for some quick inspiration -- knowing I wanted to do the wonky cross block - very minimal but lots of fun color. I pieced the wonky cross section in about an hour or so - on my day off, while Allie was at school. It took one stop at the quilt shop for some lime green linen (they were out of Kona Grass green), then it was finished in no time! I love quick little quilts like this. 

There are prayers and my signature tucked under the binding. Wrapped in love!

My dimensions were based on the package of crib quilt batting I had on hand. Finishing at about 40" x 40"

I sure hope Priscilla enjoys it - but first I'll need to mail it out to them. Sometimes it's hard living two states away!  

I actually remembered to use one of my quilt labels! I used Wonder Under to fuse it onto the back and stitched around the sides.

Sunday, November 24, 2013

A finished quilt, but it's not mine!


Last weekend I quilted a charity quilt for our Chicago Modern Quilt Guild. We were collecting full size quilts (BIG) for a local group called Teen Living. Teen Living provides necessities (apartment type necessities) for teens who are aging out of the foster care system, and will be moving out on their own for the first time. Amazingly our guild managed to make 23 full size quilts!

We were encouraged to work in small groups for this project, so I joined up with Emily. She pieced it and I quilted and bound it! (she even made the binding - how speedy is that?!). 

I quilted it with a basic stipple, and for whatever reason my Juki seemed to be skipping a stitch every once and a while - I'm hoping that it has something to do with the fact that the quilt was made using vintage linens... but I might take the machine in to have it looked at just in case. I would hate to think that I might have knocked the timing off or something! 

It was really great to see all our guild's charity quilts - and they were very well received by the Teen Living staff. I hope to have a blog post up soon on the Chicago MQG blog which will include some pictures of the other quilts. 


Thursday, November 14, 2013

I almost can't believe it!!! I'm going to Camp Stitchalot!

That's right! It seems like Christmas is coming a bit early for me this year! After talking about it a bit, Wally surprised me by putting the payment through last week! Eeek! :) He was so cute too - he showed me the image on his phone saying, "look at this text message I just got." The screen showed the paypal "payment sent" screen! How cute!

Now back to the retreat! Do you all know about Camp Stitchalot? It's a retreat out in Michigan hosted by Rossie and Brenda / Pink Castle Fabrics -- it's set up like camp - we share rooms (eek!) and have camp counselors (Jeni Baker, Anna Graham, &, Debbie Grifka), who will teach classes - we set up our machines and cozy it up. Sewing all weekend at a bed & breakfast? Yes!!

I think I'm gonna need to take a closer look at the supplies needed for the Noodlehead 241 tote! Imagine! :)

How about you? Anyone out there going to Camp Stitchalot too? Or are do you go on other retreats? I love the idea of spreading out my stuff and sewing with a bunch of other fabric lovers! :) 


Tuesday, November 5, 2013

Big City Bags - book tour!

"From Big-City Bags by Sara Lawson, Martingale, 2013; used by permission. Photo by Brent Kane. All rights reserved." 

I'm here today to tell you about how fabulous Sara Lawson's new book is! Don't get me wrong the whole point of a book release blog hop is to get the word out there, but believe me when I tell you this book is amazing!!!

My Meringue Clutch! It's actually photographed in the book! "From Big-City Bags by Sara Lawson, Martingale, 2013; used by permission. Photo by Brent Kane. All rights reserved." 

I can't express how excited I was to be asked to pattern test for Sara's book. She gave us the chance to pick what pattern and what fabric we wanted to use - we gave her our top 5 - and let me say, I would have happily made any of these bags! 

The bag that I made is the Meringue Clutch. It's perfect for day or night and I just love the texture of the gathers across the front! The clutch measures about 8.5" x 11", and it will easily hold your essentials. The instructions for this bag (and for all of Sara's bags) are impeccable - very user friendly with great tips and illustrations throughout. I would consider this to be a good project for the confident beginner - intermediate sewer. Do not fear the interfacing. Interfacing is our friend!

Speaking of interfacing, Big City Bags has an entire section in the front of the book where Sara shares her expertise about the various types and uses of interfacing. I expect that I'll be referencing this section often when I go to buy interfacing!! 

Sara's Meringue Clutch "From Big-City Bags by Sara Lawson, Martingale, 2013; used by permission. Photo by Brent Kane. All rights reserved." 

I'm going to add a side note here. I work at a used bookstore (where I run the arts and crafts section), I've seen a lot of mediocre bag sewing books - full of hideous dumpy looking bags, Big City Bags is the exact opposite of those books - full of beautiful patterns, all the bag-making info you need, and packed with beautiful pictures! Sara's book is the only purse-making book that you'll find on my bookshelf! 

So now that I've told you what I think, it's time for you to take a look for yourself. You can order a signed copy of "Big City Bags" here

Sunday, November 3, 2013

I'm on Quilty!!

Remember way back in June when I mentioned taping for Quilty? Well the first of my two videos is up on the QNNTV site! Go check it out and learn how to make some pockets for your gift cards!


By the way - how cool is it to see my quilt in the background - hanging on the Quilty set??!!

Friday, November 1, 2013

Free Motion Quilting Demo at the Chicago MQG


I was lucky enough to demo at the last Chicago MQG meeting. It was nice to have the chance to think about how and why I do what I do when I free motion quilt. I made an outline in preparation for the meeting - so why not share it here too? Here are my tips for FMQ.

lost your feed dog cover? make one out of template plastic or card stock!

Equipment:
  • Darning foot (cheap is ok, and feel free to alter yours with a rubber band)
  •  Feed dog cover  - if yours don’t drop using a switch, cover them with template plastic, mik carton plastic, or card stock. Tape the cover in place using masking tape. Store bought covers work too but be aware of them if they move.
  • Quilting gloves (I use Fons and Porter)
  • Extension table – super helpful, but ultimately not necessary.
  • Supreme Slider – I don’t use this but would love to!
  • Extra tables / ironing board – don’t let your quilt hang onto the ground!

How to:
  • Start with a well basted quilt.
  • Roll your quilt with two vertical rolls toward the middle. Pin into place with safety pins if necessary.
  • Use grippy gloves.
  • Hold on to the rolls or over/under position – find what’s best for you.
  • Stay within your “work triangle” – the area formed by the thumb and first fingers – always be aware of where the needle is in relation to your hands! Keep that “work triangle” flat with no puckers.
  • Watch the needle and the area that is next to be quilted – don’t just watch your stitching or you’ll lose sight of were on the quilt you are!
  •  Foot fast, hands slow! Play around with balance between the speed of your foot petal and the speed of your hands. (If you’re getting messy curves on the back of the quilt move your hands slower around curves).


Problem Solving

Thread breaks what should you do?

(if your stitches were normal while quilting previously)
  • Completely re-thread the top thread, then keep going.
If that doesn't fix it then:
  • Re-thread the bobbin thread.
If that doesn't fix it:
  • Change your needle.
If that doesn't fix it:
  • Check to be sure that you’re not trying to sew over a particularly thick block intersection (sometimes this can cause your thread to shred). If you are then either quilt very close to the intersection without crossing over the bulk (avoid it!), or go slower over the intersection (even use your hand wheel to cross it).
If it’s not a bulky seam:
  • Change your needle size up one – and be sure you’re using the right needle for the fabric / thread. (see chart below)

Make every attempt to sort out tension issues before you’re working on your real quilt… google to find tips for your specific machine  and find tips to test how balanced your tension is. It’s best to know you’re starting at a basic good-stitch quality first! It’s easiest to know that your tension is good and to consider the other possible problems.

This is how I roll a quilt to get it all in the arm of the machine. Quilt pieced by Emily and Sally.

Resources: (I learned to FMQ by reading the internet – the following websites helped)
Amanda Jean (short video of FMQ stipples) 

Leah Day (tons of design inspiration!!!)
how to alter your darning foot 


My pinterestboard for FMQ (tons and tons of good inspiration, some tutorials, some just pictures) 

Thread size                  Needle size
50 wt                           75/11
40 wt                           80/12
30 wt                           90/14
Topstitch needles have larger eyes and are fine for quilting
If your thread is shredding move up a size needle!

The needle / thread chart is care of Ebony Love – who wrote it in my notebook when I couldn't seem to remember it!! I recommend taking a pic of the chart on your phone - then you can reference it when you're staring blankly at the notions wall wondering what needles you need!

There you have it. My tips. Nothing new, but served with the real encouragement - you CAN do this. FMQ is something you can do on your home machine. Keep trying and you'll get the hang of it!

Do you have any tips to add? Share them below! I'd love to hear from you!

Wednesday, October 30, 2013

Window Zip Pouch: Guest post and tutorial!


Hello everyone! I'm excited to announce that I'm guest posting on the Benartex blog today with a sweet tutorial. Welcome everyone who's here for the first time! I'd love if you looked around, follow me if you like what you see! 

The Window Zip Pouch is a completely lined pouch using a bit of vinyl on the front so you can keep an eye on the stuff you have stashed away! 

I made this pouch with my sister in mind - she loves baking and I think it'd be great for stashing her recipes - she won't forget what she has in there! Alternatively it is the perfect size for a rotary cutter and scissors. 

Thanks to Benartex you all get a chance to win a FQ bundle of these fabrics (Baker's Delight) used in the tutorial! To enter do one or more of the following (3 chances per person).


1. Sign up to follow Benartex's blog, either via email or a blog reader program like Bloglovin' (both on the righthand sidebar of the blog). Leave a comment letting me know you did so. 

2. "Like" Benartex on Facebook and leave a comment letting me know you did so. 
3. Follow Mommy's Nap Time and leave a comment letting me know you did so. 

Saturday, October 26, 2013

Blogger's Quilt Festival


This week is the Blogger's Quilt Festival over at Amy's Creative Side -- it's a nice way for us bloggers to enjoy tons of beautiful quilts, without the hassle of organizing a giant quilt fest! (Also, a way for us to keep busy while the big shots live it up at Quilt Market!).

My entry for the quilt festival this fall is my Chicago MQG callender challenge quilt "Springtime Fun" This quilt will be one of the calender girls for our guild calender. 


This quilt started out as a pretty stack of fabrics that I'd pulled out based on one of my favorite Tula Pink prints, I took the one busy fabric, and pulled fabric in colors that were included in it. I really like this method of fabric choice. It feels free and easy, yet you end up with a pretty well balanced stack of fabrics! 


Next I started piecing. I didn't plan at all really, the only thing I knew was that I wanted a random bunch of HST's in there. (I didn't mark or trim those HST by the way - I just winged them). I love the freedom of this style piecing. Sewing a bit here and there, chopping bits as I go.

I had fun sewing... but then set the piece aside for a while because we were packing up to move. The deadline approached quickly for our challenge and the quilt I was planning on finishing didn't get done... so I picked up this one! I added the white border and scrappily added the rest. 

I'm really glad I made this quilt - it's a mini quilt just 14" x 18" (if I recall correctly). Mini quilts suit me so well - fun and free. 


This quilt can be seen on display at the Original Sewing & Quilt Expo starting Nov 14, 15, & 16 at the Tinley Park show!! If you're heading out to the Sewing & Quilt Expo sometime this year be sure to check it out!! 

Final stats
Size: 14" x 18"
Improvisationally pieced
Quilted by me on a domestic machine (my beloved Juki!)
Machine bound

Thanks for all the Blogger's Quilt Fest people for stopping by! Feel free to follow me to see more pretty quilts! :) 

Check out the other Blogger's Quilt Fest quilts here.

Friday, October 25, 2013

Purse Palooza!


Today's my stop on the Purse Palooza over on Sew Sweetness! Head on over and check out my review of the Pleated Tote by The Long Thread.

Monday, October 21, 2013

Modern Maples and Instagram

I'm not sure how many of you are on instagram, but the #ModernMaples has been a pretty big trend recently. I've been seeing pretty leaf quilts popping up all over and on a whim I decided I'd make one. 
modern maples quilt block
#MiniModernMaples (this is before sewing it together!)
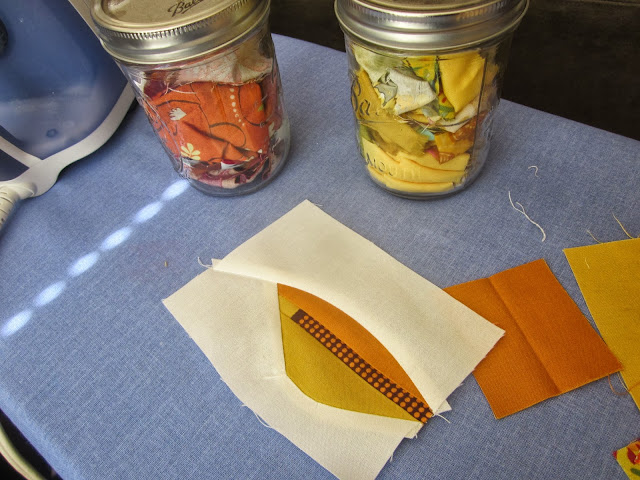
Do you think I could just make a standard 12" Modern Maples block? No way! I decided instead to make mine finish at 2 1/2" Yep. It's nothing to me if I'm not making 3/4" HST units! lol 

leaf quilt block

Anyway I made the block just for the sake of making one. Just as I would imagine, my 5 year old flipped over it! She LOVES FALL. Loves. She's been waiting for our annual fall trip to Door County WI - and has been watching for the leaves to turn colors (that's her signal that it's time for our trip!). Since Allie was so excited about the leaves in general I decided the tiny leaf had to become a little special toy pouch for her to take on our trip!

quilted pouch modern maples
Modern Maples Pouch -- I love that yellow velvet ribbon!
I added a little improv leaf on the other side, fused it to some Fusible Fleece, and there it is. It's totally cute, totally fall, Allie was so excited!! 


It must seem like I'm only making small projects these days... just wait, I nearly finished a quilt this weekend so that's coming soon! :) 

zippered pouch

Thursday, October 17, 2013

Ghosties Mug Rug!

I have been going nuts making small fall themed projects the past couple weeks. When we moved last summer I came across the beloved "ghosties" pj pants from my late high school / college / early marriage years. Yes, my Ghosties were something of a lovey... I wore them in Rome! I wore them freshman year of college when painting my sister's living room! 

ghost mug rug
Ghosties Mug Rug

Naturally they were stashed away because they had worn so thin in the butt that they actually split down the back seam! Eeek! lol. They've been in a box for a few years now. I knew I'd want them someday.

quilted mug rug

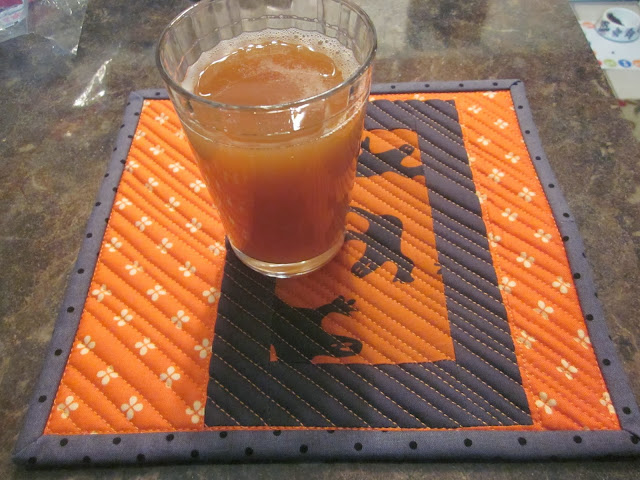
The other day I decided to make a little something using the Ghosties - they're perfect! I paired it with one of the Juliana Horner prints (from Joann's), and some generic dark grey dots. 

The thing is, this mug rug was originally going to be a pouch - that's why it's quilted with Soft & Stable (actually it's the hardware store equivalent) on the inside. Once I had quilted it up, I couldn't bear for it to be anything other than a mug rug - the texture is TO DIE FOR! Really it is! It's so fabulous and flat and yet it gives such definition to the quilting! 

quilted mug rug cider

I'm for sure claiming this one for myself. I love it and it's perfect for my hot apple cider! I can't help but get dreamy about all the memories I made, and all the growing up I did while wearing those pj's. I wish I could have another pair of Ghosties. 

***

BTW - random fact here: my mom bought the WHOLE family pairs of these ghost pj's for Christmas one year -- they'd been $3 clearance at Old Navy. Everyone in the house had them. It was rather hilarious. :) 

Tuesday, October 15, 2013

Winner Winner!


Whew! That week flew by! Now it's time to share the winner from last week's giveaway! Jake / comment # 16 will be receiving the pdf pattern for Sewing Patterns By Mrs H's Bookbag Backpack! I sure hope you love it Jake - and show us tons of pics once you make one! :) 

Thanks again to Samantha / Sewing Patterns By Mrs H for sponsoring this giveaway! Don't forget to check out her shop for more bag making inspiration! 

Monday, October 7, 2013

Giveaway from Sewing Patterns By Mrs H


Have you seen the new Bookbag Backpack pattern? I just adore it! If I had the chance I would drop everything and sew one! Unfortunately for me I have to go to work tomorrow morning (I miss late night sewing!!). But on the positive side, it means that you have a chance to win the pattern!!

That's right, I'm having an,  "I wish I could sew this - but I can't" giveaway! Sponsored by the fabulous Samantha from Sewing Patterns by Mrs H!


What do you need to do to win this fab pattern? Leave a comment below - tell me what you're sewing (or if you're like me, tell me what you wish you had time to sew). Extra entries allowed as listed below.

1st entry - comment telling me what you're sewing!
2nd entry - stop by Sewing Patterns by Mrs H, then comment here saying you did! (seriously look at all those awesome patterns!) 
3rd entry - follow Mommy's Nap Time (I'm so close to 400 followers!)
4th entry - make me a Bookbag Backpack (and I'll be your best friend for sure!) Just kidding... (sort of). 

I'll draw a winner using Random.org next Sunday 10/13

Wednesday, October 2, 2013

Simple Sewing


For a dose of simple sewing it's best to take your husband with you to the fabric store (or your mom)! About a week ago Wally and I took the luxury of a day off of work (while the kid was at school!) - and we went to the local fabric shop, Quilter's Destination. Wally was so excited about this skeletal halloween fabric. So I bought a half yard and made him the quickest 18" pillow cover ever. 

Quilter's Destination!
I literally cut an 18" square, then cut the remaining portion in half - hemmed the two smaller pieces, stacked them all, and sewed around the edge! Wally doesn't mind that it took very little time -- he's been using the pillow nonstop ever since! That makes me smile!

Also, I stopped in at Quilter's Destination recently when my mom was in town - that trip managed to end with her picking out 4 fabrics -- and I made her two 18" pillow covers and a standard pillowcase! 

Sometimes the simple sewing is a lot of fun. If nothing else it's a sure way to let your family know you love them!!

Monday, September 30, 2013

Did I mention my quilt will be in a calendar?


I don't think I remembered to share my news! My Chicago MQG Calender Challenge quilt was chosen by a guest judge - and it will be included in our 2014 calender! This is really exciting! I'm looking forward to seeing my little quilt again this fall at the Tinley Park Sewing Expo, and then seeing it in the calender for the rest of the year! :) I guess I know what my family members are getting for Christmas!


The icing on the cake? The sweet comments offered by the guest judge Sarah Nishiura (she's a local Chicago quilt artist). I love how she really understood my quilt!

Thursday, September 26, 2013

AMH Love

Last week I started a new quilt!!

AMH Charm Swap

Yes, I haven't been sewing as much as I would like to recently, but that doesn't mean that I haven't been dreaming up zillions of new quilts! So - this quilt has been marinating in my mind for a couple months. 

My idea is to use all the Anna Maria Horner fabrics. Ok, not ALL of them, but in packing up my fabric when we moved, I realized that about half of my (tiny) stash is beloved AMH fabrics that I'm not always willing to part with for small projects. So a huge quilt it is! 

Precision pieced charm squares
It's been a while since I did lots of precision piecing -- I'm glad to report that I can still piece squares!

I've started out with a stack of 5" charms from the AMH charm swap (I didn't participate in this swap, but my friend Sara generously gave me hers). That means I started with about 70 different AMH fabrics - and I ended up cutting a few more to round out the number for my BIG quilt. 

I pieced the squares in like-colored pairs - then gradually pieced from one color to the next. There were moment of, "This is not going to work!" But in the end I think the colors flow pretty well. (pardon the weird shadows in the middle and on the bottom - I swear those are purples and dark blues down there in that shadow!)


This is the beginning of something awesome. I've got a lot of ideas for the rest - but it'll have to wait -- I'm out of Kona Curry! Yes, I think Curry needs to be a key color in this quilt. It's a risk, but I think the colors will all pull together!