Showing posts with label mug rug. Show all posts

Monday, March 30, 2015

Afternoon Tea Mug Rug


Check it out! A tiny fussy mug rug. Of course on such a tiny project it's pretty easy to rationalize using tiny bits of my tiny tiny Liberty stash. These little flowers were lounging in my stash for years - given to me by a dear friend, they were always too precious to use. There comes a time where it just seems right, so that's how this mug rug was born. 


This mug rug was featured in issue 7 of Quilt Now Magazine. You can get a copy by following this link. It's always a joy to have my projects in Quilt Now - there's something much more real about seeing my project in print! 

Friday, June 13, 2014

Jungle Ave Mug Rug


I was lucky enough to help out with Sara Lawson's quilt market prep - which was super fun (any time I get the chance to sew with other people I'm all for it!). Afterward, Sara sent me some of her brand new Jungle Ave fabrics, and a set of her Aurifil thread collection. Naturally I went right to work making something fabulous with it. 


I made a tiny little mug rug (measuring at about 7" across). I'm pretty much in love with it. The fabric is a dream to work with, and I quilted it using a layer of Soft & Stable instead of batting. Whoa does that Soft & Stable make the quilting pop!! I love it! 

This little mug rug is a gift for Sara - She's surely one of the most generous, kindhearted people in the fabric world. I'm glad to call her a friend! 

Thursday, October 17, 2013

Ghosties Mug Rug!

I have been going nuts making small fall themed projects the past couple weeks. When we moved last summer I came across the beloved "ghosties" pj pants from my late high school / college / early marriage years. Yes, my Ghosties were something of a lovey... I wore them in Rome! I wore them freshman year of college when painting my sister's living room! 

ghost mug rug
Ghosties Mug Rug

Naturally they were stashed away because they had worn so thin in the butt that they actually split down the back seam! Eeek! lol. They've been in a box for a few years now. I knew I'd want them someday.

quilted mug rug

The other day I decided to make a little something using the Ghosties - they're perfect! I paired it with one of the Juliana Horner prints (from Joann's), and some generic dark grey dots. 

The thing is, this mug rug was originally going to be a pouch - that's why it's quilted with Soft & Stable (actually it's the hardware store equivalent) on the inside. Once I had quilted it up, I couldn't bear for it to be anything other than a mug rug - the texture is TO DIE FOR! Really it is! It's so fabulous and flat and yet it gives such definition to the quilting! 

quilted mug rug cider

I'm for sure claiming this one for myself. I love it and it's perfect for my hot apple cider! I can't help but get dreamy about all the memories I made, and all the growing up I did while wearing those pj's. I wish I could have another pair of Ghosties. 

***

BTW - random fact here: my mom bought the WHOLE family pairs of these ghost pj's for Christmas one year -- they'd been $3 clearance at Old Navy. Everyone in the house had them. It was rather hilarious. :) 

Sunday, April 28, 2013

Mini Quilts: Mug Rugs


I've always been a huge fan of mug rugs. They're tiny, fast, and useful. It has only been recently that I've begun to really think of them as mini quilts though. I can put some intense piecing and quilting into a 5" x 8" mug rug - so why not recognize it as something more than a coaster?

I'm rambling.

What I'm trying to say here is that I made a mug rug recently. But I haven't been able to bring myself to use it yet. Actually I considered giving it away - I have the intention of making a mug rug soon for a friend - but this one isn't quite perfect enough. 


I love this little guy though. Scraps of some favorite fabrics, bound in the most perfect orange fabric (my last bit of it!)


Then there's the back. The back!! I wanted to test out my skills after long arm class, but the mug rug top didn't want fancy quilting... so I quilted the back separately. These are the best flowers I've ever made! Now I need to work on getting some consistent swirls! 

All this rambling, for a sweet little mug rug. I love it though, that's what matters. 

Thursday, December 13, 2012

Mug Rugs By The Dozen!

You might be thinking that with all the pouches popping up around here that I haven't been quilting at all. Well that's only partially true. but I've been working a lot on some long term projects - harder piecing, and finishing some little stuff. 


One of my major projects the last few months has been a commission for 13 mug rugs (yes, thirteen!). My mother-in-law has had a couple made by me (and even made by Allie) mug rugs on her desk at work. Her employees like them... so MIL had me make them each one! 

I worked toward having a variety of colors and styles - there are a few guys who will be receiving them so I couldn't have them all girly! As it turns out, a couple of my favorites are those gender neutral ones!


I've been working on these slowly since September, and sat down to do all the quilting in one afternoon. It was fun to play around with a variety of quilting for these. 


I also tried homemade spray starch when I was preparing the bindings. I decided I don't like spray starch (after it singed onto the bottom of my iron - and I can't get it off!). It's nice that it makes things crisp, but overall not worth the hassle.

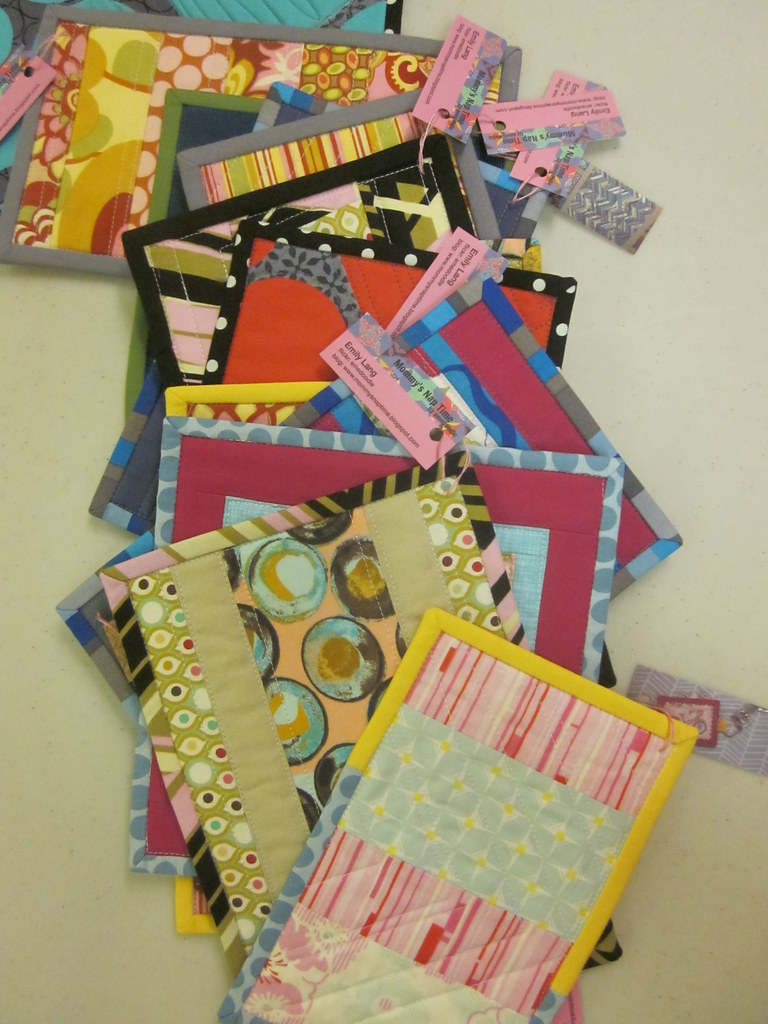
I made my own labels (printed on my printer), fused to the mug rug backs, and sewn into the binding. I know these won't be permanent, as the Wonder Under washes away in a few washes, but they're nice to have on there. 


Finally, I used a bit of embroidery floss to tie one of my Moo cards to each one. I like using this as a little tag, so people know who made the item, and they can then follow my process here on the blog. 

I'm hoping these mug rugs are well received - either way, they've greatly helped fund my trip to QuiltCon

Saturday, May 12, 2012

A Flight of Hope: Alzheimer's Art Quilt Initiative


I'm so happy to see it listed. I came to make this little quilt because our Chicago Modern Quilt Guild decided to  work on them at a meeting and send them all in as a group. Truthfully I had only heard of the organization in passing prior to that. I'm so glad that I know of them now! You see all around me there are people suffering from Alzheimer's or similar ailments (my Grandma for one, but also my MIL has spent years working with Alzheimer's and dementia patients). AAQI is raising money to fund research to find a cure. 


Go on over and have a browse at the little quilts they have up for sale and auction. You'll find the CMQG quilts listed here (ok they're not listed as a group yet - I'll update when they are). Mine is here. There are some really cute quilts to be had. Most of them have "fast finish triangles" which means they're easily hung with a small nail and a straw or chopstick. I'm sure you could even put them in a frame too. 


If anyone is interested in making a quilt to be sold or auctioned on AAQI check it out - it's really easy to submit a quilt! 


Here's a little bit about my quilt and my inspiration for making it: 
The title, "A Flight of Hope", describes not only the flying geese quilt block, but also the desire to fly away from the troubles caused by Alzheimer's. Around the center panel I quilted inspiring words, including the word "Hope." We have hope that one day we'll have a cure for Alzheimer's. 


Now go buy my quilt! :) 

Thursday, January 19, 2012

The First Finish of 2012!

And you thought it was going to be the Swoon quilt??

Mug rug thank you.

Nope. Last night I got a text from my cool co-worker Becky saying that she'd finished knitting my hat. Can I tell you how cool that is? Last fall I stole some skeins of yarn from my mom's ginormous yarn stash and asked Becky if she would knit me a hat... knowing I could figure it out but I'd rather sew than knit. She agreed no questions asked. Knowing that she had finished the hat meant that I had to get my butt in gear making the thank you gift I had planned. So tonight I whipped up a tiny little ticker tape mug rug. I went through my newly sorted tiny scraps and pulled out the most "Becky" fabrics. I think it turned out pretty cool. I hope she likes it!

**Edit - Becky loved it, and she made me an awesome cable knit hat with matching wrist warmers! Too cool! I'll have to try to get a picture of them soon! **

Wednesday, November 9, 2011

It's dark and dreary here...

So I don't have any cool pictures to share... just old ones from when I started the quilt.


But... Yesterday I officially finished piecing my mom's quilt top!! Now I just need to decide and purchase a backing and quilt it up! It looks pretty awesome! I am excited to see it all come together!

Other than that it's been a relatively unproductive week. I haven't made much progress on my swoon quilt since my husband keeps trying to get me to go to bed before 2AM... and it takes too much time/concentration to stop in the middle of that block - meaning I can only work on it after Allie is in bed for the night. 

Lets see... I joined up for the Christmas Scrappy Mug Rug Swap - after sitting out a round I feel ready to jump back in! Although I feel a bit weird because this round is not secret - so I feel the pressure of trying hard to make something for someone who knows I'm their partner. Luckily for me I received an awesome partner - Wendy, who I met at The Sewing Summit! 

Keep your eye out for a post later on about a super secret project that I can now talk about! 

Sunday, July 24, 2011

Chicago Modern Quilt Guild Mug Rug Swap - finished!

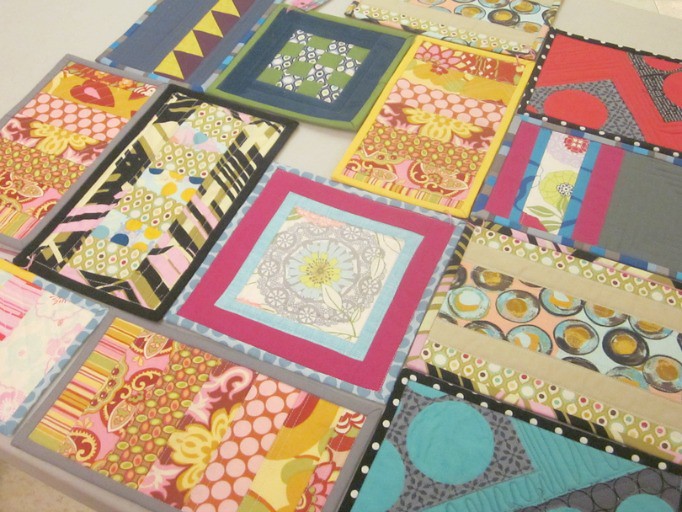
My last mug rug was given to it's new owner at our CMQG meeting last week... so it's time that I can share them all with you!

Here's how it all worked. This was a first for me, that it was not a blind swap. I knew who I was making the mug rugs for and they knew that they would recieve them from me too. For that reason I didn't share all the pictures along the way.

My mug rugs were sent to Ebony, Terri, and Rachel. I felt like I started out with just a limited amount of info on each of them. Ebony was the only one that I had really gotten to know a bit (at the retreat last spring). So I did what I always do with swaps, try to challenge myself with at least one part of the swap item.

I'll start with Ebony's - I knew that she appreciated precision and accuracy. Also, it came to my mind while I was planning this one, that she'd asked my gut opinion on fabrics once - trying to be childlike and non-judging about what our first impressions/decisions of choices were. (I'm rambling) Anyhow, I ended up doing a porthole type block with a really fun accent fabric underneath, and a strip of "hoo-ha's" (hehe not my name for them... tutorial for them is here I sewed mine down by machine though not by hand). On the back I added a tiny wonky star and some flying geese (that almost didn't get used there because they were a little wonky in the unintentional way). I'm pretty in love with that mug rug I must say!


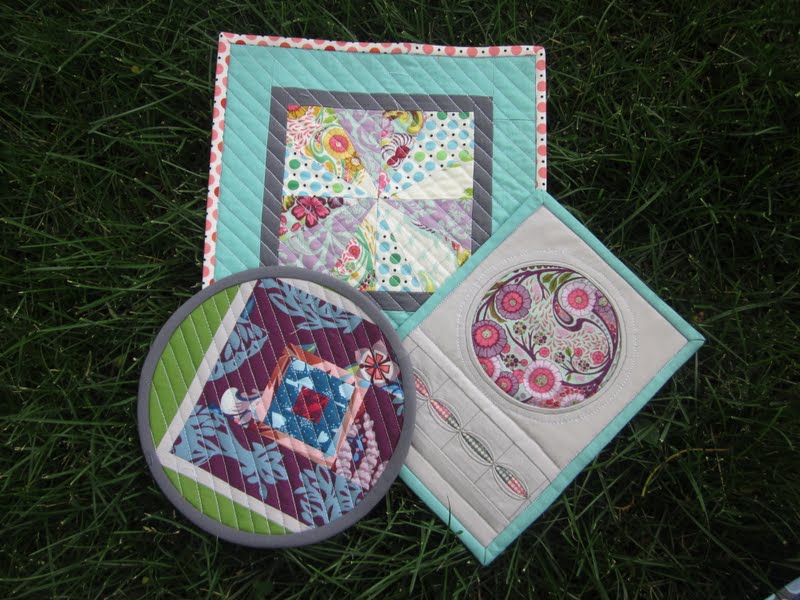
Then I worked on Terri's. I hadn't gotten to know her or Rachel very well so I knew just a little bit about them. From what I knew about Terri, she likes darker tones than I tend toward, and also likes batiks. Well I was working with my stash so Terri got an awesome mug rug made with the fabrics from my stash that most resembled her likes... purples and rich colors. I made an offset square block then quilted it, then cut it in a circle. That was my first try at binding a curved edge. It wasn't bad at all... but I did sew it on a little too taught and I'll do it better next time. I love the effect of the round edges and the straight quilting!

Rachel's was a fun one too. Hers accidentally ended up on the large size. I had tried the block on the front several times before, and I still haven't gotten those points to line up just so... but I'll keep trying. I really enjoyed this brighter color palate. The colors were more intentional than I usually work with. I added a tiny star on the back of this one too. :)

Now go ahead and check out the ones I received here. Also, check out the table we displayed them all on at our July CMQG meeting (click here, then click around to the previous pictures to see lots more!).

Saturday, July 23, 2011

Mug Rugs

Yep I'm still making them!
Mug Rug for MIL
Here's a sweet little mug rug for my MIL. She starts her first day at a new job on Monday and I figured the occasion was deserving of a mug rug (not to mention that she hinted at wanting one for work). I'm pretty sure she has no idea that I've actually already made her one. I tricked her and Wally into taking Allie to the store just now so that I could finish it before her first day!


I used scraps from my DQS11 quilt... and also trimmed down those three extra string blocks too. The star measures just over 1.25" point to point... :) hehe I think that's my smallest to date. I used some new (to me) Anna Maria Horner Garden Party for the back - that I scored at Vogue Fabrics today!!! It was bound using the "knife edge/ birthing method" hehe. The Ebony style - with an opening left in the middle of the back to be hand sewn, rather than at the edge. It definitely worked much smoother than trying to sew down the turning hole at the edge! 

see how I sewed the pieces together to leave a gap in the middle for turning?
All wrapped up and ready to gift!
 I can't believe I just had time to finish this, photograph it (in the last minutes of daylight) and blog it before they've returned! :)

Wednesday, July 6, 2011

CMQG - Mug Rug Swaps Received!

Last week I received mug rugs from my three partners for the Chicago Modern Quilt Guild swap. I can't quite post the pictures of the ones I sent out yet (since I've arranged to deliver one in person at our guild meeting next week). But here are the lovelies that I received!
CMQG - Mug rug swap recieved!
top two: from Terri (one is for my daughter!!) Bottom Left: from Elaine Bottom Right: from Sarah

 Here's a close up of the two from Terri! I love the colors and style of both of them - and I'd never before seen binding like the white one (zoom in it's pretty cool). I did then the next day see someone post about that sort of binding on a blog pretty awesome! One of them is for my daughter although if you ask Allie which is hers she'd say both of them! :) Thanks Terri!!
CMQG - Mug rug swap recieved!
This one is from Elaine who I'd hoped to have as one of my partners too! (next time I'm sure!). She surprised me with this awesome star which is made using AMH fabrics and grey (my fav!) Some of the fabrics are a cotton sateen which is amazing in texture! Not to mention that it was inspired by a blog post by AMH and... when Elaine posted it to flickr none other than AMH herself left a comment on it! Can you believe it?! Awesome!
CMQG - Mug rug swap recieved!
This mug rug is from Sarah, and she really hit the mark! I love this pattern and the of course I adore those fabrics (did I ever mention my love for Anna Maria Horner fabrics?) She used fabrics from Anna's Bohemian and Chocolate Lollipop lines of fabric (both out of print). I'd never even seen any bohemian in real life before - never! It's not even on my list of wants because it's so out of print!

Such a great surprise then was this little stack of 6 fat eighths!! I believe all but the brown multi dots are from Anna's Bohemian line of fabric (the brown multi is from Chocolate Lollipop). Oh my! :) Did I mention that I love Anna Maria Horner? I do. :) These are pretty amazing and I'm going to have to take a deep breath sometime and cut into them! (not pictured here: two awesome AMH fabric covered magnets that will be shown on my bulletin board soon!)

Thanks ladies for such an awesome swap! I had a lot of fun creating for my partners and obviously I got some awesome mug rugs in return!! I can't wait till our next guild meeting so I can see what everyone else made!

Friday, June 17, 2011

Bee Blocks, Mug Rugs, Pillow Swaps...

It's been a finishing kind of week so far. I'm not nearly as far down my list as I'd like to be though. I'm pushing through all my deadline work right now so that I can clear out and work on the BIG project. :) The table covers for my Aunt's jewelry booth. Those will be a bit of a challenge (totally out of my comfort zone in a good way). I'm not going to let myself sign up for any other swaps etc until those table covers are finished! I"m aiming for an early August finish for them (so I can bring them with me the next time we come to visit).
Sew Beautiful - June

As for those finishes ... well I've only finished on of those things listed above. The bee block. Cara asked for a house block for the Sew Beautiful Bee this month. Her final quilt will be sent to a family during their stay at a local NICU. My neice was a NICU baby when she was born... and my other neice is in the hospital so often that we really understand the comfort and longing for "home." That's what this quilt will represent, their home.

I had grand ideas for this block... I was going to make a two story deal with an "a-frame" entrance way... like my MIL's old house. I loved the shape of that entrance. But alas I started working on it and misused some fabric along the way... leading to my not haveing enough of that purple. I scrapped the original plan and worked with what I had. I think it turned out pretty nice... but I didn't have enough white to frame out the bottom. I'd still like to try a pieced word... maybe "Hope" to be used in the quilt too.... we'll see what the time allows me.

I made some major progress on my two remaining mug rugs for the CMQG swap. I finished the backs of both of them this afternoon and I'm about to go work on quilting them up. I have no idea how to quilt the one... but since my main machine is still out of commission (and FMQ is pretty hard on my old machine) I'm thinking it'll be some sort of straight quilting. We'll see.

Finally there's the Pillow Talk Swap. I've got my top almost all pieced. I am not feeling amazing about it... but I think it looks cool and is nicely executed. I've got to keep moving on it since it's due out soon enough!

More on these things later!

One of three finished - almost!


Some of us from the Chicago Modern Quilt Guild are doing a mug rug swap. Signups were before my sewing machine(s) went crazy. And before we moved. I signed up to swap three mug rugs not thinking about how much I've got to get done just now. No matter, I love making these things. Sure, I could take the easy way and sew up some simple ones (I think I have half a dozen that I've made already that I could send out.... but I'd rather have the challenge of making something specifically with my partner in mind. I also join swaps as a means to push myself creatively and to grow my quilting skills.

pretty quilting on the back...
With all that being said I have two mug rug tops finished and today I went from a basic sketch and color idea to an (almost) finished mug rug. I love love love how it turned out! The big challenge on this one was not only the bias binding (which I typically don't do, I usually use straight cut binding), but also the circular shape. Without showing you a whole picture you'll just have to imagine how cool that is for me. I'll share lots of pictures of it once It's been received (since this is not a blind swap). Until then, I'll be working on sewing down the binding and finishing those other two mug rugs!!

I can't resist keeping this... what use do I have for a circular scrap
of beautiful quilted goodness? This is the backing fabric.
PS - anyone trying to cut bias binding for a mini quilt and having trouble figuring out what size square to start with? Jay Bird Quilts has the equation and lots of info there, including an easy to use equation to figure it all out. :) I like math.

Wednesday, June 8, 2011

A quick little post.

I do have a newly finished quilt to share... but that will have to wait until I have time to actually formulate a decent post for it! 

Until then I'll show you guys a bit of my progress on another project. Some of the members of the online forums for the Chicago Modern Quilt Guild are having a little mug rug swap. I've been paired up with three different people (thanks to the spreadsheet guru Ebony!). This is not a blind swap - which is weird for me (it's actually my first non-blind swap!). So I can't really share all my progress or sketches etc. or else it'd give it away for my partners! I'll just share a little bit.

A little peek at Rachel's mug rug.
My goal in joining swaps is to pursue something a bit more challenging or different from my normal projects. Mug rugs are great for this since you only really make one block. This time around I'm working on perfecting a block that's troubled me thus far. My attempt this time turned out much better than my previous attempts (I actually read the directions... I hate following directions!). I'm really liking the color palate and it's pretty awesome so far if I do say so. This one is for Rachel.
A little peek at Ebony's mug rug.
Next is a mug rug for Ebony. She's the only one I was partnered up with that I have a better grasp of her likes and dislikes. That makes it easier but also harder. For hers I'm trying to think outside of the box using texture and color. There may just be some tiny piecing going on there too - because I can't keep myself from the tiny. The fabrics thus far for Ebony's mug rug have been chosen mostly for their pattern/shape. I'm really liking it so far but don't know where else I'm going with it.

Finally I have a sketch and a great idea for Terri's mug rug... but I haven't gotten started on it yet. :) More on that later!

Wednesday, May 4, 2011

No pins no handsewing binding: A tutorial.


After a little encouragement from a friend, I've decided to write up a quick tutorial for the binding I used here. No pins used (ever), and no hand sewing.

As background, I do follow Amanda Jean's binding tutorial to prep my binding. I use 2.25" strips, although I think this may be easier with 2.5" strips (especially if your piece is as bulky as mine was).

Before starting be sure that your quilt sandwich is very neatly squared up. Those corners won't end up perfectly square if you don't. I've found that it also helps to keep things square if you've quilted the quilt a bit more densely (less for it to wiggle around).

1) Read Amanda Jean's tutorial. Cut strips (I use width of fabric, not bias) 2.25", join them as determined in the tutorial above.

2) Iron strip in half, using a spray bottle to steam for a very crisp edge. (I just use plain water, and use a spray bottle instead of the steam option since my iron tends to burn me with steam).

3) Starting an inch or two from a corner of your quilt, sew the raw edges of the binding to your quilt sandwich using a 1/4" seam allowance (binding layered on top of the top of the quilt - not the back). Fold and turn corners as Amanda Jean shows.
Step 4
4) Use your iron tip to press the binding off and away from the quilt top. Don't worry about folding it around just yet. Be sure to put tension on that binding so that it's ironed neatly at the stitches. You can use the tip of the iron pushed into the corners too. If you've folded and sewn the binding properly in those corners they'll lay just right.

Step 5
5) Now hold the corner of your quilt between your pointer finger and thumb and flip the binding over to the other side.

Step 6
6) Starting in the middle of any side, iron from left to right, pulling the binding around as snugly as possible (without distorting the layers of your quilt sandwich). Iron straight to the corner, which will end in a little triangle. Use your spray bottle a lot, steam the heck out of every inch of the binding. This will make it easier to sew without it shifting.
Step 7
7) Carefully fold the next side on top - still working left to right. As long as you've got all the layers of your binding creased right where the edge of your quilt is the fold should be just in the right place. If not, fiddle with it a little... It helps to use a pointy tool (chopstick?) or your thumb nail to keep the folded part as it should be. Again, iron the heck out of it. Use lots of water. Make sure this is really crisp. Continue with the rest of the quilt.

Step 8
8) Notice that when you're all done those folds stay put without any help.

Step 9 stitch in the ditch.
9) Now hold one of those perfect corners, and slide in your machine so that the quilt top is on top. Starting at the very corner stitch in the ditch using your right hand several inches in front of the needle to monitor that fold as you sew. I don't find that this requires much monitoring. ****If you're having trouble stitching in the ditch, err on the side of your needle being farther from the binding - it'll look less messy than if you hit that binding.

Step 9/10
10) As you approach the corner (2-3" from it) use your right hand to hold the corner folds exactly in place. Hold the folds until you get within an inch or so to the needle. Slowly approach the corner and remember if you have any problems with the folded edge you can put the needle down, and lift up the presser foot to straighten it a bit (use chopstick - with foot off the pedal!). I find that it doesn't really require much fiddling. Use hand turn/wheel thingy to put the needle in the down position right at the corner, lift presser foot, and pivot the quilt.

11) Continue around the quilt. Trim your threads, and enjoy the perfection!

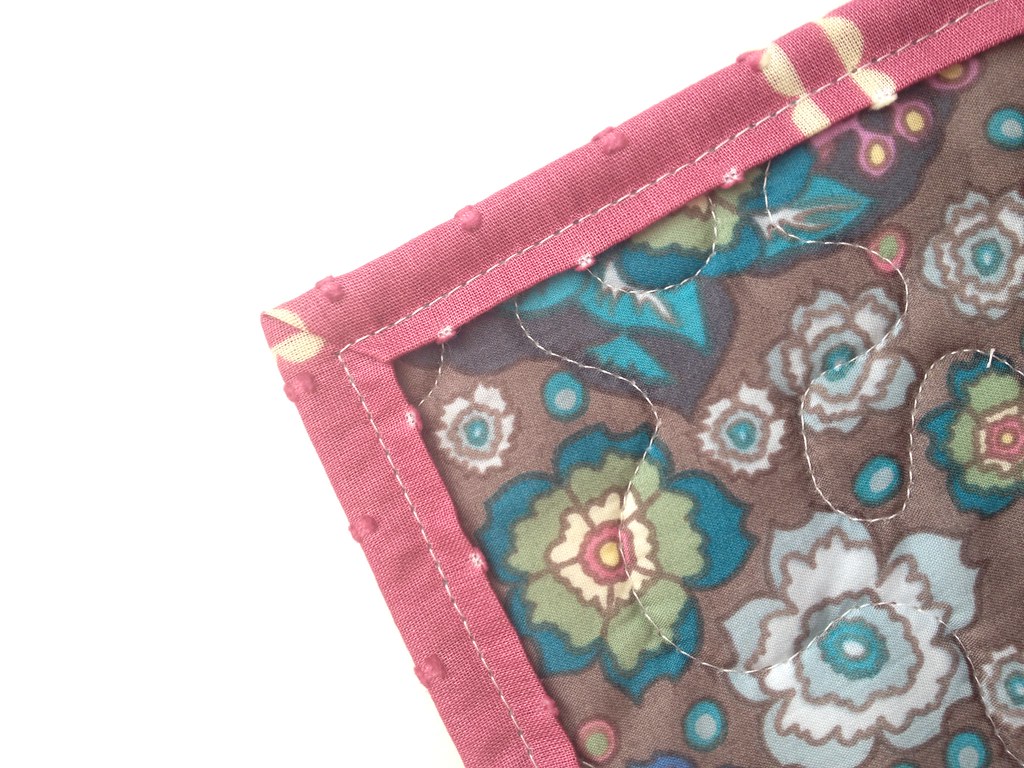
sewn binding, top view.

sewn binding, bottom view.
Enjoy!! I'd love to see your finished projects if you use this tutorial! Please don't hesitate to leave me a link or an email about it! :) Let me know if you've got any problems... I'm sure there are parts here that are worded funny.
No pins, no handsewing, binding tutorial