Showing posts with label learning to sew. Show all posts

Thursday, May 17, 2012

Sometimes it pays off to listen to the teacher.

Last night I was working on the most fabulous quilt, Emily's {Modern} Robin, and at this point in our projects (the last round we'll do on each other's quilt) it means we have to add some pretty long borders and still keep things square/not wavy.

(Note to self - take straighter pictures!)
Top border = wavy
Bottom border = not wavy
(the rest = bad picture taking/wind)
Can you guess who doesn't like to measure and pin her borders?

Well, last night I realized (for real) that I really need to measure and attach those borders properly! I was halfway through the first of three pieced borders I'm adding on this turn. And... they weren't at the level of flatness that I was expecting - a little wavy, no biggie... well yes it could end up bad. And there's still quite a bit of piecing going onto this quilt - so it's time to do it right! 

What? You don't know what I'm talking about? Go on over to my friend Ebony's page - she talks about trying to long-arm quilt a quilt with wavy borders. What a hassle! As a matter of fact this (crazy) experience with wavy borders inspired Ebony to post some basics for adding non-wavy borders. Go read about it there. No really, go read it. Someday you'll need to know. 

I went back and did a little fixing. I left two sides as is -- I'll perfect it the next border. 

Ugh I hate to pin though! :) 

It's worth it. Someone hold me accountable - if it's over 25" on each side of the piece, then I need to use pins to add a border. 


The end. 

PS: Please feel free to ignore the teacher and the quilt police too on most everything else.  

Wednesday, February 8, 2012

Which are you?


PPTS - a start

When sign ups go live for the Doll Quilt Swap on flickr (and other swaps) the discussion always comes up about what level of a quilter you are. It's so hard to determine and I'm sure so many people have different ideas about what makes you a beginner, intermediate, or expert. My flickr friend Shayla came up with this explanation. It gives me a lot to think about. I like to think of myself as being somewhere between intermediate and advanced, but according to this breakdown I'm closer to the advanced to expert category. I wonder how my quilts would be judged at juried show. I have been thinking about this a bit more since I'm somewhat interested in submitting my work to a local show or two this summer. We'll see, but without further rambling, here is Shayla's breakdown of quilting levels. 

_____

A beginner is someone who ranges between the just learning to sew squares together all the way to accurate points meeting, not chopping off corners, and can handle things like log cabins, churn dash, square-in-square, maybe even some basic applique. They probably would only do basic quilting if any. They need instructions and patterns for most projects. The top level of beginner can complete a quilt with pieced/appliqued blocks which they will probably send to a quilter but may do something like stitch-in-the-ditch or echo quilting. I expect to see mistakes in a beginners work, but by the time they get to the top, those mistakes should be minimal and only occasional.

An intermediate level would be someone who can handle at least basic paper piecing, more detailed applique, curves, probably some y-seams, and can make a completed quilt for sure with better quilting details--probably at least in the process of learning free motion. Their work should be consistently accurate and clean (no sewn puckers, straight seams, accurate cutting) not sloppy. They could enter their work at the county level and win ribbons. There is a HUGE range to intermediate which really depends on how the individual pushes themselves. They also will often design or adjust patterns to fit what they want. This is usually the level where quilters begin to break away from solid borders into multiples and pieced borders. Top of this level usually starts publishing patterns that become very popular because the instructions are precise and understandable and the designs have lots of appeal.

My idea of an advanced quilter would be someone who has basically mastered a majority of the quilting techniques (various applique methods, piecing, paper piecing, free motion and regular quilting, etc.) and consistently turns out superior work (not perfect, superior). They may or may not have also mastered things like thread painting, fabric painting and other artsy type techniques depending on their particular style and interest. They almost always design their own patterns. I would expect to see their work in state level, possibly national, competitions, even if they don't choose to actually enter such things. Now days, most can do some pretty good free motion although this wouldn't (in my mind) be a requirement because some quilters prefer to send quilts to someone who has really put the time into learning the fancy quilting or can handle the larger quilt sizes and so may or may not have mastered this. This is especially true when it comes to competition quilts. I would think in the mid to top range of advanced the quilter would be able to handle a scalloped or shaped edge without blinking an eye. This is the level that one should be to write a really good quilt book (not saying an intermediate wouldn't, but these are the better ones generally). 

Experts or Masters are people who have mastered all the things like piecing, paper piecing and applique. By this point all their work is self designed and near perfect. By this point they've usually found a particular format and style that suits them and have really started exploring what they can do with this area. They often add lots of details to their work, complicated piecing, hand or machine stitching and thread painting, etc. They have the "rules" down pat and can now break them with superb results. I would see their work at international level competitions. These are the ones who make quilts that just blow your mind (think Tokyo International Great Quilt Show stuff). Even at this level, many choose to team up with an expert quilter who will custom quilt their very complicated designs--I do know of some who quilt their own quilts though.

_____

What do you think? I love the breakdown of all the categories. I feel like there is so much room for all of us to grow - to constantly be learning new things. A while ago there was a whole trend of talking about the "dumbing down of quilting" but I think we're doing the opposite here, making everything accessible and encouraging each other in learning new things. Let's keep growing!

Sunday, May 1, 2011

I may be a bit biased...

But I just rocked my first try at true bias binding! I matched up my seams with the pattern of the stripes too! And then I bound it completely by machine. Seriously. Whoa. And then I did it again but with ric-rac. Seriously ric-rac is so cute! I need more of it now. More cute. 
tiny wonky nine patch from Oh Fransson!
I listened to the entire two disc album of Billy Joel Live at Shea Stadium. I heart Billy Joel. <3 

I can't hear anything but Billy while I use my husband's noise canceling ear phones... that's weird when sewing. It's a first for me, really.
Binding from the back. Yummy!
I finished two projects. They've been lingering around for a while. One because I made it so intricately, and tiny that I didn't have the time or energy that night to bind it. It was put immediately into constant use under our teapot. It's about 7" square and rocks! It's already tea stained... and I'm pretty sure I set those stains pretty good with my iron while perfecting that no pin, no hand sewing, all machine, amazing binding. (I'm a little excited about it really).
Binding from the front.
I needed a project to sew tonight. Since I've decided to buy backing fabric (instead of using the not-quite-right fabric from my stash) for the baby quilt top I made yesterday... that post is coming sometime soon. So I didn't have a "set my mind to it" project to knock out while DH did homework. Obviously this was a night for complexly simple finishing projects. (no making that dress that I really want to make for Allie but don't seem to have the brainpower/want to design it). 

I realized it was a night to finish that teapot holder thing when I was making myself some tea (that yummy black tea that I talked about the other night). Of course, that should be finished. :) It turned out really cute. The binding is a thrifted bed sheet. You might have recognized it from last summer's matching skirt/dress. so I apparently never showed you guys the pic of both of us? Here it is:
This was a whole year ago... can't believe it!
 ******
Ok so that took all of half an hour... (who knows Billy Joel was still singing so I was still sewing). As I stood looking at the leftover bits of that binding I realized how awesome it'd be on the bookshelf quilt I'd been avoiding that I thought didn't look right. I knew that as much as I didn't love that FMQ writing, I wasn't going to pick it all out. I might as well finish it right? Perfect chance to use that pink ric-rac. I had bought it specifically to use on this quilt. Perfection! The no pins, no hand sewing binding worked perfect too. Perfect. I even remembered to add those corner things so I can properly hang it at some point. I think it'll go right above Allie's bookshelf (the one we haven't bought yet) for her room (when we get a new apartment). Perfect. 
"Children are made readers on the laps of their parents"
Notice that I even alphabetized the books. Bookseller that I am, I knew it'd annoy me if they were out of order!
Back, showing corner tabs to use a dowel rod to hang it.
Now for some tutorials I used. Well sort of. I didn't actually follow any of them... I mostly looked at the pictures then went to my sewing room and rocked... Anyhow. I don't like following directions but you might. 
no pins, no hand sewing. I have no clue if anyone has a tutorial for this... I just ironed it all into submission then crossed my fingers (not literally - that could be dangerous). It worked but would be a lot of extra work for a larger piece. No, really I can't find anything like whatever it was that I did. Maybe I'll take some pictures and try to explain it... some other day! For now I'm off to bed.

(pictures will be added tomorrow!)

Tuesday, March 15, 2011

Words in/on quilts!

Recently I've been really loving seeing words written/stitched onto quilts. It all started back during the DQS9 when Cathy was creating this little quilt - yes with tiny stitched words across the middle. Lovely! Since then I've given it a try and not done too bad. But here's the thing, as much as I love the way little embroidered words look, they take forever especially when I'm not very good at it. Also, my letters tend to look a little bit more remedial than I'd like. And what if I want to stitch a poem or a whole letter? (ok I know... a little nuts there right but I have always loved words... and journaling). So then I've been lusting after these pillows. They have sweet bible verses and the child's name on them too! Perfect!
FMQ words - practice
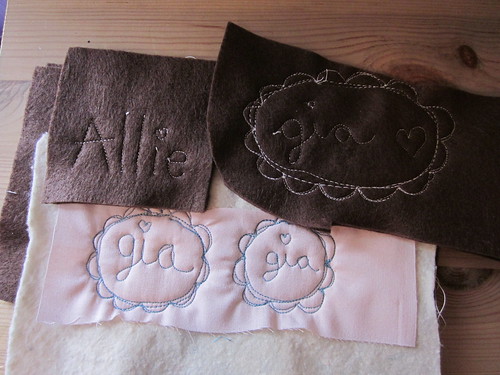
Some of my practice swatches. I practiced for about 20 min before making the real thing.
On with my point. For the past few days I've been compiling a pinterest board full of awesome examples of words on quilts. Here it is if you'd like to see. Finally I got off my computer and gave it some practice! One of the ladies at the CMQG retreat a week ago recommended practicing my free motion wording on a doubled up layer of felt since it's about the same thickness as a quilt sandwich but much cheaper! I'll recommend that highly! It worked like a charm. I just sat down and practiced. I practiced cursive, and I practiced print. When printing I would stop and pull the threads a bit (to give a little slack) before moving to the next letter - but I didn't cut those threads until the end. I had a lot less bunching of threads that way. The tiny pointy scissors that I have helped a lot in trimming those little threads in the end. Once again my inspiration for the label shape came from Cathy's DQS9 quilt label. that little circle with the ruffled edge is cute!

I completely recommend you try this! I'm loving it and can see that most of my future quilts will have some sort of text quilted into them! 

I'll do my official post about being finished with Gia's quilt sometime after the sun comes out so I can get some good pictures!!

Tuesday, December 14, 2010

Fabric Tuesday!


so this is love mosaic
Originally uploaded by emedoodle
A near finish... I just need to sew down the binding on this one! :) Dear husband must be loved... I knocked out this quilt in less than two weeks and used some of my favorite fabrics which otherwise would have been horded forever!
This was my first time doing strait line quilting... in a step pattern at that! My walking foot (thanks Santa!) came in the mail yesterday so I got right to it! The baby took a really long nap while I got it all done. Well I surely made up for that last night by having to sleep on the floor next to her and wake up every half an hour or so while she was sick. Yuck. That was seriously the grossest night of my life thus far! lol. She's feeling better now (thank God!). We did call the doctor, who said this is going around.

Some binding sewing will be happening tonight! Oh and I even attached a quilt label too! :) The pattern for this quilt was the Color Brick Quilt Along hosted by Stitched in Color. It worked up really easily and turned out just great! I added a border though to add some extra length. It's definitely the biggest quilt I've ever made (by a few inches)!

Now go on over and link up for Fabric Tuesday!

Thursday, December 2, 2010

Quilting Math Revisited.

My friend Mary is (relatively) new to sewing and likes to have a lot of guidance from me about how much of this or that she needs. It tends to usually be a vague question. Such as in this situation, "How much batting do I need to buy?" (she's making potholders, about 9" cut. She has great hopes of sewing something like thirty of these babies before christmas (some before next saturday!). lol. :) I figured I aught to break it down using my mad algebra skills. Did I mention that I once wanted to be a math teacher? {ok that was fleeting, mostly I wanted to teach theology and math, but well, theology teachers don't need degrees, there was no chance that I'd be hired as anything but a math teacher so I dropped the Edu from my major!}

Enjoy!


Mathematically speaking:

X/9.5 =Y

X= number of inches wide the bolt of batting is
Y= how many potholders you can make out of a 9" cut off of that bolt of batting. (giving wiggle room for imprecise cutting)

N/Y = Z

N= how many potholders (one piece of batting per) you want to make
Z= number of 9.5" lengths you'll need.

Z(9.5) = how many inches you'll need to have the lady cut off the bolt of fabric. (multiply this by two if you're going to use two layers in there, which I'd recommend!)


:) hehe. Maths are good.

You got that?

Monday, November 29, 2010

WOW!


I just made a Gathered Clutch from the tutorial by noodlhead. I decided to cut fabric for two of them, one for my mom, and one for my MIL. I am ok when it comes to sewing in zippers. I am pretty decent at most other sewing. Why did it take me almost three hours... maybe more... to assemble them? (ok to assemble one and partially assemble the other). I just don't get how to get those ends of the zipper looking so neat and tidy. It doesn't work so well for me. I can't ever figure out am I supposed to sew all the way to the edge here, or almost to the edge there, are those tabs supposed to be tucked under while I sew the body of the bag together? lol. The zipper itself was a breeze (ok almost a breeze), but those silly ends / sewing the body together just kicked my butt! I decided to set the second one aside (with just that last step to go) until tomorrow. lol. I'm not sure if my mediocre finished product is worth all the effort. I like the boxed pouches much better because when I was done sewing them I felt like the end product was worth the time taken to sew it. :) That's of course aided by the fact that while sewing the boxed pouches I didn't get frustrated nearly as often. lol. In theory I should be able to figure out how to neaten my sewing around those ends of the zipper. I hope! :)
PS - I used some of the new Tula Pink fabric for the pouch(s) - it sure is beautiful fabric!!

Monday, October 4, 2010

My first quilted pillow!!!

Last week I received my blocks from the Mod Bento Block Swap over on flickr. It's a central swap, so we all  made our blocks, quartered them, and sent them to the coordinator, who then mixes them up and sends you quarters from other peoples blocks. I'm so excited about the blocks I received; they go so well with the quarters of my own blocks that I kept. Since I'd only gotten the chance to make three full blocks (12 quarters) before the deadline, I decided to make them up into three pillows. Granted, I've never made a pillow before, but it turned out great!!
the quilting of the pillow top, as seen from the back/inside... getting better!
I did a meandering stipple on the front, layered with batting and muslin. My stippling is getting so much better since I quilted Rosemarie's Quilt. I had so much room on that quilt to perfect it! the back is all white (can you believe it, the first time I've sewn with white fabric; I resisted the urge to use grey!), and the opening edges overlap by about 5". The pillow form is 18" and the finished pillow top (before sewing to the back) was just a hair under 19". I think for my own future reference, I'd like to do french seams on the inside (heck even on the outside to look like piping?!) and take it in about a half an inch (finished top being 18.5").

I'm in love pretty much. :) Now all I need is a couch! lol... that one is a LOOONG story. All we have in our living room are rocking chairs (yes, three of them... even a toddler sized one!).

Now, go over to Quiltstory to see some Fabric Tuesday action!

Thursday, August 19, 2010

Mod Bento Block Swap

The giveaway post is here.

As the Doll Quilt Swap 9 winds down (yep I just finished the quilt yesterday), I've been thinking about joining another swap or two. I'm not really sold on the whole "quilting bee" although I think I'd learn a lot, I don't really have the fabric or postage to be doing that sort of huge project. I like the idea of doll quilt swaps because I like the finished product... neet and tidy. I've decided to join the Scrappy Pincushion Swap, which not only inspired me to make these,
but it is also hosted by the same people as the Doll Quilt Swap (lots of the swappers are the same too). The scrappy pincushion swap starts up as the DQS9 winds down, which is perfect!

Then I started looking for other swaps... and a friend from the DQS9 swap told me about the Mod Bento Block Swap. It's a pretty cool setup. You make as many mod bento blocks as you'd like to recieve, then send them to the swap mama with a self addressed prepaid envelope, and she'll send you that many blocks from the ones other people send in! I like that there's really no rules other than fabric choice (which is right in my comfort zone), and date of sending (which is two weeks from now - perfect).

So yesterday I set out to give it a try! We're using Film in the Fridge's tutorial, which is awesome! Here is the block I made yesterday, and the two I made today! I've been taking extra care to measure/cut/sew/trim meticulously... and mine actually ended up at the prescribed 16" square! Pretty awesome!

Monday, August 9, 2010

Quilting Math: Part 1

Whenever I make a quilt, my sketchbook starts to look like a math book. I don't like to buy more fabric than I need for a project, and I hate to have to run to the store to buy more mid-project if I run out. So before I buy fabric to sash, bind, and for the back, I do the math.

Today I'm going to break down for you how I figure out how much fabric to buy to sash a quilt. This sample I'm using is the measurements and sketches for my DQS9 quilt... so it's doll size.
Here's the sketch. The shaded area is made up of my blocks, and will be sashed in a lattice style. The sashing will be strips that are cut 2" wide, and finished at 1.5"

To determine how much fabric is needed for the sashing, I first add up all the areas sewn horizontally to the sashing.
3+3+3+3+9+9 = 30

Then I add up the total height of the finished quilt (from the top down I've got: 3+1.5+12+1.5+3= 21
Then I add one inch (for wiggle room), and multiply this number by 2 (since I'm using two strips of this length). 21+1 = 22
22 x 2 = 44

Now add the two numbers together 30 + 44 = 74
So you'll need a strip that measures 74" x 2" to sash this quilt.

Since quilting cotton usually is printed on the bolt as 44" wide, we'll take our strip length (74") and divide it by the usable inches of the fabric (I usually bet on having 42" of usable fabric once the selvages are removed). So.
74 ÷ 42 = 1.76 (round up to the nearest number, 2)
Meaning you'll need two cuts, selvage to selvage to equal 74 inches.

Now if you've already got that fabric by the yard on hand, you'd go ahead and cut two strips that are two inches wide each. Sew them together, sash your project and go on your way.

If you have to buy fabric for this project, it's easiest to buy a 1/4th of a yard.

***

Here's how to figure out the yardage if you've got a larger project. For instance for this string quilt I'm working on, I'm doing just a basic border around all four edges (the string part is 45" x 31") I'm putting an 8" border around the string section.

For this project I'll end up needing 5 strips (selvage to selvage) that are 8" wide.

The math you'll have to do for this is 5 (number of strips) times 8 (width of strips)
5 x 8 = 40

I'll need 40" of fabric... divide this number by 36 (the number of inches per yard).
40 ÷ 36 = 1.11 

I round up to the nearest quarter of a yard, so I'll be buying 1 1/4 yards of fabric for the sashing of my string quilt.

100th post coming up soon!

I'm thinking of doing a little giveaway... although, well, lets be truthful, I only have about 20 readers... and some of those are my family. lol. So I'm going to think about that, and hopefully decide before I hit the 100th post (I'm at 97 now I think)... We'll see.

I just whipped up some little pincushions - possibly to give away for my 100th... maybe plus some bits of fabric + some other goodies. :) Take a look:

Friday, August 6, 2010

French Seams!

I just made something with french seams! Really! For some reason I thought they'd be harder than they were! Earlier this week I had made a pillowcase for DH... with awesome bike fabric trim. Well today I wanted to sew, but being that I just embarked on a huge project for Rosemarie, I don't want to start anything else big. So I decided to make myself a pillowcase. I used this great fabric that I got from the One Yard Wonders sweepstakes win (one yard of fabric delivered to my door each month for a year - awesome right?), "Sparrow" by Alexander Henry. I love the fabric but the colors aren't really something I can see myself using in a quilt... so I chopped into it and used almost the entire yard for my pillowcase (just a little two inch strip left, from the selvedge).
I used a 1.5" strip of black and white saftey pin fabric as an accent, and used this tutorial from Film in the Fridge. It took just a little more time and energy than the other pillowcase I made, but it was well worth it. I wish I had seen this tutorial before I'd made DH's pillowcase!
Notice the bike fabric on Wally's pillow. AMAZING! I loooove it! Now to go sleep.
You're probably wondering why there's no pictures? My camera battery is dead and I've had to order a new charger since it has been lost in the land of "the two year old picked it up." lol. I'll have Wally take a pic on his cell phone tonight to be posted.

****Edited to add pics****
(magically neither pillowcase matches anything else in our bedroom... they don't even match eachother. lol.)

Friday, July 30, 2010

A Quilt for Anne Michelle


Anne Michelle's Quilt - top
Originally uploaded by emedoodle
This week I threw myself into a project, not simply for the sake of sewing, but for the sanity that sewing gives me. Monday morning I got a text from my best friend Michelle -- we live about 400 miles away from each other, so understandably we have many other best friends too --- anyway, her very good friend Leslie (and husband Kevin) were anxiously awaiting the arrival of their first child, and I was excited to hear the news that he/she was born. Instead I got a text that I hope no one else ever has to read. Leslie's baby was stillborn. She was full term and had a completely healthy pregnancy. No sign of any problem until just a short time before Anne was born, when they lost the read on her heartbeat. She was born via C-section although they had already found out that she was no longer alive.

My friend Michelle was there as Leslie's secondary support person. She got to hold little perfect Anne Michelle just once. They were given time with her to accept the loss, and to marvel at her perfect beauty.

I can't explain how it feels to recieve this news. I mean, my own daughter was born with hearing loss - something that never crossed our mind during the pregnancy. My sister has a child (now 4) who has been battling cancer since she was a year old. I know that parenting comes with a lot of surprises. But this was/is too much. Leslie had the most joyous day of her life taken from her. This is her first child (second really, after one miscarriage) - her first chance for that happy memory. It's shattered.

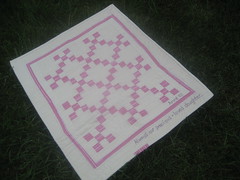
After hearing this news I knew immediately that I had to start a project to keep my mind busy. I knew it was going to be something little and delecate, and pink. This is what I got from there. A little (22" x 25.5") quiltie for Leslie and Kevin. Although I have never met them, I feel like I know them very closely - through my friend Michelle. All I can think of is that they left the hospital without a baby to hold. So empty, at least this little quilt can be something to fill their arms. Even though she's not here to enjoy it, I felt that Anne deserved a quilt for her own too. Something that can just be a gentle reminder of the joy and excitement and sorrow that came with her little life, that was shared completely within her own mother's body. I wish there was more that I could do, but this is my talent, and it's for them this week.


A little more on the details, I made this out of some leftover fabric from a shirt I made Allie when she was a baby, I didn't have very much left, and I really had wanted to bind it with the pink too... I ran out. This is my first real attempt at embroidering words onto a quilt, and it's pretty cool... not perfect, but pretty. Also my first attempt at close strait line quilting, and before doing more of it I'll definately invest in a walking foot. (duh)... it got a little wonkified there in the middle and I had to scramble to fix it. The back is some of the "lorenza" by Alexander Henry that I got from winning the one yard wonder thing. I wanted the back to be free and fun, as Anne is now up in heaven waiting for us.

For the souls of the faithfully departed, by the mercy of God, may they rest in peace!

Friday, July 23, 2010

Tutorial: Sewing School (one thing, one week challenge)


Accepting the challenge given by Amy, from Amy's Creative Side.
This week we had my niece Katee in town with us. She's ten and has sewn with me on two or three occasions before. For her recent birthday Wally and I got her all the necessary sewing supplies to get started (minus the sewing machine). While I wanted to give her my old White sewing machine, my sister decided she'd rather Katee use her machine (the same as my old Singer)... since of course if Katee ran into any problems my sis would be much more likely to understand how to fix them. So, with the understanding that when she returned home she could set up her mom's sewing machine on the auxiliary dinning room table, we got to work! Here's a breakdown of what we learned etc.

I'd recommend dueling sewing machines for this project... side by side so that the student can really do it all by themselves. Prior to this week, my niece had completed two projects, both using a sewing machine sewing strait lines only, each time following instructions with an example before each step. Hardly independent sewing, so this was done in the hopes of getting her much more comfortable with sewing without me there with her.

Step 1: Machine parts and function.
  • Machine parts: stitch length, stitch width, backstitch button, bobbin winder, presser foot, needle, feed dogs, bobbin.
  • Machine threading.
  • Bobbin winding and threading.
Step 2: Basic skills. Practiced by sewing a basic 9 patch.
  • Sewing with a 1/4 inch seam allowance.
  • Pinning seams.
  • Ironing.
  • Chain piecing.
Step 3: First project, simple potholders.

  • Measuring fabric with ruler/pen.
  • Cutting precisely.
  • Pinning (prepared for the "inside out/pillow case/birthing method").
  • Sewing around the outside, keeping needle down at corners to turn fabric.
  • Leaving an opening for turning inside out.
  • Clipping corners.
  • Turning inside out/poking out corners.
  • Top-stitching around entire outside and closing up the opening.
  • Quilting an "X" on the top, through all layers.
Step 3: Taking what we learned to make another similar project.
  • We used this method to make a small needle book for travel. A basic pillowcase method project, with the addition of a loop for hooking onto a bag or purse, and Velcro sewed on using a zig-zag stitch.
Step 4: A more complex project, pieced potholders bound traditionally.
  • Using pre-cut 2" strips to make a log cabin block.
  • Ironing seams to the side
  • Keeping seams even throughout the project.
  • Choosing colors for fabric.
  • Pinning the quilt sandwich.
  • Quilting across in an "X" pattern.
  • Preparing a strip for single fold binding.
  • Sewing the binding strip on the front mitering corners.
  • Hand sewing the binding to the back, mitering corners.

Friday, April 2, 2010

The Little Folks Quilt!

It's finished! I'm so happy about how this quilt turned out! It's the first time I've taken the plunge and done free motion quilting on a regular sized quilt. It's also the largest quilt I've made to date (it'll fit a twin bed).

The fabric is from Anna Maria Horner's Little Folks line. The Violle worked up so beautifully. I was a little worried that it being a bit lighter weight than quilting cotton that it would bunch or something as I quilted it. That didn't happen at all! I'm very pleased at how it turned out. It's backed and sashed with Kona Cotton in Coal, and bound with AMH's Good Folks ... something in Dusk. :)

Now I'm just itching to make another! I have a bunch of the Little Folks left... (I was kinda stingy about cutting peices for this... wanting to hold on to all that fabric!). I'm not sure if I'll make another or something else. For now I'm very pleased; it's just perfect!

Friday, March 5, 2010

More embroidery...

Here's what I've been working on. I'm not sure yet, but I'm thinking of incorperating this into the back of this quilt.
 For the back I'm planning on doing Coal Kona cotton, with a strip of patchwork of the other fabrics from the front. Possibly binding it with some fabric from Anna Maria Horner's Good Folks line (since I couldn't imagine trying to bind a quilt with the violle - though I'm sure it is possible. Not to mention that it's a good excuse to buy some Good Folks fabric!

Wednesday, February 24, 2010

New projects...

Strips... lots of them!
I got this fabric from http://www.connectingthreads.com/ for really cheap last week. Just waiting to try something new. I decided to give the chain pieced log cabin blocks a try. I hadn't thought of it this way, but when you are using strips instead of measured pieces (or tiny scraps as in my case) the sewing goes a lot faster!

I made 8 of these in a matter of about an hour. Also, added in some other blocks...

 I don't even know the proper name for it. Whatever I think they look pretty fun. I'm planning on adding some solid colored sashing between the blocks - likely white. I'm up to 16 blocks done for this one already. So rewarding!

Wednesday, February 3, 2010

Happy Birthday Michelle!


Last week was my best friend Michelle's birthday. Now, we don't usually buy eachother gifts, but I figured I would send her one anyway.
So here is the mini-quilt that I made for her. I was testing out some new techniques including free-motion quilting. I used OhFrasson's tutorial (from Sew Mama Sew) for the tiny patchwork.
Here's the back too. I backed it with a really soft bedsheet. The quilting started with just lines, and I added the stippling last. I wasn't completly happy with it pre-stippling. I'm getting a little more confident with free-motion quilting!
Here's the scarf. Made using the tutorial here.
I hope she liked them as much as I liked making them!

Friday, January 29, 2010

Sneak Peek!

Here's a little look at my most recently finished project.
It's in the mail now! More pictures to come once it has been recieved!