Showing posts with label Pellon. Show all posts

Tuesday, February 18, 2014

Covered Seam Finishing Tutorial: The Aragon Bag

Aragon Bag!!

Last month my guild hosted Sara Lawson for a workshop on her Aragon Bag. It was a really fantastic workshop and I was lucky enough to be the guild appointed "helper" for the workshop. So I made my bag ahead of time and came to the meeting prepared to help wherever needed - fusing interfacing, assuring people that they did indeed have it put together right, etc. It was pretty fun! 
Of course I made the Aragon bag ahead of time - and it came together so nicely! I can't even begin to tell you just how smoothly - I didn't swear or anything! I'm so proud of how polished this bag is! There were some major Aha! moments throughout - points where I read the step and couldn't imagine a better way to do the step - it all fit together so nicely - all the little details!

So, on to the bag. I had finished my bag before the workshop - all but the bias binding around the inside raw edges. Ugh. That part... I don't like hand sewing. My hands don't like hand sewing... so I devised a plan to not sew that by hand - and it worked!! Here's how:

Covered seam finishing mini tutorial:
Materials needed:
Fabric
Iron
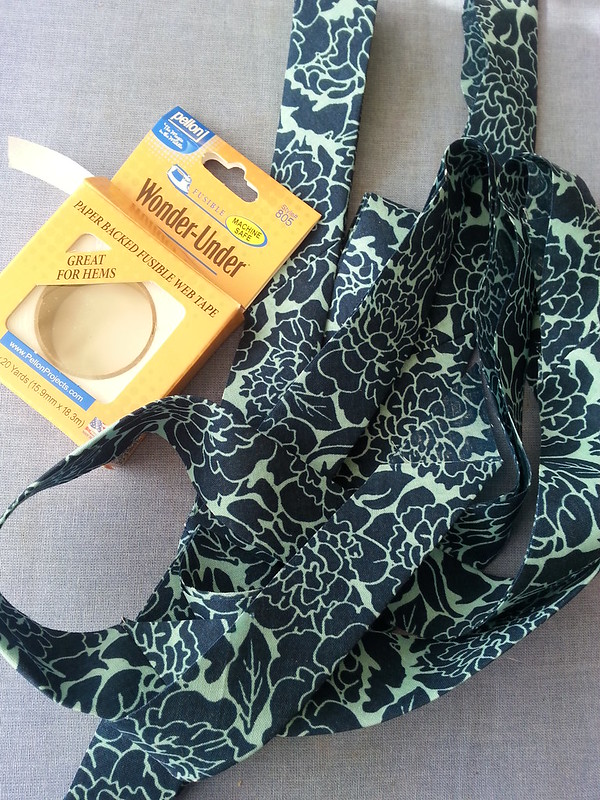
Bias tape, folded in half.

First make yourself some bias tape - it really does need to be on the bias!
Cut your strips 2 1/2" wide (cut as many yards as the pattern calls for). 

Next press the strip in half right sides together. 
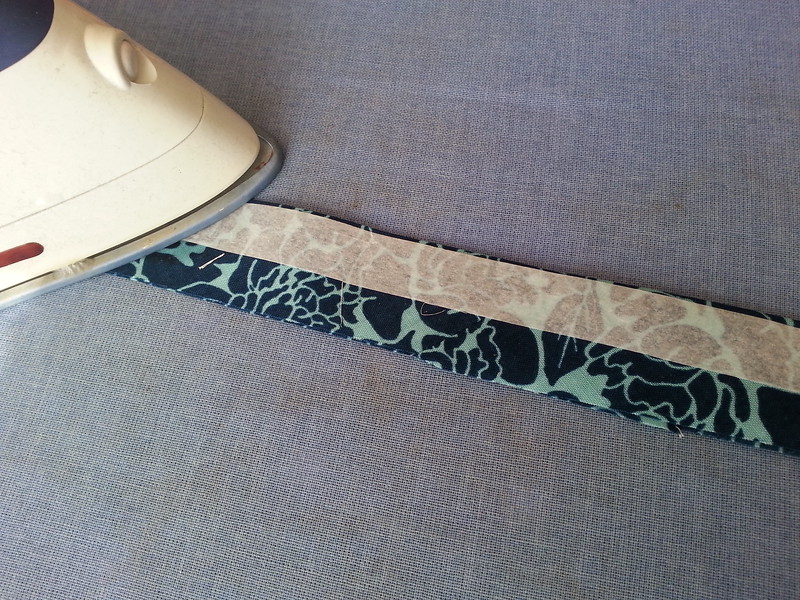
Fuse the wonder under along the folded edge.

Then lay the Wonder Under tape along the folded edge (on the right side of the fabric) and press it (according to the directions) along the entire length of the bias tape.

Leaving the paper in tact sew the raw edge (paper side up) along one side of your seam. I used a ton of clover binding clips to hold it in place.
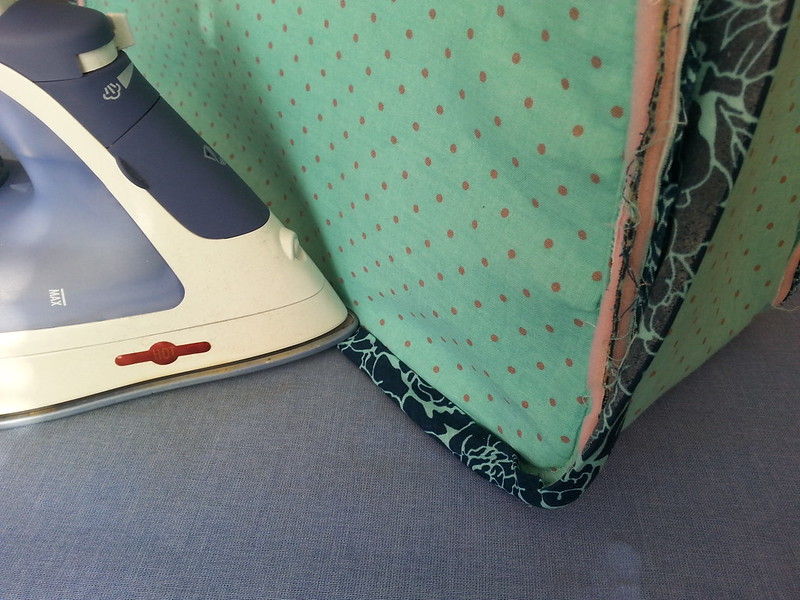
Carefully press.

Peel off the paper and carefully press the bias tape over and around the raw edge seam. Use an occasional clover binding clip to secure the binding to the edge long enough for the Wonder Under to cool. Be sure to pull the bias tape taught enough that it covers past the seam line. (tip, in a few places I found it necessary to trim the seam allowance down just a bit).
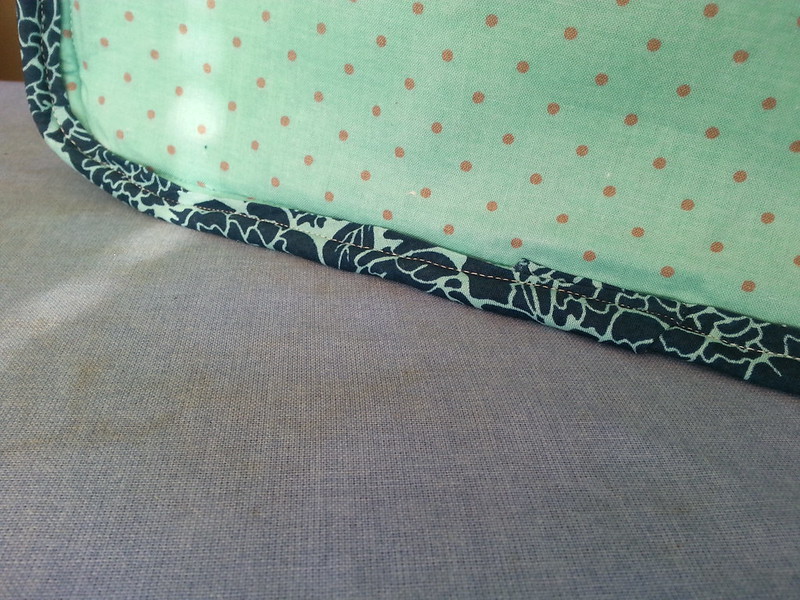
Image from the folded edge side.

Carefully sew along the folded edge. 

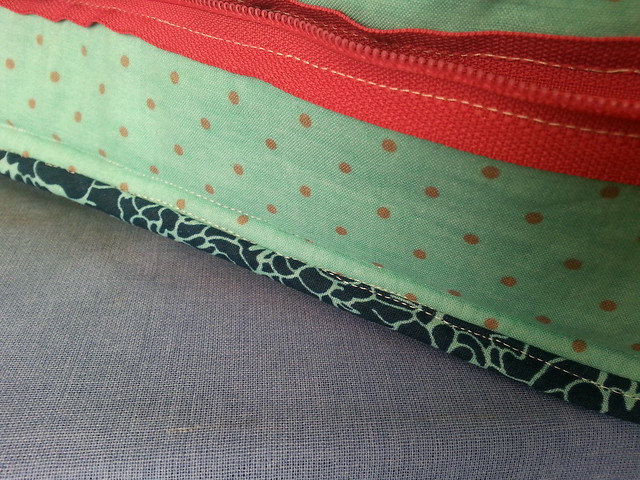
Image from the opposite side. It doesn't matter much if your seams are perfect - covered is all you're looking for.


Tada! Completely machine sewn covered seams! 
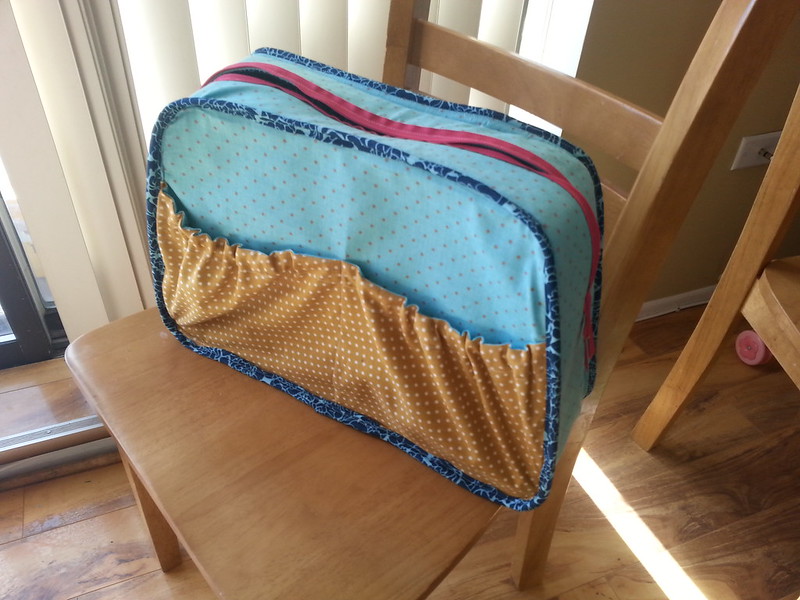
Completely covered in so little time! 

I really enjoyed sewing this Aragon Bag and now I'm able to say that all along I was making it for m mom! She came to visit last weekend and she had no idea that the bag was for her!! Happy early (early) mother's day Mom!! 


Wednesday, December 18, 2013

Christmas Half Square Triangle Zip Pouch Tutorial!


As a part of Pellon's Handmade Holiday series, my brand new tutorial is available for download on Pellon's projects page! I'm pretty excited about this one. The colors are just perfect - and I just adore adding tiny piecing on projects! 


Everyone could use a pretty little zip pouch so head on over and get the download!

Saturday, December 7, 2013

What I'm working on...


Pellon's Quilter's Grid, Fusible Fleece, and Wonder-Under tape. I sense a fantastic Pellon project in the making!!! It's time to go pick out fabric to add to this pile of pretty interfacing! 

While I'm at it check out my Pellon artist page. I'm living my fourth grade dream of being an "artist." 

Saturday, July 6, 2013

Did you remember the interfacing?


Just a quick PSA for you guys! Stop by your local Joann's and you might just see one of my projects! Two of the new Pellon products will feature pics of my projects on the packaging cover!


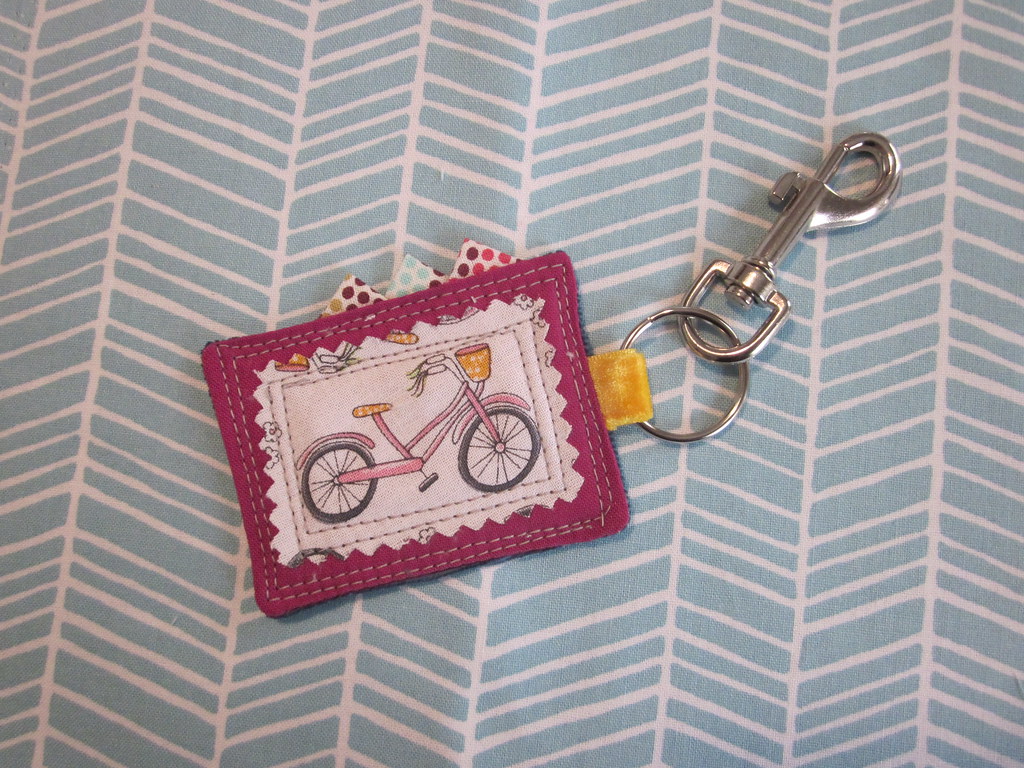
See? That's me, the bicycle keychain (bottom right). I'm way excited about this! My mom was in town when I went to see it for myself - and she was so adorable saying "I think I'll buy one just to show my co-workers!" lol Mom! 

I haven't seen it in stores yet, but my Bubble Pillow graces the cover of another product package too!


And last but not least - these cute project sheets will be on the Pellon displays at Joann's soon (I really have no idea when, but they're coming!). I'm pretty sure I'll geek out and tell all the fabric cutters at my Joann's when I see those project cards! :) 


Stop by Pellon's Project Page to see more of my projects. 

Wednesday, April 3, 2013

Pellon has a new website!

I'm pretty lucky to be a Pellon Project Designer, and I'm glad to share with you that they've updated their website! Look how pretty it is!! :)

Pellon's new website! 

Check out info about all Pellon's products, as well as a ton of cool project downloads. You can find my artist page here. You'll find the projects I've designed there. Hopefully I'll be adding a couple new projects there soon! 

Oh and while you're at it go check out the new Pellon University videos on the youtube page.

Enjoy! :) 


Thursday, November 15, 2012

Playing with some new Pellon!

You might know that I really love adding words to my projects... (heck I have a whole pinterest board for it!) but I'm not very good at hand embroidering words. Much more is the fact that I don't enjoy it nearly as much as every other aspect of quilting. I've always been wanting a way to add these touches to my quilts without spending the time and annoyance to hand stitch them. 


Recently my way of doing this is to free motion quilt them into the finished quilt. I'll add a name here or a word or two there. It's a battle to get neat and precise words when you're FMQing a large quilt. I've been doing quilt labels like the one below - by making a whole quilt sandwich and then trimming it down and stitching it to the finished quilt. It's not as neat and tidy as I'd like. 


A few months ago Erin sent me some samples of this Fuse-N-Tear 371R. It worked exactly as I had hoped! 

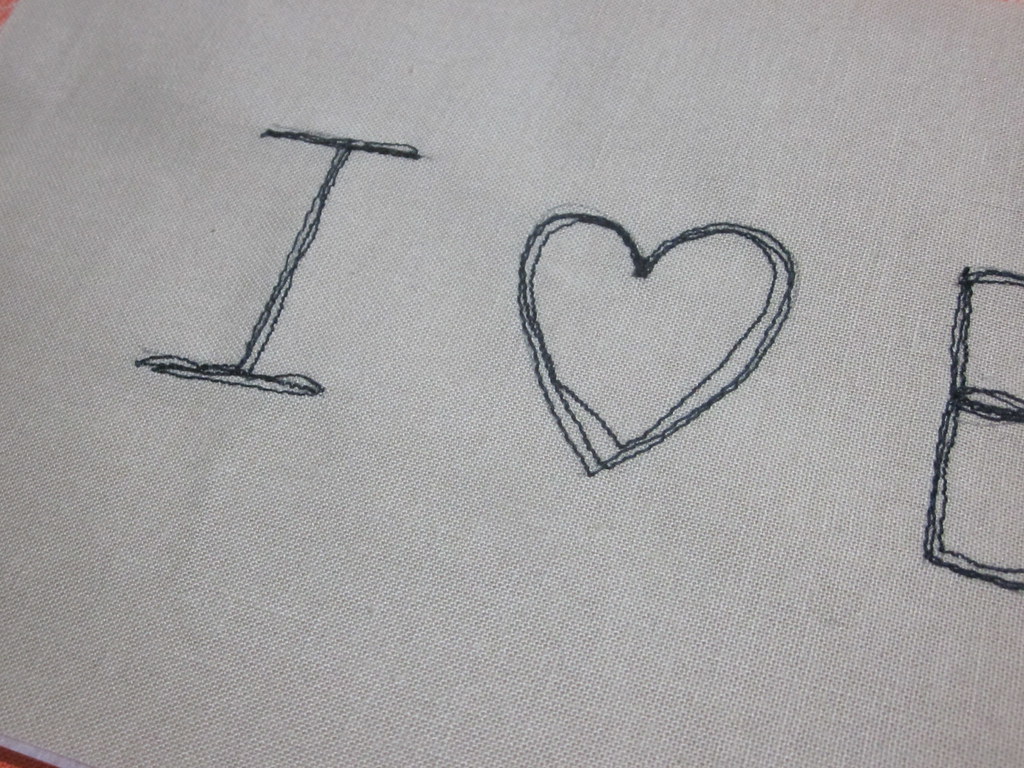
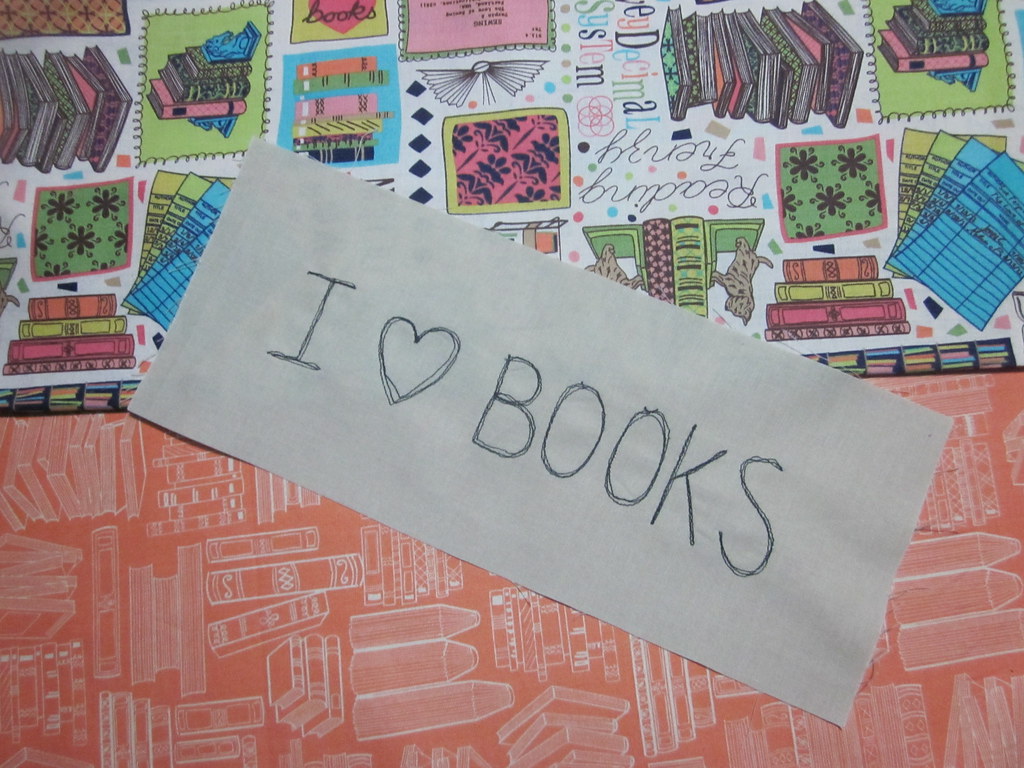
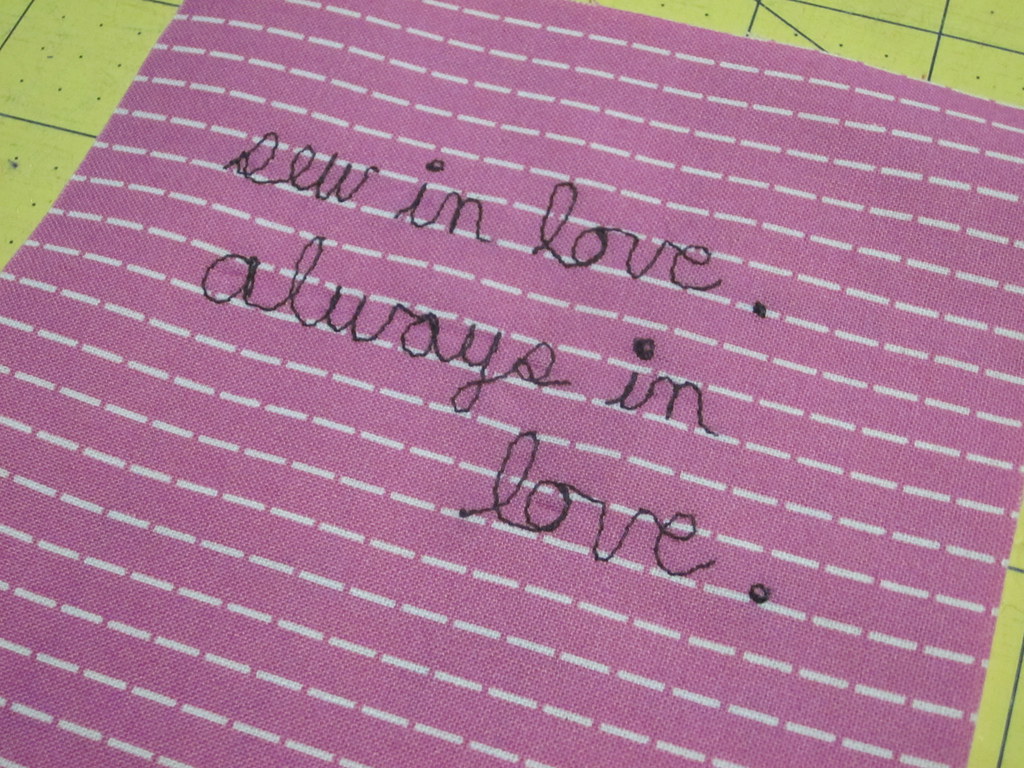
Check out how fabulous my words are!!


Those pink lines are about 1/4" apart. Yes, I had to test it in tiny. This method works just perfectly with 1/4" cursive letters! 


So what should I make with these? I think the books one will probably become a journal cover (using those two awesome book fabrics from connecting threads. The pink one will definitely be a pouch. Help me plan my Happy Little Pouch Hop pouches! What shape? What fabrics? What kind of details?

(linked up to WIP Weds)

Friday, November 2, 2012

Hey Guys... I was at Quilt Market!

Ok... so in truth just a teeny thing that I made was at Market! 

key fob

The keychains I made for a Pellon tutorial (find the tutorial here) were displayed in the Pellon booth at Quilt Market! That's pretty darn cool!

key fob bike

Don't they look so cute there? It makes me want to make more of them... I'm pretty sure I know some people who are getting them for Christmas!

Thanks Charlotte for taking pics of these for me! You're the best!

Tuesday, October 23, 2012

Sweet & Tiny Keychain - My New Pellon Project!

Check it out! The instructions for my tiny keychain are now available for free download on Pellon's website! 

christmas gift

These little things take just a little fabric and a little time - they'd be perfect to add to your Christmas gifts! 

bike keychain

I've made a few of these now, and by far that one at the top is my favorite! I really love the punch of that AMH ribbon! 

bike keychain

If you're lucky enough to be going to Quilt Market this weekend stop by Pellon's booth and you just might see these little keychains there! Take a picture of them for me - it's my first time of having something made by me at Market! :) 

Thursday, October 11, 2012

Cathedral Window QAL: Block Four

Click here for more info about the QAL!

I can't believe we're already nearing the halfway point of the Cathedral Window QAL! Here is my contribution, the Opposing Waves block! 


I  had a lot of fun putting together this block. I cut the pieces at a slight bias for extra curve, although that step isn't entirely necessary it will give your waves a more dramatic effect. The fabrics I used were Kona Curry, and Kaffe Fassett Shot Cotton in Lichen and Moor. The shot cottons look really amazing in this block, although it is hard to take pictures of that amazingness!


Block size: 12 ½ ” x 12 ½ ” unfinished

Fabric Requirements:
8” x 14” of three fabrics
5 ½ ” x 12 ½ ” of one fabric

The green fabric pictured here is 8" x 14"
The purple fabric is where you would trim down to get your "bias cut" pieces.
From each of the three 8” x 14” pieces cut a 5 ½ ” x 12 ½ ” rectangle at an angle so that the corners of the ruler are on the edges of the 8” x 14” piece. This will provide a slightly biased edge without wasting too much fabric.  


Take one bias cut 5 ½ ” x 12 ½ ” rectangle. Fold one 12 ½ ” edge back 1” and press.
Repeat on the other two bias cut rectangles. Leave the straight cut 5 ½ ” x 12 ½ ” rectangle flat; this will be the base fabric.


Lay one bias cut rectangle on top of the base fabric so they overlap by 1” on the long side. Align the raw edges of the two pieces with the fold of the bias rectangle on top. 
Repeat using a second bias rectangle on the opposite side of the base fabric.
Repeat again on the second side of one of the bias pieces.

All layers in order, marked, and stitched along the lines.
Pin all layers together, and use a disappearing fabric pen to mark the following horizontal lines across all the pieces:
·         ¼” from bottom
·         4 ¼” from bottom
·         8 ¼” from bottom
·         ¼” from top

Carefully sew along each of these marked lines.


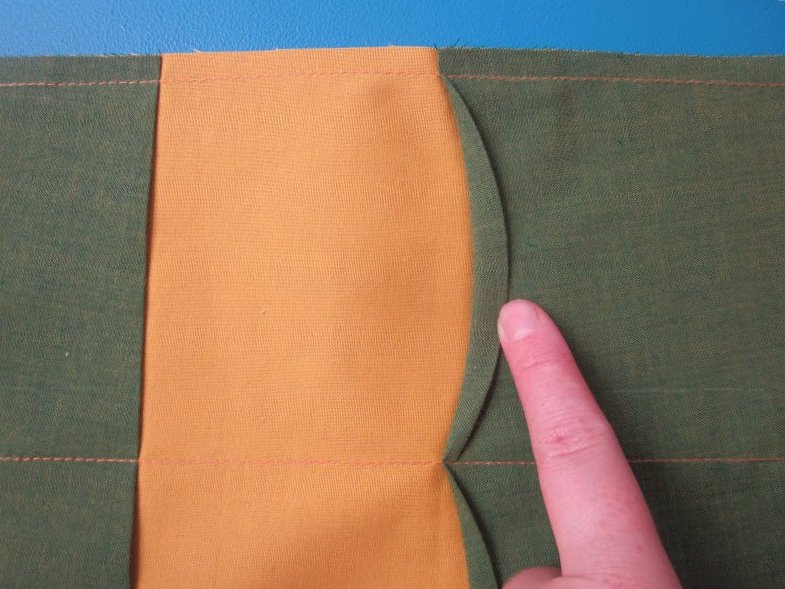
Press the vertical fold between each of the lines away from the base fabric. The bias edge will curve gently. Each curve should be approximately ½” at the widest part. Press the curve into place.


Press one vertical row then top-stitch the curve close to the folded edge. Repeat for all rows.


Trim block to 12 ½ “ x 12 ½ “


If you make one of these be sure to add it to the Cathedral Window QAL Flickr page and you may win one of the fabulous prizes! And as always, if you make a block using this tutorial I'd love to see it! Add it to my Flickr group too!

***

Saturday, September 29, 2012

Cathedral Windows QAL - Prizes!


Cathedral Window Sampler QAL

Now that the cat's out of the bag, I can share the amazing prize bundles!

Cathedral QA Lg

First & Second place will be randomly drawn from all completed sampler tops. You do not need to have the mini backed, quilted, or bound, but all nine blocks must be completed. You may have one entry for each completed sampler top.

First Prize
1 Kindle Fire HD
1 $35 Fat Quarter Shop gift certificate
1 pkg Pellon® EK150-10 Easy-Knit® Tape
1 pkg 70 Peltex® Ultra Firm Sew-In
1 pkg Pellon® 987F Fusible Fleece
1 pkg Pellon® 805R Wonder-Under®
1 pkg Pellon® SF101 Shape-Flex®
1 Legacy™ by Pellon® Throw (60x60) 100% Natural Cotton Batting
1 pkg Pellon® Perfect Loft™ Cluster Fiber
1 Pattern Playground CD

Second Prize
1 $35 Fat Quarter Shop gift certificate
1 Legacy™ by Pellon® Crib (45x60) 100% Natural Cotton Batting
1 pkg Pellon® Perfect Loft™ Cluster Fiber
1 pkg Pellon® 805R Wonder-Under®
1 pkg Pellon® SF101 Shape-Flex®
1 Pattern Playground CD

**********

Third & Fourth place will be drawn from all individually completed blocks. You may have one entry for each of the nine blocks completed.

Third Prize
1 pkg Pellon® 987F Fusible Fleece
1 pkg Pellon® 805R Wonder-Under®
1 pkg Pellon® SF101 Shape-Flex®

Fourth Prize
1 pkg Pellon® 987F Fusible Fleece
1 pkg Pellon® 805R Wonder-Under®
1 pkg Pellon® SF101 Shape-Flex®

**********

Individual block prize bundles will be drawn from all entries for each block design. You may have one entry into each of the nine drawings for each block completed of that design.

Individual block prize #1-9
1 Aurifil thread bundle
1 Pattern Playground CD

**********

All blocks must be completed & submitted to the Flickr group by midnight central time on November 15 to be considered for the drawing.

Thursday, September 27, 2012

Introducing the Cathedral Windows Quilt Along!


Cathedral Window Sampler QAL

I am teaming up with Pellon and FreeQuiltPatterns.info, along with 8 other amazing designers, to bring you a fun 9-block Cathedral Window mini sampler.  Each week in October, there will be two block tutorials featuring each designer's take on the traditional Cathedral Window. 

Oct 1 :: Sara @ Sew Sweetness
Oct 4 :: Bree @ My Crafty Crap
Oct 8 :: Jill @ Made with Moxie
Oct 11 :: Emily @ Mommy's Nap Time
Oct 15 :: Rachael @ Imagine Gnats
Oct 18 :: Jessica @ Sew Crafted
Oct 22 :: Elizabeth @ Don't Call Me Betsy
Oct 25 :: Kim @ My Go-Go Life
Oct 29 :: Heather @ Olive & Ollie

And of course, what would a quilt along be without prizes?!  We have some truly amazing prizes for you from some amazing sponsors.

Pellon


Aurifil


There will be prizes for completing each individual block and for completing the full 9-block sampler top (does not need to be fully completed with back & binding).  You will have until November 15 to complete all the blocks.

Check My Crafty Crap for more info this week (including the full prize announcement!), and get ready to kick things off next week!

Tuesday, September 25, 2012

Whoa Whoa! My first Pellon Project!

Today my very first Pellon Project went up on their website! I'm so excited to share my Bubble Pillow with you!

Bubble Pillow
The prototype for this pillow was gifted to my cousin's baby Chloe (ok - Chloe is less baby, more toddler now). I love the finished product - so cozy! Make one for yourself, or for a friend! Go ahead and snag the free download here on Pellon's site!

I hope you're as excited about this as I am! If you make a Bubble Pillow I'd love to see it! Drop me a line here or add your pics to my flickr group! Happy Sewing!!

Wednesday, September 12, 2012

Oh so tiny!!


This is one of my favorite projects that I made last weekend. It's a teeny key chain, which uses some fabulous Pellon batting... :) This time around I was just double checking my instructions and it all turned out just perfect! It finishes at about 2" square and those prairie points? they're about 1/4" tall! 

I made this using the AMH scrap pack that Wally got me for my birthday! Note that even the ribbon is AMH! So cool! It will definitely end up attached to my own keys, but it's got a little bit of traveling to do first! :) 

I just love a quick tiny project!!

Wednesday, July 25, 2012

Pellon!

Did I mention that I'm working on some projects for Pellon?

I'm really excited about this - a chance to show some new ideas and play with some new products.


In related news, I ran out of my third bolt of Pellon Val-u-Fuse. I think that's quite an accomplishment - I never really paid attention to how much was left on that bolt - until suddenly it was gone!

Stay tuned for more on this subject. In the meantime go check out my "artist profile." I consider this to be an accomplishment of my 4th grade career goal - I wanted to be an "artist" I'll count this as a goal achieved!

God willing it'll be sunny this week so I can take some pictures of stuff!