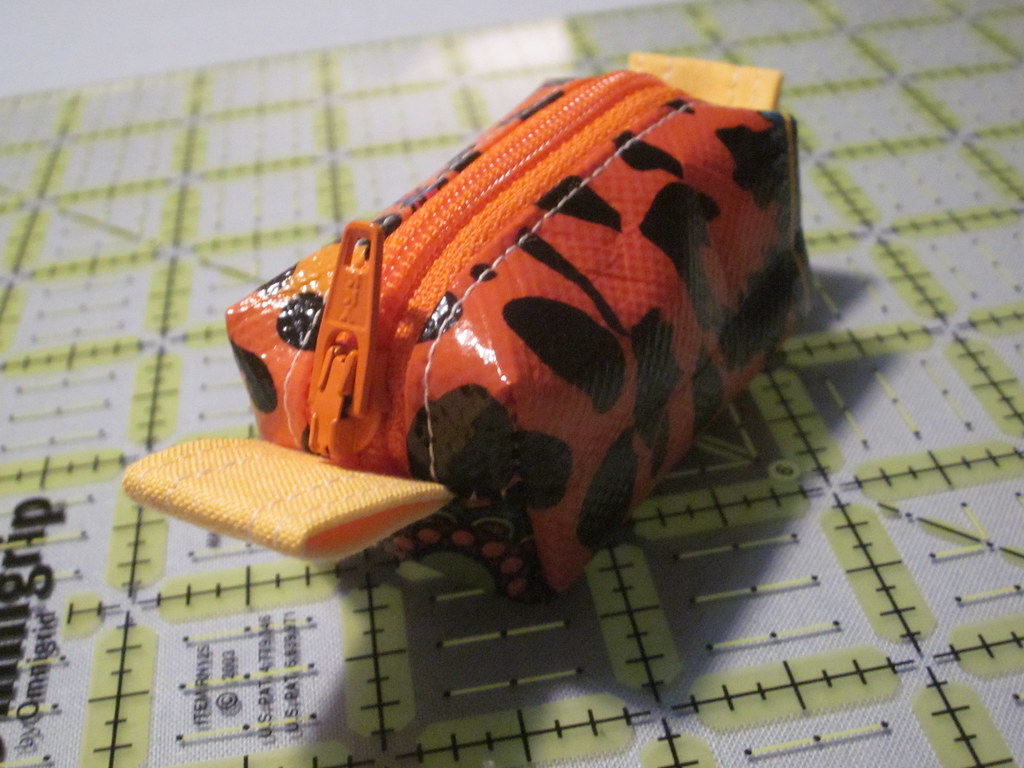
Welcome to day one of the Happy Little Pouch Hop! To kickoff our pouch hop Elaine and I have both planned a special post for you! We'll be posting the links to our guests blogs each day of the hop so be sure to check in often! The schedule of guests can be found
here. Feel free to grab our blog hop button, and post it to your blog if you'd like. We hope you'll be inspired to make some awesome pouches and that you'll share them on our
flickr group - there are already some fantastic pouches showing up there! The weekly giveaways will be chosen from the finished pouc
hes that are shared in this discussion thread.
Don't forget to check out
Elaine's post!
***
Now for the Pontoms Pouch Tutorial!
I've been making box pouches for years, they're quick and satisfying. They most certainly make the best gifts. I like the math behind box pouches, but if you don't love math and need help drop me a line and I'll help you out. If you'd like a totally customized pouch check out
this post by my friend
Diana, she'll walk you through how to do the math for a box pouch based on the finished pouch dimensions. I refer to this all the time!
Final Measurements: 2 1/2" x 1" x 1"
Cutting directions: 4" x 2 3/4" (cut two from re-useable bag material**)
3" x 5" (quilting cotton - for pull loops)
Additional supplies:
5" zipper
key ring / clip
**I like to use the re-usable laminate type shopping bags as my cloth for these box pouches. These bags can be found at nearly any store and in all different colors / patterns. I like to buy mine at HomeGoods and Michaels since they carry a variety of pretty patterned bags. They cost about $1 - $3 per bag and if you cut carefully you can source up to two fat quarters worth of material out of each large bag.
Here's an example that you can find at Joann's. Alternatively oil cloth can be used.**
(picture of shopping bags)
Prepare the zipper pull loops:
 |
| Finished pull loops |
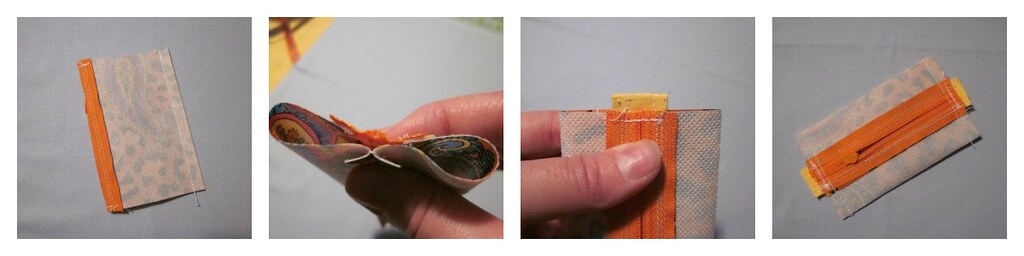
Fold 3" x 5" fabric in half the long way and press. Open up and fold the long edges to the center fold and press. Fold in half along the first pressed fold. (Essentially make a strip of binding tape - or use a leftover scrap from another project!)
Top stitch close to the edge on both long sides.
Cut in half, leaving you two pieces that measure about 3/4" x 2 1/2" each.
Fold one piece in half with the raw edges together and baste 1/8" from the raw edge. Repeat with the second piece.
Attach zipper:
 |
| Inserting the zipper |
(Switch to your zipper foot!)
Sew zipper to the 4" side of one bag piece (right sides together) using a 1/4" seam allowance.
Finger press the seams so they're folded toward the bag piece. Top stitch close to the fold.
Repeat for the other side of the zipper, using the second bag piece.
Assemble the bag:
(Switch to your regular presser foot!)
Fold the bag unit in half, right sides together, with the 4" sides (without zipper) together. Sew down the edge parallel to the zipper using a 1/4" seam allowance. This forms the seam that will be at the bottom of the bag.
Finger press the seam open.
UN ZIP ZIPPER PART WAY! <--- don="don" forget="forget" p="p" t="t" that="that">
Fold bag unit so the pressed open seam is directly on top of the zipper. (finger press the two sides flat)
With the raw edges out, baste the pull loops between the zipper and the bottom seam on each side.
Sew along both sides reinforcing the zipper ends by back stitching over them a few times.
Box the corners:
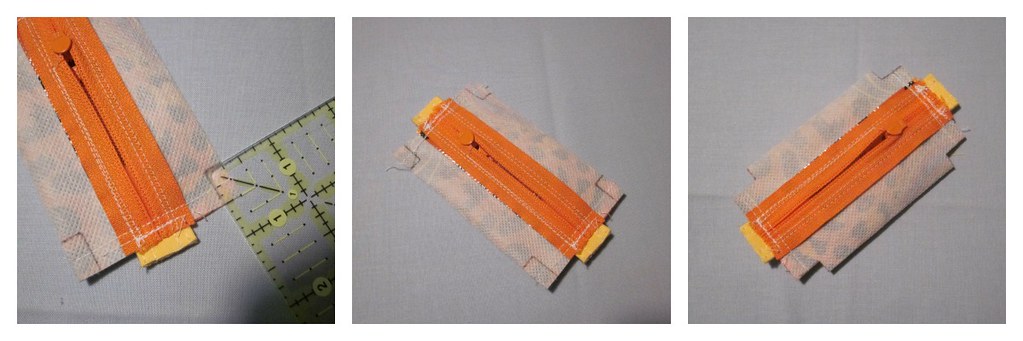
With the pouch flat, zipper side up, measure and mark a 1/4" square. This square will be measured from the side fold, and the side seam allowance. (see picture for details, it's not as tricky as it sounds)
Mark all four corners.
Carefully clip and remove the area within those squares.
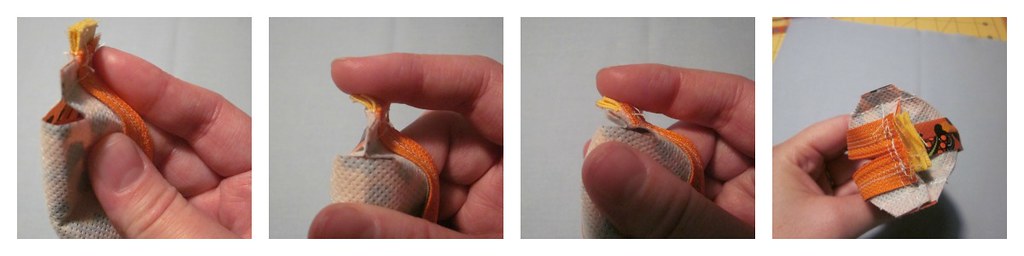
Pull one corner open at that notch, flatten it in the opposite direction (giving it height, rather than keeping it flat). Carefully sew across that flattened edge using a 1/4" seam allowance. Back stitch at the beginning and the end of the seam.
Repeat for the remaining three sides.
Turn inside out. attach your key ring, and be amazed at the teeny pouch!

(optional last step - put your
PonTom's in there!)