Showing posts with label Happy Little Pouch Hop. Show all posts

Wednesday, December 12, 2012

Happy Little Pouch Hop: Week 2 Winners!


Finally we're ready to announce the week 2 winners for the Happy Little Pouch Hop! 
Congrats to all the winners! Check your Flickr Mail soon, you'll be hearing from us!


Prizes have generously been donated by:

$10 gift certificate to Fat Quarter Shop - #3 SuddenlySandra

Gathered clutch pattern #24 SuddenlySandra (again!)


Oh Fransson!
Oh Fransson! perfect zip pattern - #28 Negligent Style

Oh Fransson! perfect zip pattern - #10 jennyWrenCameron


One package of Pellon SF101 - #43 Hook and Needle


WhileBabyNaps
While Baby Naps - kit - #61 Paskiaq1


And the last prize, the co-host's fav pouch... 
$10 gift certificate to Fat Quarter Shop - Cutsewpresslove, which was one of the only pouches found in both Elaine and I's flickr fave's! :) 

Thank you to all of our sponsors and all our great pouch enthusiasts who played along! I can't wait for next year's pouch hop! Be sure to follow Elaine and I's blogs, we make lots of pouches throughout the year too! :) 


Monday, December 10, 2012

HLPH {Challenge} - Final update!

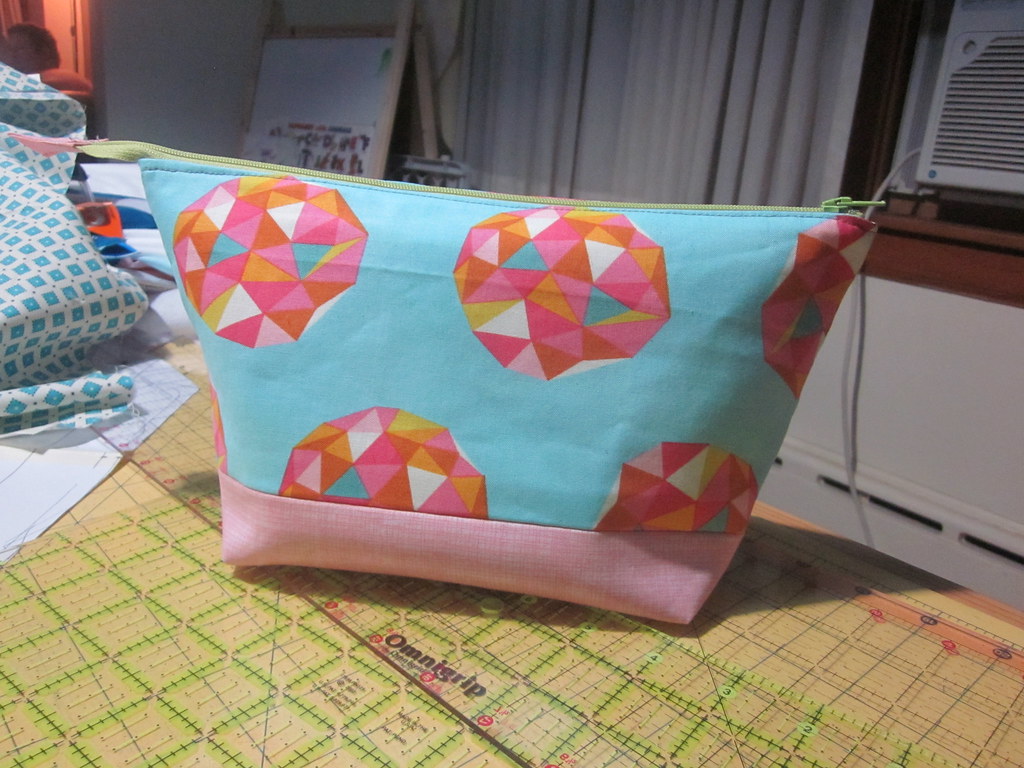
It figures that on the last night of the challenge I would make my favorite pouch all week!

happy little pouch hop

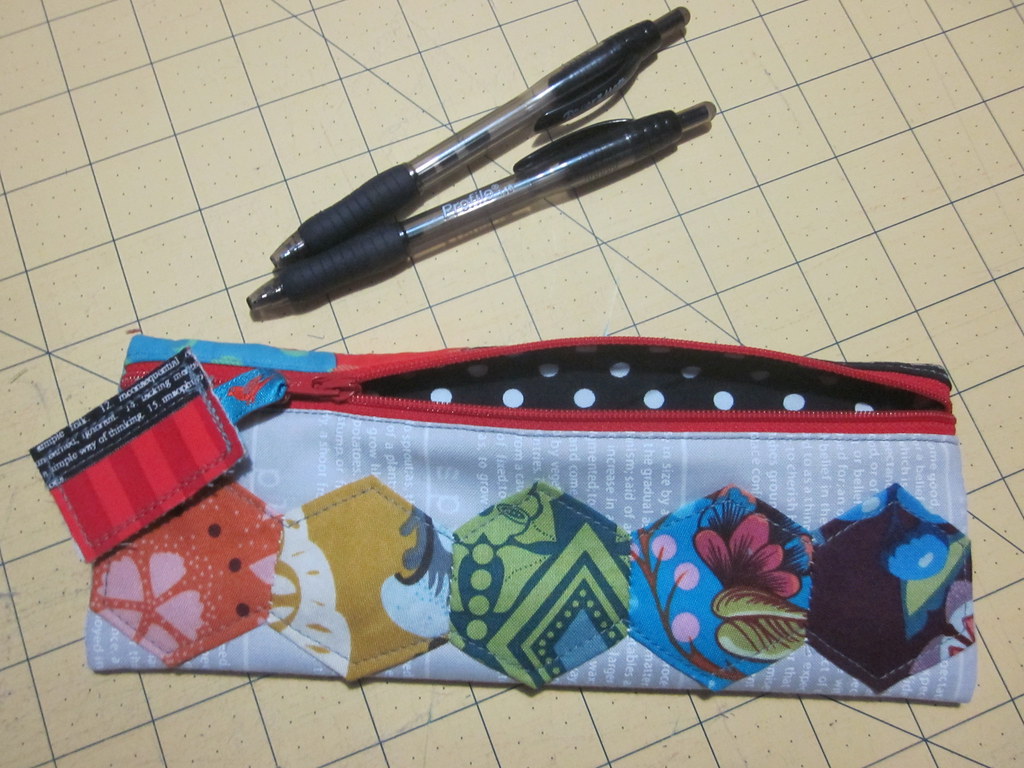
I set out to make something just for me - I guess I was feeling a little down because I've made all these awesome pouches, yet I'll be giving them all away at Christmas this year. SO, of course I needed one just for me.

happy little pouch hop

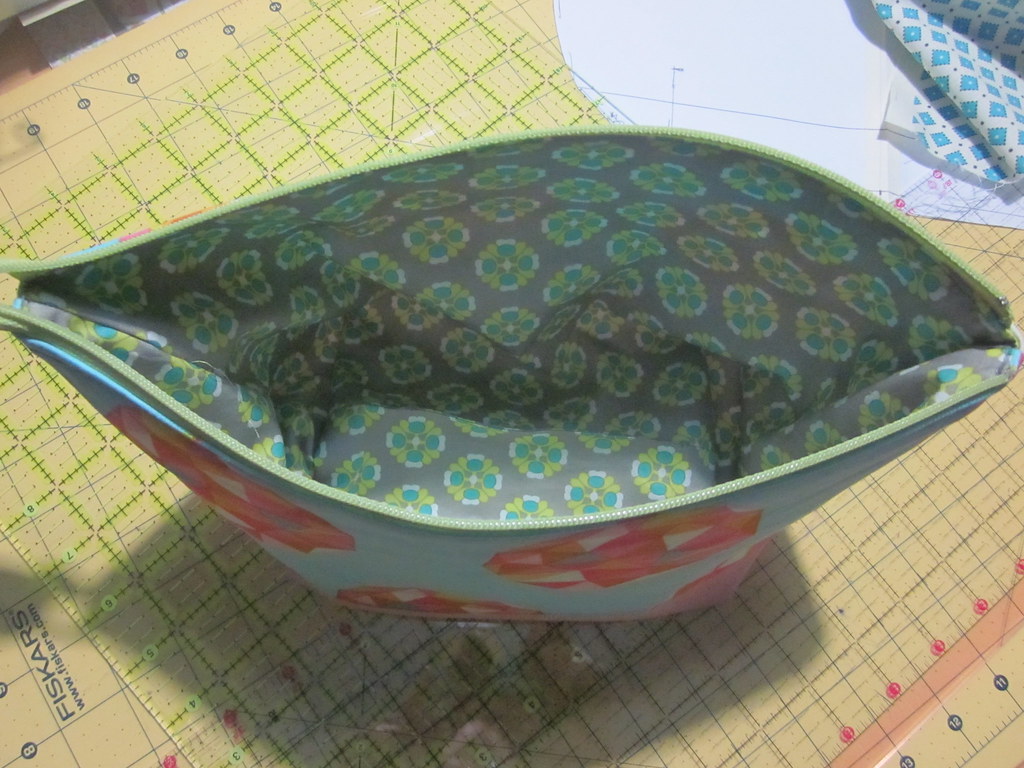
I decided that it should be a pencil pouch since I don't have one, and because then I could use it every day in my purse! I initially thought of this tutorial, but it makes an unlined pouch. Then I thought about the way these were constructed, and knew that the lining part would work just the same (essentially it is the same, without boxing the bottom two corners). Then I added a bit of this (I sure love my "purses" pinterest board - pouch inspiration galore!). Finally I added this as the color inspiration! (yes, I essentially stalked my flickr account like I would for any swap partner!

Happy little pouch hop

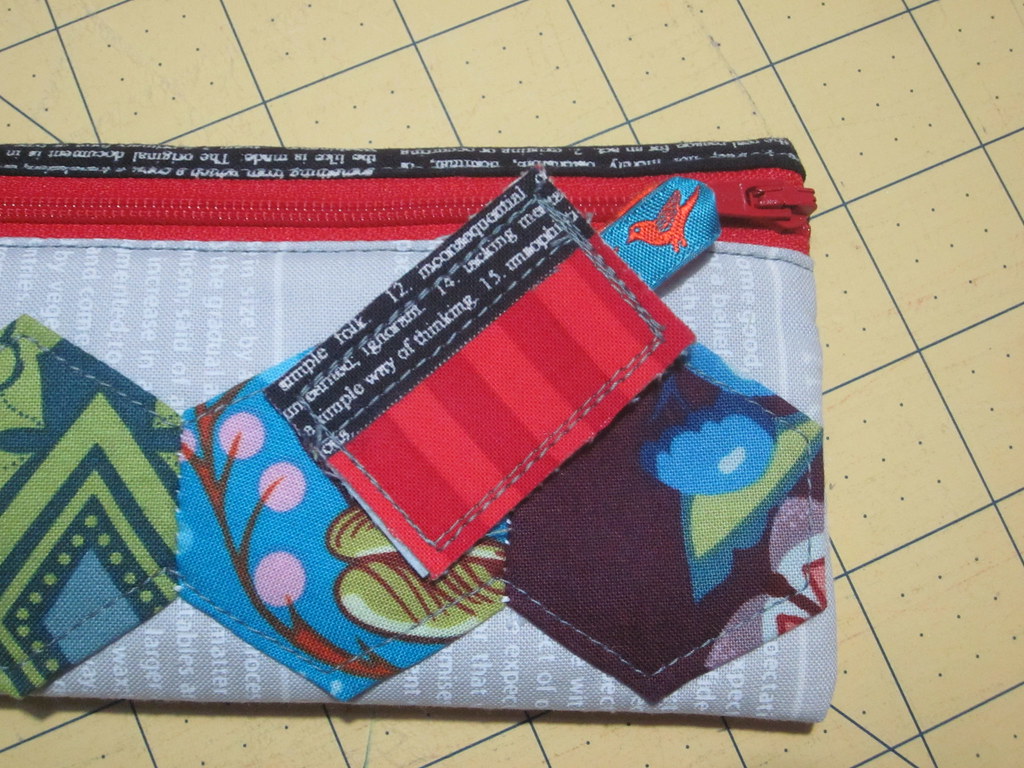
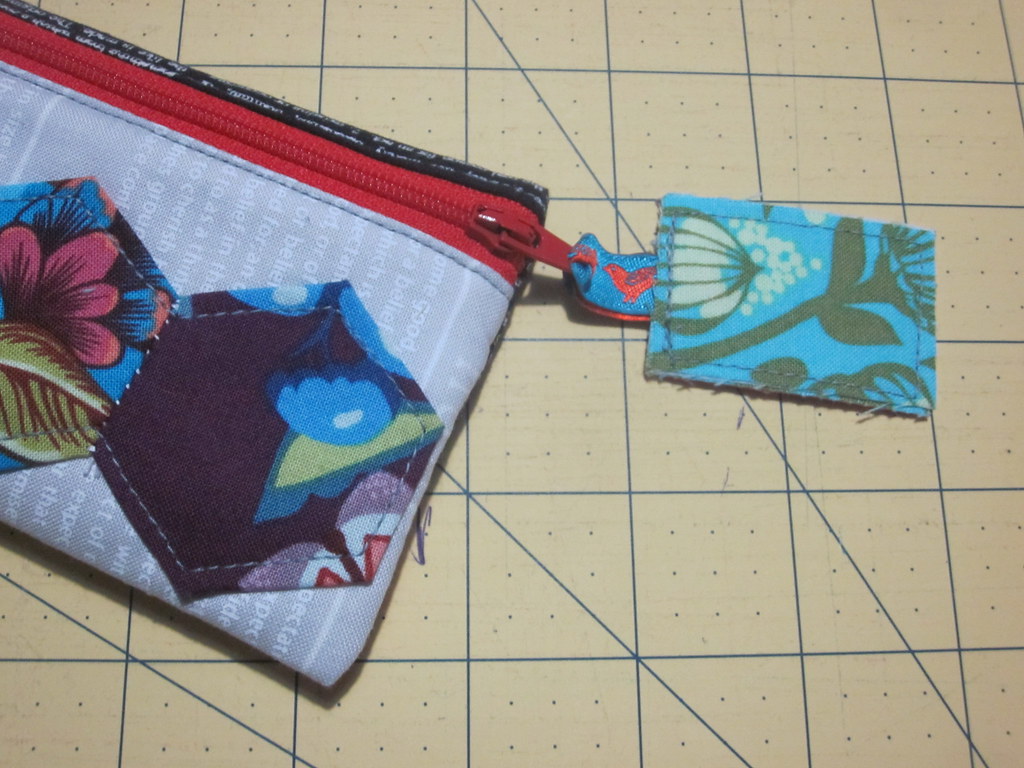
I love the results! I wasn't quite on spot with my colors - but I was working with what was handy - and these hexies were already basted and joined into a rainbow strip. I'm love love loving the pull tab - I used two layers of Pellon 809 Decor Bond and Pellon 805 Wonder Under.

happy little pouch hop

Finally, a little bit of pretty pouchiness for me! 

Friday, December 7, 2012

Happy Little Pouch Hop: Day 10 - The Final Day!

Can you believe our two weeks have come and gone already? I just can't believe it! Elaine and I have had a lot of fun gathering all you Pouch Enthusiasts together to share ideas, tutorials, and pretty pouches! Thank you guys for making this blog hop so much fun!

Let's take a little look back at what we've made...

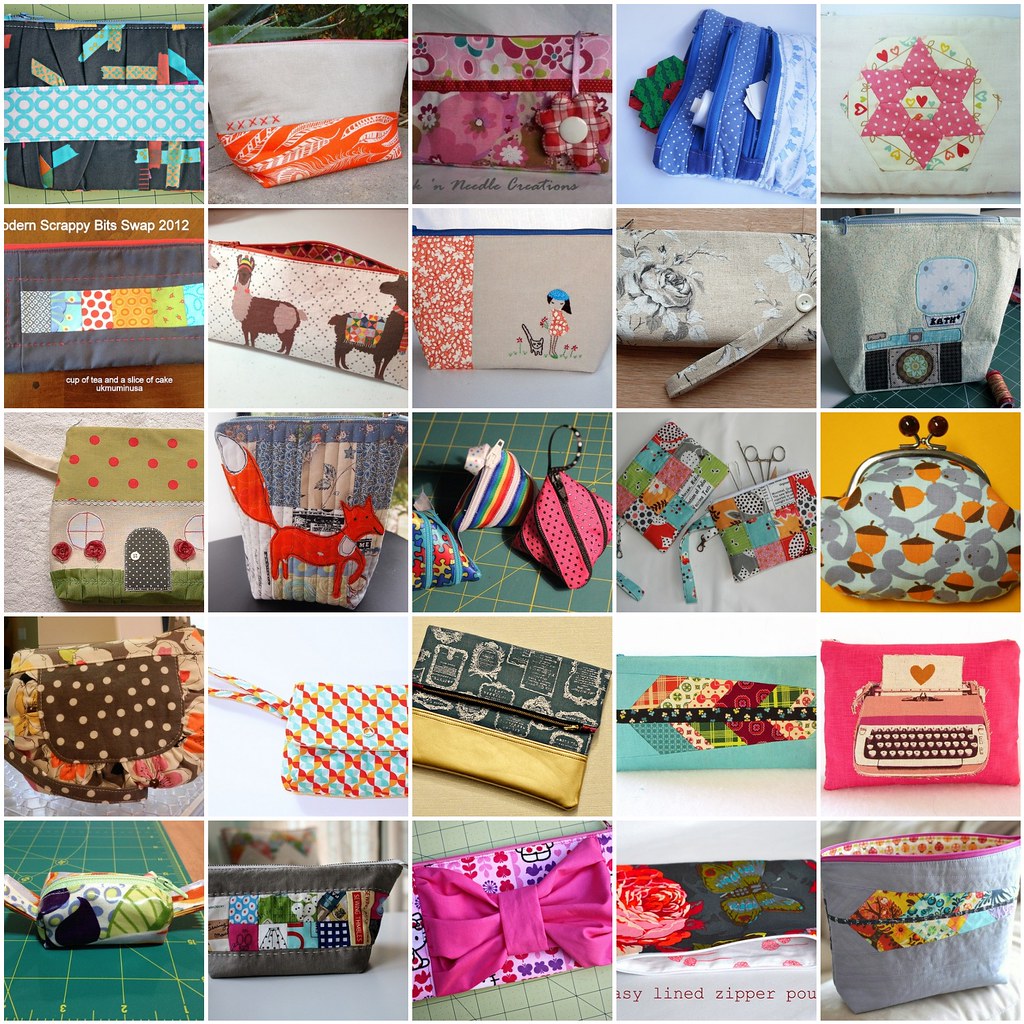
Pouches made by you!!! Find the proper links to all these pics tagged here.

HLPH {Challenge} - Pouches made by me in the past two weeks!! 


As a lover of pouches I must say that I don't want the pouch hop to end! So you can all continue to post your pouch makes in our flickr group and.... Join us again for round 2 of the Happy Little Pouch Hop - the same time next year! That's right - We're planning to make this a yearly gig which is absolutely perfect for finishing off our christmas sewing (pouches! Everyone gets pouches!)

I sure hope you guys have enjoyed this as much as we have!

I'm sure you'd all agree that it's time to thank our fabulous sponsors! Be sure to check them out for all your pouch making needs!

Prizes have generously been donated by:


WhileBabyNaps


Don't forget to submit the pouch(s) to our flickr discussion for this week to be eligible for our fabulous giveaways! Submit your pouches to the discussion page no later than Saturday, December 8th at 12:00 Noon, CST! We'll draw names using Random.org, and we'll also choose one "Happy Little Pouch Hop Favorite" which will be chosen from Elaine and I's favorite's (I hope we can agree - since they're all so awesome)!

If you'd like to weigh in on our decision please check out our flickr group page and leave a comment here with the link to your favorite pouch made during the swap (this week or last). I can't wait to see what you guys think! 

Thursday, December 6, 2012

Happy Little Pouch Hop: Day 9 - Kaelin & Beth


Today we have Kaelin / The Plaid Scottie here to share an awesome pouch tutorial! Kaelin is one of those bloggers that I’ve been following for ages. I originally met Kaelin through flickr swaps, but met her in real life at Sewing Summit last year. She’s a real hoot! Besides being an overall awesome person, Kaelin is really talented. She’s been in several cool magazines, and has some awesome tutorials available on her blog too!

Today we also have Beth / Plum and June with us to share a sweet tutorial for a multiple pocket pouch. If you aren’t familiar with Beth’s blog be sure to take a look around, she has some really fabulous stuff going on there! Not to mention that she makes some really awesome pouches!


***
Don't forget to start working on your own pouches and add them to the flickr group. All finished pouches can be added to the Week 2 Finishes discussion to be eligible to win our awesome prizes!

Wednesday, December 5, 2012

Happy Little Pouch Hop {Challenge} ... Progress!

happy little pouch hop
Drawstring pouch

Alright alright. That accountability thing that was happening when Elaine and I were making the same pouch each day....

lol

To use less words and more pretty pictures I'll explain it simply: we've both skipped a day or two here or there. However, in the end we have both finished a wild amount of pouches so far!

happy little pouch hop
Makeup bags

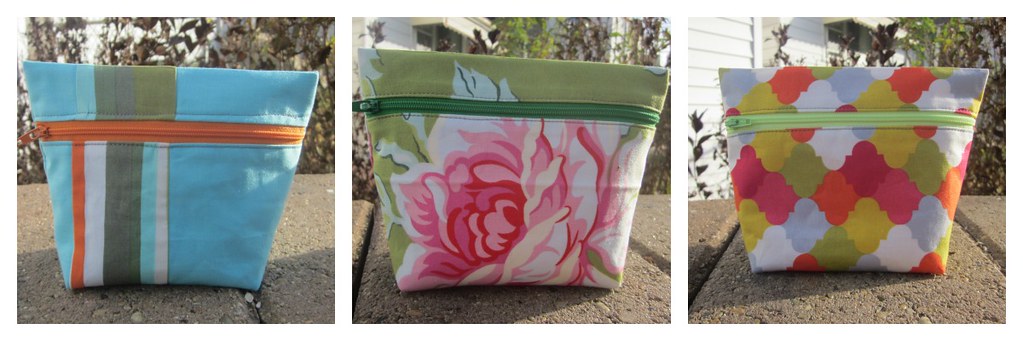
Yesterday I completed a whopping 4 pouches! I made three using Sew Like My Mom's Makeup Bag Tutorial. I made three at a time since I figured several people on my christmas list would enjoy them. They turned out really great and the instructions were nice and clear. The only thing  I did differently is that instead of sewing down the sides of the lining and the outside all in one line, I first sewed each part (lining and then outer) individually up the side until I was close to the zippered part - then layered them together to back-stitch a bit and then sew the rest of the length of the sides... this gave me much more room to sew those boxed corners individually, and didn't effect the finished pouch. (I'm sure that made no sense but it really did make a difference, I should have taken a picture though!)

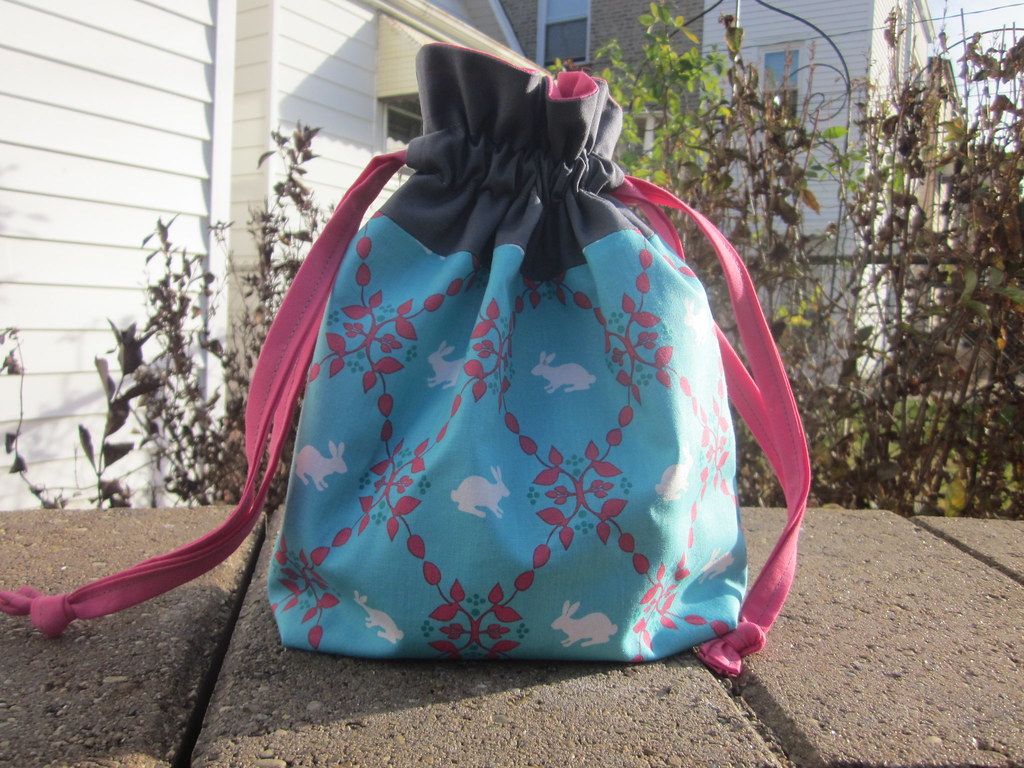
I also sewed another of Jeni's Drawstring Bags. I really love how cleanly these come together! I used some sweet Laurie Wisbrun bunny fabric which I thought to be fitting to use on Jeni's pattern, since Jeni's sweet bunny George makes appearances on her blog all the time. :)

It turns out that I seriously love that little bunny drawstring - I want it for myself. Is that bad? I really made it with my niece Rosemarie in mind... but I have another project in mind for her too, does that mean she won't miss this pouch? :) I haven't decided. lol.

Happy Little Pouch Hop: Day 8 - Shruti, Liz, & Cherie


Today we have a guest post from Shruti / 13 Woodhouse Rd! I’ve been reading Shruti’s blog for years, and she was even my swap partner for a Doll Quilt Swap a while back! Shruti is everyone’s most exotic bloggy friend - she’s from India! The time difference makes it perfect for us to chat on facebook early morning (her) which is late night for me! She makes some really excellent projects and is always hosting a blog hop or blog series! She and I have co hosted a couple hops now, and she really knows how to pull together some talented people!


Today Shruti is sharing an update post on her Samosa Pouch Tutorial. Check it out here!


Next up is Liz / Dandelion Daydreams. Liz has made a lot of great projects recently - I hope you’ll take a look at her site.I especially love her tutorial for the Union Jack quilt block! I only recently “met” her online, but she seems pretty awesome! Very cool!

Liz has a brand new tutorial for us today! Read it here!


***


Don't forget to start working on your own pouches and add them to the flickr group. All finished pouches can be added to the Week 2 Finishes discussion to be eligible to win our awesome prizes!

Tuesday, December 4, 2012

Happy Little Pouch Hop: Day 7 - Elizabeth & Emily


I’ve had the joy of having met both today’s guests in person!


First off, have known Elizabeth for a couple years now. I’ve read her blog for a long time, and I’m lucky enough to be in her bee (Sew Beautiful) - seriously I’m not sure how I lucked into this bee! Elizabeth blogs at Don’t Call Me Betsy and we met in person at Sewing Summit last year. Elizabeth is wildly talented - you’ve seen her work all over the place - my favorite? Her bee quilt (the spiderwebs) made the cover of “International Quilt Festival: Quilt Scene”! Check out her finished quilts here. She’s sure to inspire you too!


Next we have a post by Emily (or as my daughter calls her “friend Emily”). Emily is my closest quilt friend, and we sometimes find ourselves up sewing/chatting very late at night. Although she doesn’t have a blog (yet), she shares her quilting and sewing journey on flickr. She is a huge Oliver & S fanatic and makes tons of pretty dresses for her cousin’s kids (and Allie too!). Her personal style and eye for color are exceptional. Here’s a great example of her eye for color - her “Mine!” quilt - the intentionally paired groups of color in each block blows my mind!

Emily’s guest post will be hosted here on my blog (unless she starts her own by then!!). Read it below:


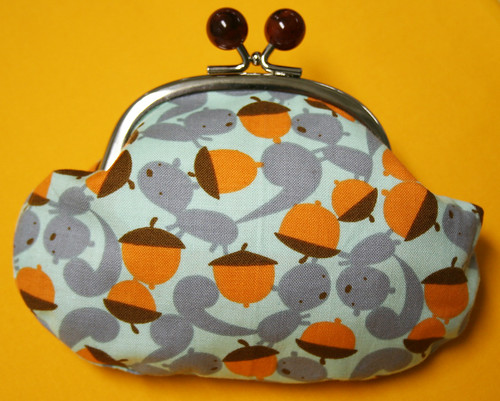
 A Squirrely Pouch and a Review:

Squirrely Pouch Full

Hello everybody and Happy Tuesday!  My name is Emily and today I am here to share with you a pretty little pouch I made using a Purl Bee tutorial called Lovely Liberty Coin Purses.  

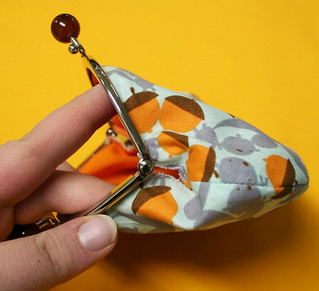
Squirrely Pouch Open

Now in the tutorial they talk about the kits that they are selling...they don’t sell those anymore.  BUT they do sell the frames (they come with paper rope and a pattern) and then all you need is some fabric, thread, sew in interfacing and glue and you are ready to go!  When I got my handle in the mail I noticed that the pattern in the package (which is written in Japanese) was not the same shape as the one in the tutorial so I reshaped the bottom of my pattern to look rounded like the tutorial...other than that I followed directions I swear!  

The sewing together the little purse was way easy and then came the gluing (I used this glue).  Mine got a little messy but I used a strong toothpick to help stuff in the purse edge and the paper rope.  Oh and I didn't crimp the frame...I just put in some extra glue and called it a day.  

Squirrely Pouch side

In the end this project was way super easy and the frames are so nice, I just love the big spheres and the colors!  This was my first ever metal framed pouch and I love it and will definitely be making more.  The many pictures in the tutorial make it super easy to follow and the final product is so cute!

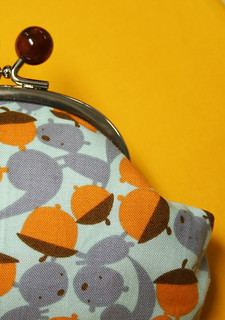
Squirrely Pouch Detail

I made my Squirrely Pouch using David Walker’s Squirrels and Nuts fabric in Sea and some Pure Organic solid in Orange on the inside, the clasp color I chose is tortoise shell.  

Monday, December 3, 2012

Happy Little Pouch Hop: Day 6 - Holly & Heidi

Welcome to week two of the Happy Little Pouch Hop! We've got a ton of pouches, tutorials, and reviews to share with you this week, so stick around! We drew for the week one prize winners so go see who won what over there!


Today we start off with Holly of Bijou Lovely. Holly is an awesomely inspiring quilter. Everything she makes just takes my breath away! I would suggest checking out her pages for finished quilts  - as well as her tutorials. I personally have made an entire quilt made using her Herring Bone Block tutorial!


Next we have Heidi of Fabric Mutt. Heidi has made some pretty adorable pouches recently - It wasn't until I flipped through her blog recently that I realized how many of them have made it into my flickr favorites and my pinterest pages! 

Heidi is giving us a review of the box bag from Tacha Bruecher's book Hexa-Go-Go. Go check out Heidi's review!

***

Don't forget to start working on your own pouches and add them to the flickr group. All finished pouches can be added to the Week 2 Finishes discussion to be eligible to win our awesome prizes!

Sunday, December 2, 2012

Happy Little Pouch Hop - Week 1 Prize Winners!!


Look at what you made this week!

for more details, click here

The above pouches were all entered into this week's prize drawings (note: there are a few entries for which I did not have permission to include them in the mosaic, so there are actually even more pouches that were made by YOU!). I've had so much fun seeing the pouches that you are making and while I thought I'd be whittling down my "must make" list, you have certainly been inspiring me to add more to it!

Okay, so onto the drawings! We are so fortunate to have a wonderful group of sponsors. We used random.org to generate our list of this week's prize winners. Without further ado:


Prize: $10 gift certificate

Prize: Gathered clutch pattern!

Prize: 1 package of fusible fleece
Winner: #14-- Marika

Prize: $25 gift certificate
Winner: #10-- Negligent Style

We also have one new sponsor to add!
Elizabeth Hartman!
Prize: Perfect zip pattern!
Winner: #1 suddenlysandra

Congrats to all our winners! We will contact you via Flickr Mail to obtain any information that we might need in order to get your prizes to you. We'll be back on Monday with more links to pouch enthusiasts and more prizes!!!

Saturday, December 1, 2012

Happy Little Pouch Hop {Challenge} - Week 1


As I'd mentioned before, Elaine and I decided to challenge each other to make one pouch a day during each weekday of the swap. I failed the challenge on Weds - I wan't feeling very well and just went to bed early. I guess we all have days like that. To make up for it I was a machine last night!

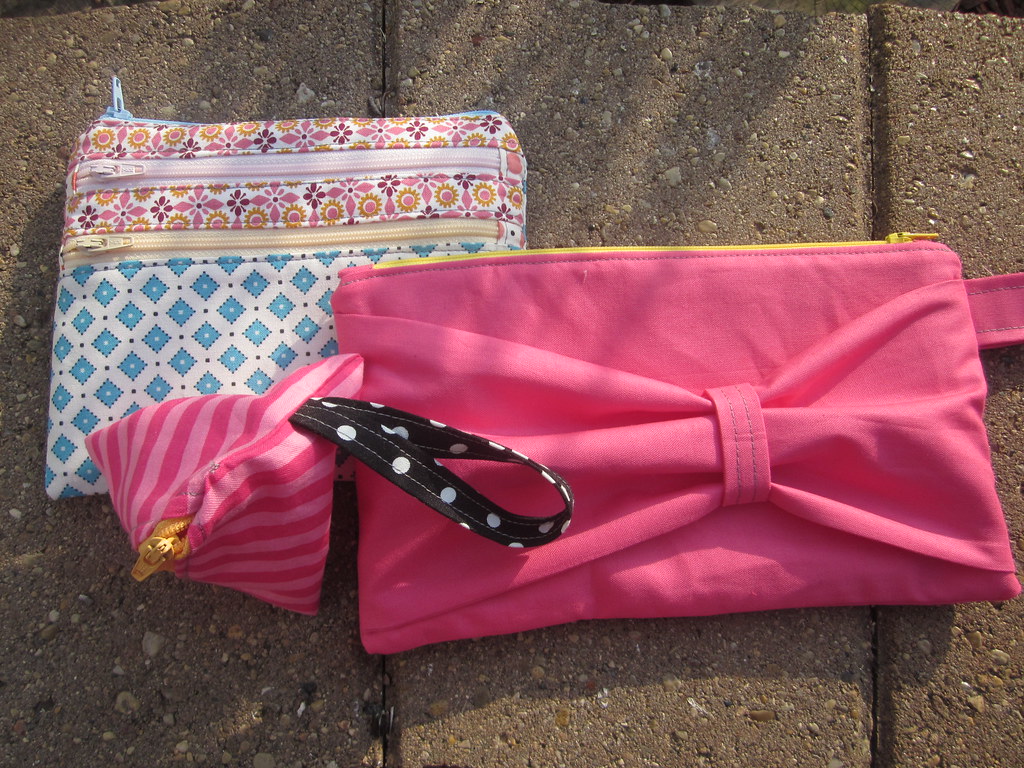
Last night I decided to tackle our pouch from weds (which is a bow clutch that I've been meaning to make for my mom for ages!), as well as the Samosa pouch for Thursday. Knowing that it was going to take a bit of time to do both - I cut and prepped the fabrics in the afternoon while Allie was watching a movie. (I typically don't do any sewing related stuff while she's awake & at home). I decided to cut the fabrics for the Triple Zip pouch too (Friday's challenge).


As it turns out that bow clutch is really super fast the ... 8th time you've made one!


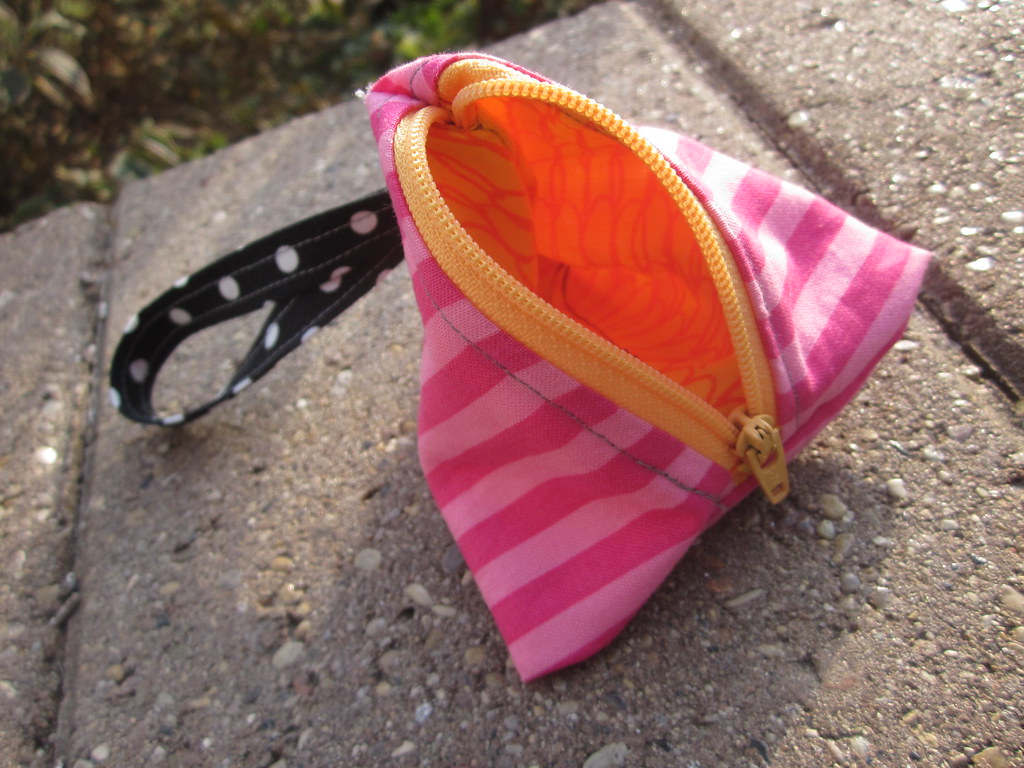
The Samosa pouch came together very quickly too - I had some troubles with the zippered tabs being too thin (my feed dogs wouldn't make the jump from the thin to the thickness of the zipper area)... so that was a little hangup... similarly I had some issues with the top end of the zipper - I think I was overthinking it or something, but I'd do it my normal way next time. Before making the Samosa pouch I was having trouble visualizing how it was sewn together to make it a triangle... it turns out reading the directions with the partially sewn pouch in front of you helps an awful lot! In the end it was quick and adorable. I started with 4 1/2" squares of fabric though instead of the slightly larger fabric it called for... mostly because I wanted to use that hot pink stripe and that was all I had of it!


Next I figured I would prep the zippers for the Triple Zip pouch - without realizing I'd end up finishing it entirely before I realized how far I'd gotten! Again, this pouch is really not hard to make - it's a lot of steps but doing the separate pockets repetitively really ingrains the process into your mind. I'm happy to say that I really understand how to add a pocket to the front of a pouch now! Don't be intimidated by this pouch - it's really not hard, just a lot of steps! (Again with the zipper issues on the top zip - I think I just have it in my mind what works for me - Next time I'll do the top zip the way I usually do mine.)


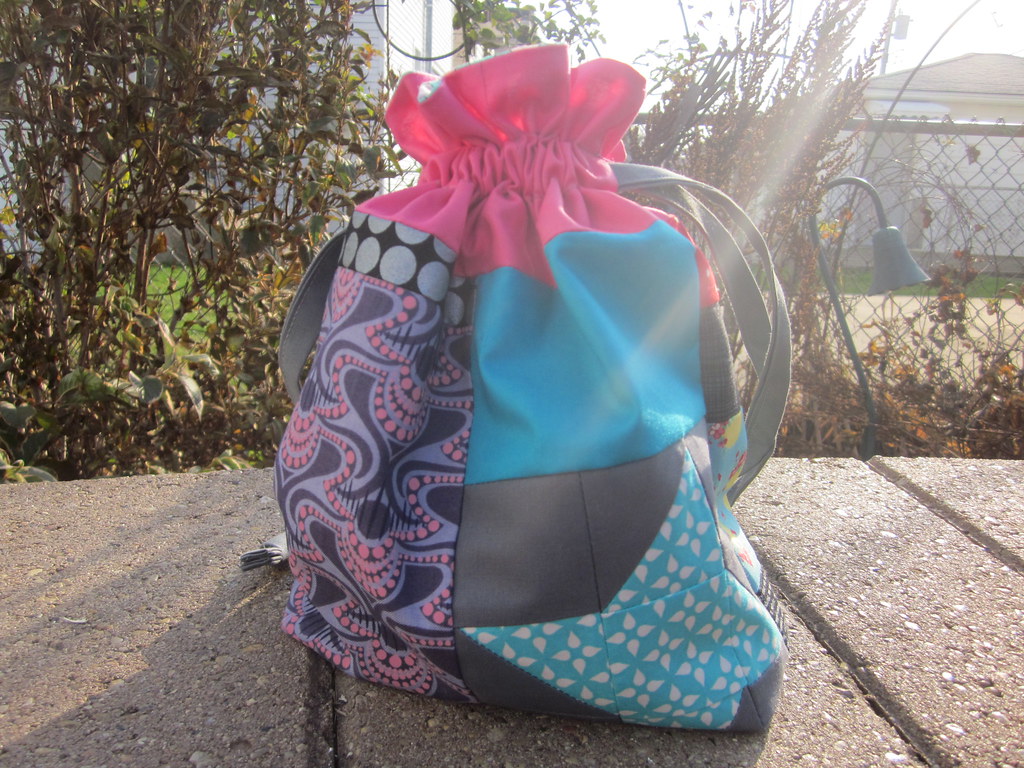
Finally today I worked on Jeni's Drawstring Pouch - which is so adorable and really really easy to make! I can't believe it took me this long to make one! For mine I used some scraps pieced together for the main part of the pouch - I could have placed that friendship star a little better - but I'm pretty sure Allie won't mind. I only strayed from the tutorial by cutting squares on the corners to box them (rather than the folded / diagonal method she used). I added a couple cute little prairie points to the inside (I found them already folded, in the scrap bin). These prairie points are quickly becoming one of my "things".

Overall I think it was a really fun first week of the blog hop - and I'm super excited about knocking out some Christmas sewing with all these pouches too! I hope you'll sew along with us - remember to enter your finished pouches to the flickr group discussion for this week - we'll be drawing for prizes later this weekend!

Friday, November 30, 2012

Happy Little Pouch Hop: Day 5 - Sara, Cindy, & Jennifer


Good morning! We have some pattern reviews and eye candy for you today!


We’ll start with Sara today, Sara blogs at SewSweetness. She’s one of those bloggers that I’ve been reading almost as long as I’ve been blogging. She lives in my hometown and I’m glad to say that I’ve finally met her in person! Her blog title says it all - she really is sweet! She makes the most amazing purses, and writes patterns and tutorials for them that make them seem so easy. Seriously this lady is talented! She also sews clothes and quilts - as if being awesome at one thing weren’t enough! :)

Sara is reviewing the Noodlehead Gathered Clutch today - so go on over and see what she has to say!

Next we have Cindy who blogs at Adventures of the Singing Quilter. Cindy has been sewing several pouches recently, and she’s a swapper in the Pretty Little Pouch Swap. She’ll be giving us a review of Elizabeth Hartman’s Perfect Zip Bag pattern. I can’t wait to see what she has to say about the pattern! Read it here.

Finally we have the lovely Jennifer from Ellison Lane Quilts. Jennifer’s work is fun and inspiring. I’m excited to see the pretty pouch eye candy she has to share with us today - since everything she makes is really fabulous! Check it out here.


***

Don't forget to start working on your own pouches and add them to the flickr group. All finished pouches can be added to the Week 1 Finishes discussion to be eligible to win our awesome prizes!

Thursday, November 29, 2012

Happy Little Pouch Hop: Day 4 - Lindsey & Michelle


First up is Lindsey from Lindsey Sews. She has a great blog and shares all sorts of fun projects. Beyond all the other projects, be sure to check out her project in Stitch magazine this winter! Wow! That clutch is fabulous! Now on to her post - Lindsey has a tutorial ready for us. Head on over and check it out!


Michelle / I like orange Is a very talented woman. She quilts, and sews purses and pouches. She swaps and even writes patterns! I’ve known Michelle for most of my quilting life - she’s a fellow AMH lover and is great at pulling fabrics together into a beautiful cohesive piece. Many of you have heard me rave about the Pretty Pleats Tote? - Michelle wrote the pattern for it!

Michelle is one of the founding leaders of the Pretty Little Pouch Swap on flickr - so naturally we had to have her on our blog hop! Go check out her pattern review of the Hexiecase by Amy Friend.

Her post is on her Threadbias.com page - since some technical issues have lead to her losing her blog -- peek around Threadbias while you’re there- it’s a really fun site!


***

Don't forget to start working on your own pouches and add them to the flickr group. All finished pouches can be added to the Week 1 Finishes discussion to be eligible to win our awesome prizes!

Wednesday, November 28, 2012

Happy Little Pouch Hop: Day 3 - Hollie & Katie


Today we have two pattern reviews for you! Maybe they’re for a pattern or tutorial that you've been wanting to try? I’ve had the Noodlehead Open Wide pouch on my list for ages! After having scheduled this post last week - now I've finished my first Open Wide Pouch!


First up we have Hollie from The Undercover Crafter. Hollie’s blog is full of all sorts of fun. She’s an active member of online Do Good Stitches, and she is overall pretty awesome. She recently made a pouch that I think is pretty cute (check it out here). I just love the little details! Hollie has a tutorial review for us head on over to read it.

We also have Katie of Katie’s Korner. Katie is one of those super sweet internet friends that keep my life positive! We’ve been in a bee together for the past two years (Sew Beautiful Bee), and she’s really just a joy! She is going to review the Noodlehead Open Wide Pouch for us today. Go on and check it out!


***


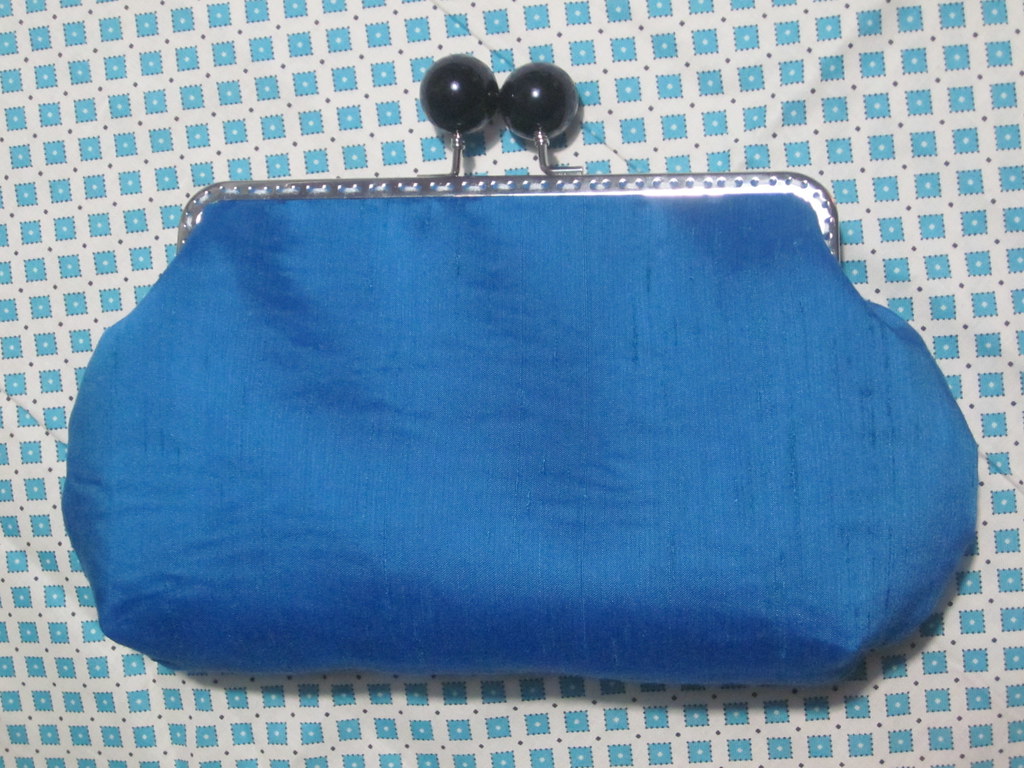
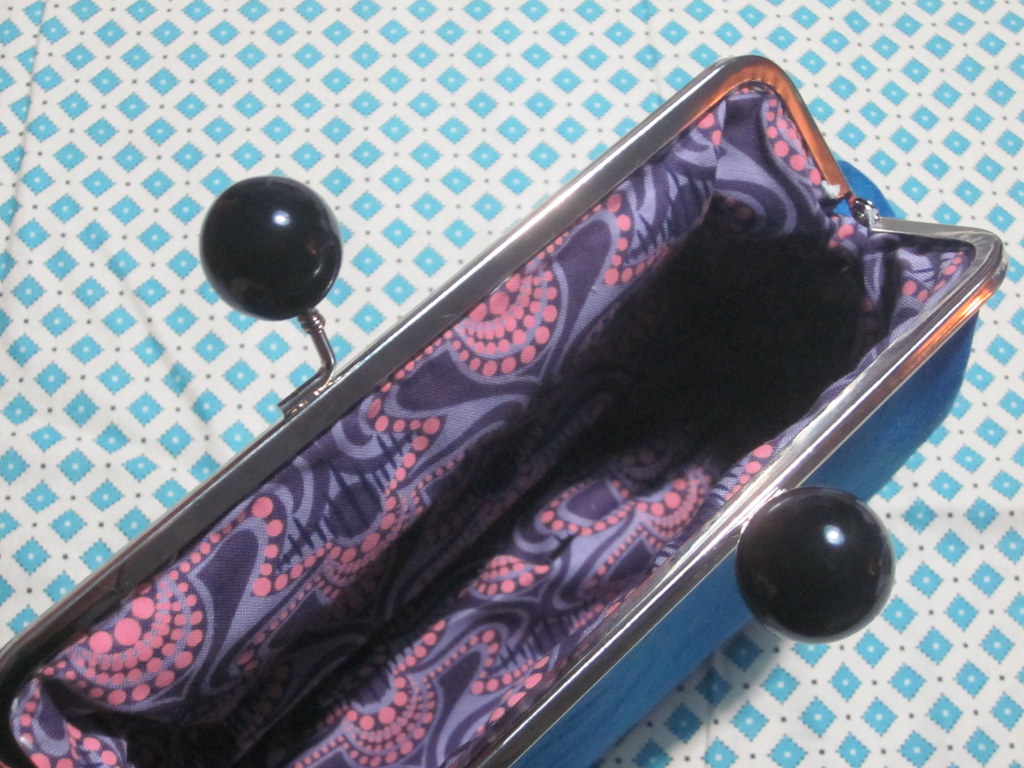
HLPH {Challenge} - Yesterday's challenge for Elaine and I was to make a frame pouch. I am glad to say that I have finally made a frame pouch I'm happy with! I used this tutorial for drafting a pattern, and then winged it! My frame is an 8" x 2" sew-in frame from Joann's. The outside of my pouch is some interesting polyester material that came from a freebie box that someone had brought to our last CMQG meeting! While I love the way this pouch turned out, I don't expect to be making many more of these - I really don't enjoy hand sewing. It took a lot of finger strength to stitch that frame into place, and I somehow managed to break a needle while hand sewing!


Don't forget to start working on your own pouches and add them to the flickr group. All finished pouches can be added to the Week 1 Finishes discussion to be eligible to win our awesome prizes!

Tuesday, November 27, 2012

Happy Little Pouch Hop {Challenge} - Day 1 Open Wide Pouch

A couple months ago when Elaine and I had just started planning the Happy Little Pouch Hop we were feeling pretty confident and decided to challenge each other... We challenged each other to make one pouch for each weekday of the pouch hop!


So, provided that we manage to actually make a pouch a day - you may be seeing these "Challenge" posts scattered throughout the next two weeks. 

On day one (yesterday) I worked on a "Noodlehead: Open Wide Zippered Pouch." This is the first time I've used the Open Wide tutorial and it was pretty great. I'm thankful for the cutting directions for several sizes (mine is medium sized), as well as the optional cutting directions for the color blocked look. It took the guesswork out of it!


The pouch took me about an hour to make which isn't too bad. I managed to sneak it in while my dear husband took the kid with him to the grocery store! :) 

I definitely see more of these in my future! Also, there's pouch fever going on here - as Elaine and I were talking about these Open Wide pouches on Facebook, my CMQG president Donna dropped everything to make one too! I hope these posts make you feel that way too! (I'll share the link to Donna's as soon as she blogs it!)

I also started working on my Tuesday Challenge yesterday. I knew I'd be pretty busy considering how challenging the frame pouch is. You'll have to stick around to see if I get it finished by the end of the night! 

I hope you're all enjoying the blog hop - don't forget to post your finished pouches to this week's flickr group discussion for a chance to win our weekly prizes! 

Happy Little Pouch Hop: Day 2 - Courtney & Lucy


Today we have two special ladies to introduce for day two of the HLPH!


First up is Courtney of Mon Petit Lyons. Courtney is a stay at home mom to two sweet little boys. She is a quilter and sewer of all things beautiful. She just made a beautiful Weekender that has me jealous! She has a special post scheduled for us today head on over to check it out!

Next we have Lucy of Charm About You. Lucy makes some really adorable things and she’s got a whole list of tutorials posted - I especially enjoyed reading through the “threading” one! Wow! I’m sure you’ll get lost reading her blog  - but first read her Pouch blog post!

***

Don't forget to start working on your own pouches and add them to the flickr group. All finished pouches can be added to the Week 1 Finishes discussion to be eligible to win our awesome prizes!

Monday, November 26, 2012

Happy Little Pouch Hop Day One - PonToms Pouch Tutorial


Welcome to day one of the Happy Little Pouch Hop! To kickoff our pouch hop Elaine and I have both planned a special post for you! We'll be posting the links to our guests blogs each day of the hop so be sure to check in often! The schedule of guests can be found here. Feel free to grab our blog hop button, and post it to your blog if you'd like. We hope you'll be inspired to make some awesome pouches and that you'll share them on our flickr group - there are already some fantastic pouches showing up there! The weekly giveaways will be chosen from the finished pouches that are shared in this discussion thread

 Don't forget to check out Elaine's post!

***
Now for the Pontoms Pouch Tutorial!

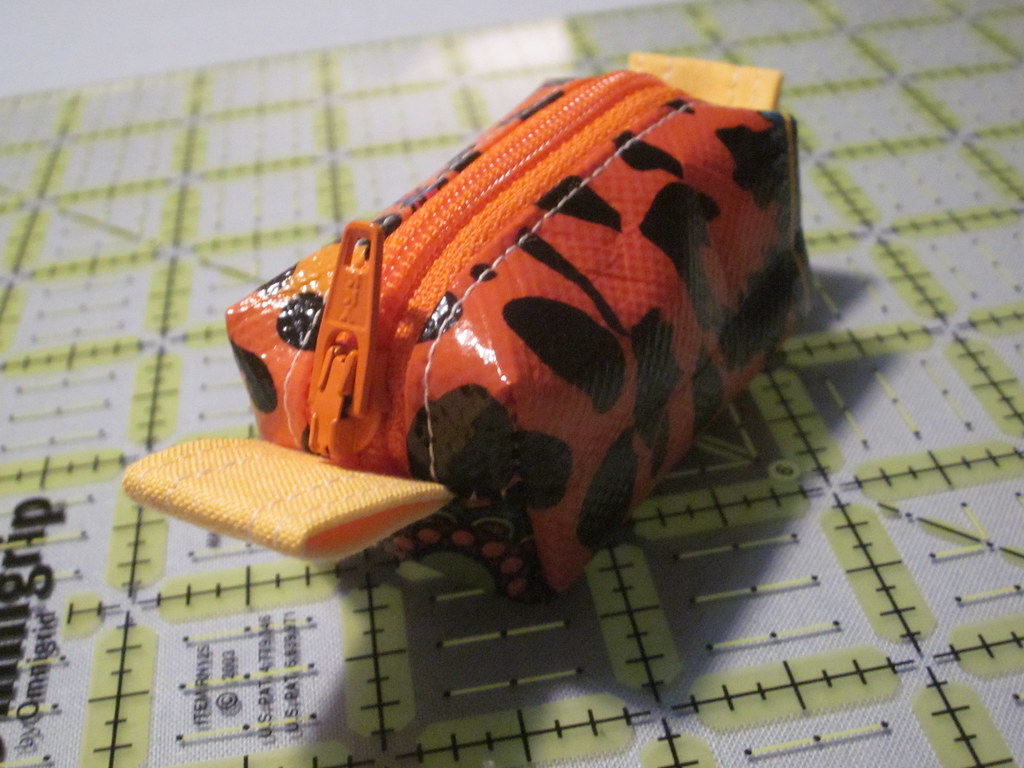
I've been making box pouches for years, they're quick and satisfying. They most certainly make the best gifts. I like the math behind box pouches, but if you don't love math and need help drop me a line and I'll help you out. If you'd like a totally customized pouch check out this post by my friend Diana, she'll walk you through how to do the math for a box pouch based on the finished pouch dimensions. I refer to this all the time!  


Final Measurements: 2 1/2" x 1" x 1"

Cutting directions: 4" x 2 3/4" (cut two from re-useable bag material**)
                              3" x 5" (quilting cotton - for pull loops)
                           
Additional supplies:
                              5" zipper
                              key ring / clip

**I like to use the re-usable laminate type shopping bags as my cloth for these box pouches. These bags can be found at nearly any store and in all different colors / patterns. I like to buy mine at HomeGoods and Michaels since they carry a variety of pretty patterned bags. They cost about $1 - $3 per bag and if you cut carefully you can source up to two fat quarters worth of material out of each large bag. Here's an example that you can find at Joann's. Alternatively oil cloth can be used.**

(picture of shopping bags)

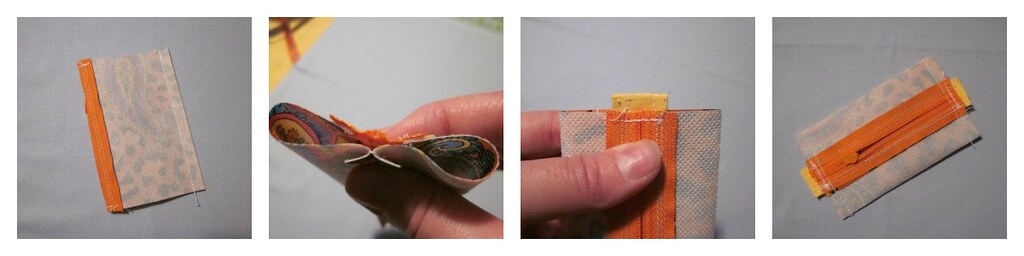
Prepare the zipper pull loops:

Finished pull loops
Fold 3" x 5" fabric in half the long way and press. Open up and fold the long edges to the center fold and press. Fold in half along the first pressed fold. (Essentially make a strip of binding tape - or use a leftover scrap from another project!)

Top stitch close to the edge on both long sides.

Cut in half, leaving you two pieces that measure about 3/4" x 2 1/2" each.

Fold one piece in half with the raw edges together and baste 1/8" from the raw edge. Repeat with the second piece.

Attach zipper:

pontoms pouch
Inserting the zipper


(Switch to your zipper foot!)

Sew zipper to the 4" side of one bag piece (right sides together) using a 1/4" seam allowance.

Finger press the seams so they're folded toward the bag piece. Top stitch close to the fold.

Repeat for the other side of the zipper, using the second bag piece.

Assemble the bag:

pontoms pouch

(Switch to your regular presser foot!)

Fold the bag unit in half, right sides together, with the 4" sides (without zipper) together. Sew down the edge parallel to the zipper using a 1/4" seam allowance. This forms the seam that will be at the bottom of the bag.

Finger press the seam open.

UN ZIP ZIPPER PART WAY! <--- don="don" forget="forget" p="p" t="t" that="that">
Fold bag unit so the pressed open seam is directly on top of the zipper. (finger press the two sides flat)

With the raw edges out, baste the pull loops between the zipper and the bottom seam on each side.

Sew along both sides reinforcing the zipper ends by back stitching over them a few times.

Box the corners:
pontoms pouch

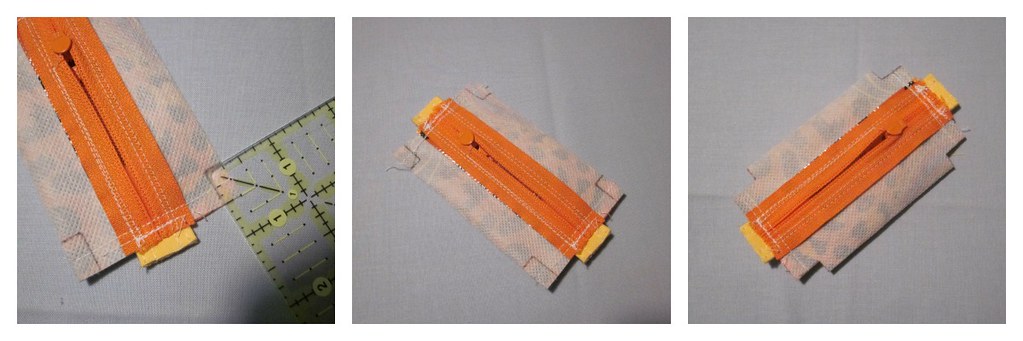
With the pouch flat, zipper side up, measure and mark a 1/4" square. This square will be measured from the side fold, and the side seam allowance.  (see picture for details, it's not as tricky as it sounds)

Mark all four corners.

Carefully clip and remove the area within those squares.
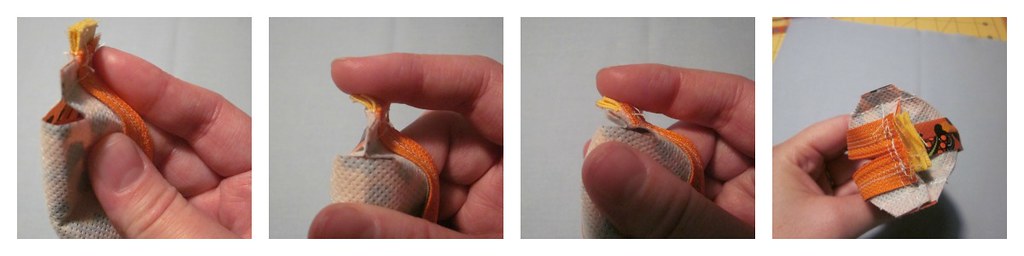
pontoms pouch

Pull one corner open at that notch, flatten it in the opposite direction (giving it height, rather than keeping it flat). Carefully sew across that flattened edge using a 1/4" seam allowance. Back stitch at the beginning and the end of the seam.

Repeat for the remaining three sides.

Turn inside out. attach your key ring, and be amazed at the teeny pouch!


(optional last step - put your PonTom's in there!)