The Looking Up pillow was published in issue 31 of Quilt Now magazine.

Showing posts with label FMQ. Show all posts
Showing posts with label FMQ. Show all posts
Friday, December 23, 2016

Monday, July 13, 2015
Rolling Hills Cushion - Quilt Now Magazine Issue 13

Check it out! My Rolling Hills Cushion is in the new issue of Quilt Now Magazine! You can find this in issue 13 on PocketMags online, on newsstands if you're in Europe, or in Barnes & Nobles (in a month or so).
I love this little pillow - It was my first project after returning from QuiltCon. I was fueled by loads of inspiration (and some new FMQ to practice). I didn't have the stamina to start a huge project, so this was made with those random FQ's I bought from the QuiltCon vendors. I just love the texture of free motion quilting on linen!
I think quilted pillows are one of my very favorite things. What about you?
Thursday, April 17, 2014
Pillows and Fancy Free Motion Quilting
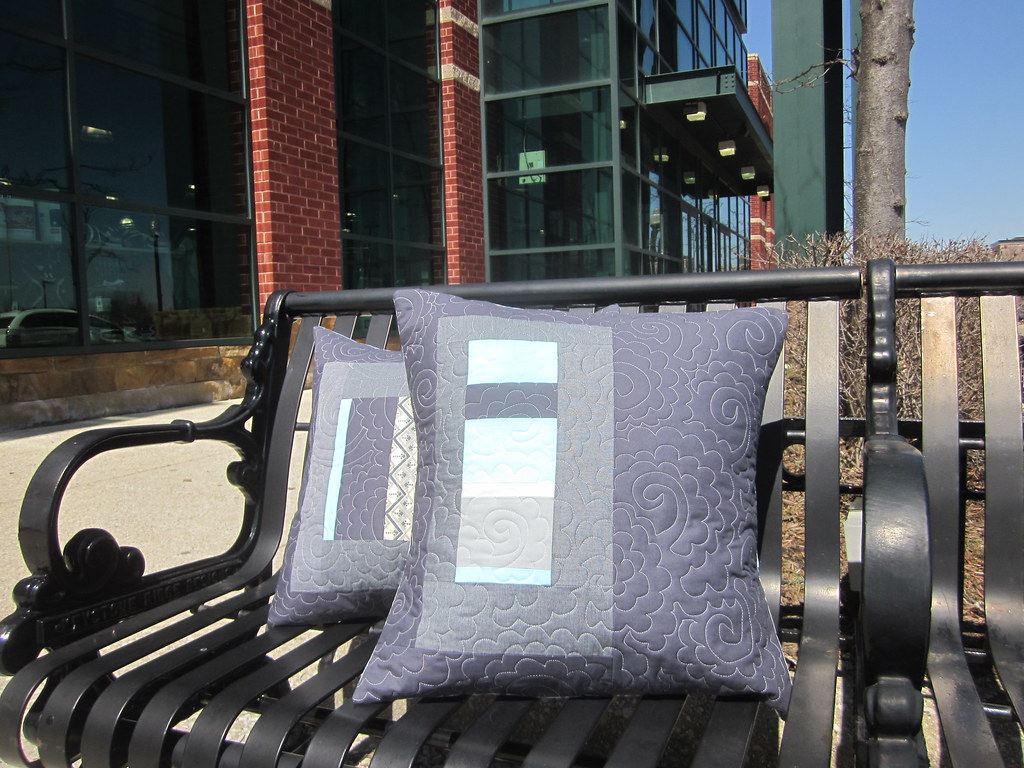
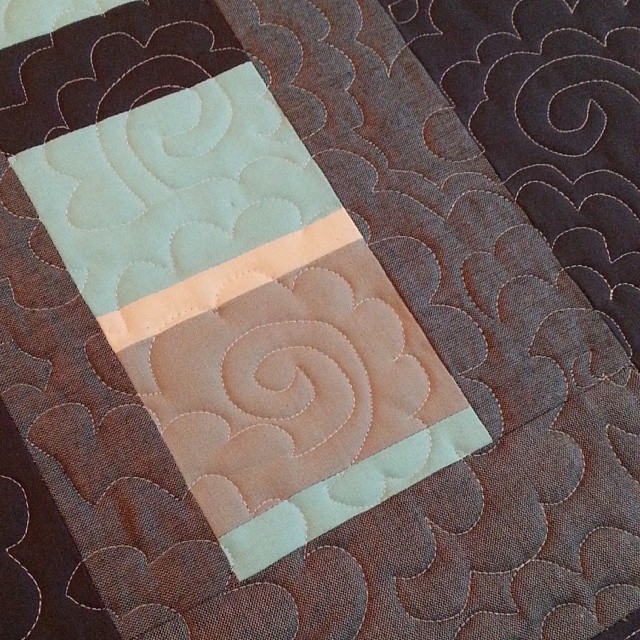
Recently I've been working on honing my skills at free motion quilting. I've been working mostly on smaller projects which lend themselves well to being densely / intricately quilted. I'm still not where I want to be with this, but I'm working on getting the movement and flow down so that it will translate easily into all my quilts.
On a whim this week I decided to make a pair of pillow covers for my cousin and his fiance. They are getting married this weekend, and as of last weekend I still hadn't decided on a gift - so handmade seemed to be the best option!
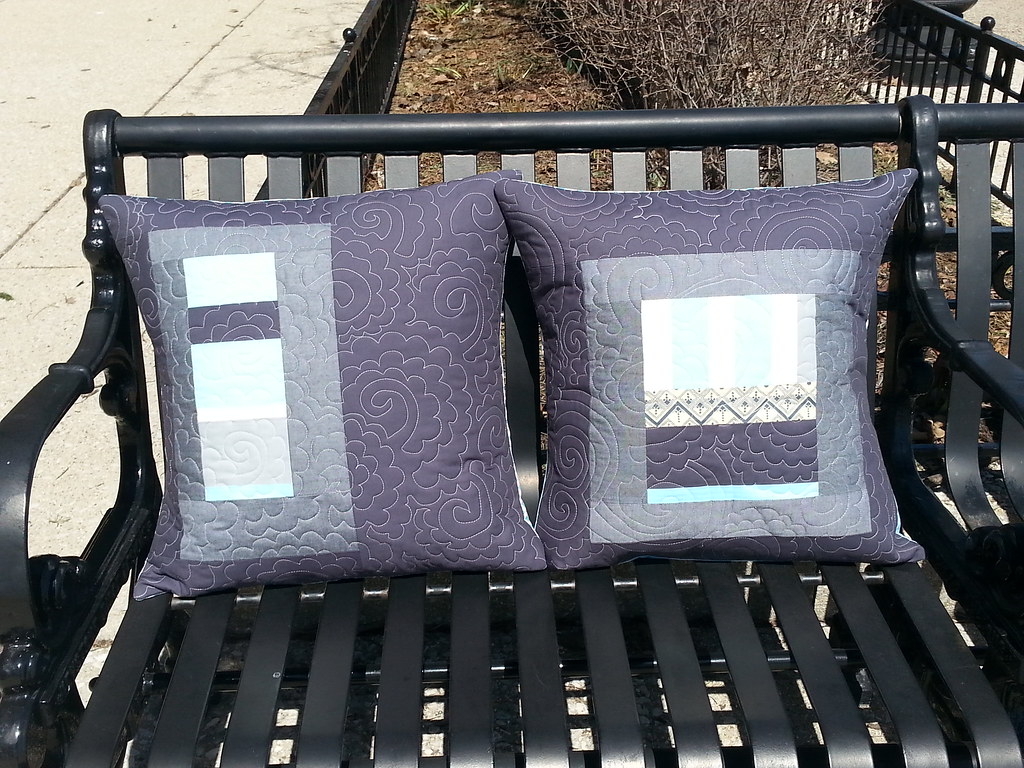
You might notice that these are made with the scraps from my "Modern in the City" challenge. The strips and strip sets were already partially pieced so why not? Jason and Andrea have not yet solidified their decor style - but both their living room and bedroom have grey and blue so these can go either place. I sure hope they love them as much as I do!
Friday, January 31, 2014
Doll Quilt Swap 14 - and new traditions.
It's 8:00 on Friday morning. Friday. One of my only days to sleep in. Well, those days are over I guess. Allie and I have started a new tradition. Friday morning I wake up BEFORE her (ugh). And once she's up I make breakfast and coffee. She sits next to me watching cartoons (It's The Magic School Bus today), and I sit next to her and catch up on email stuff - for just a few minutes. So far it's working and she's happier. I guess maybe Friday's can be my one morning to write a blog post?
I'm still working hard at work and working hard at home to find a couple nights a week to dive into my sewing. It's not an easy thing - I miss my 3am sewing sessions!
The past few weeks I've been pushing myself to finish my Doll Quilt Swap mini. Today is the due date for it and I just finished on Weds!! My swap partner had very simple requests (one sentence). After a bit of stalking her flickr I realized that her style is pretty similar to mine. She likes Anna Maria Horner and Tula Pink, she likes saturated colors and low volume texty backgrounds. With that I got started sketching.
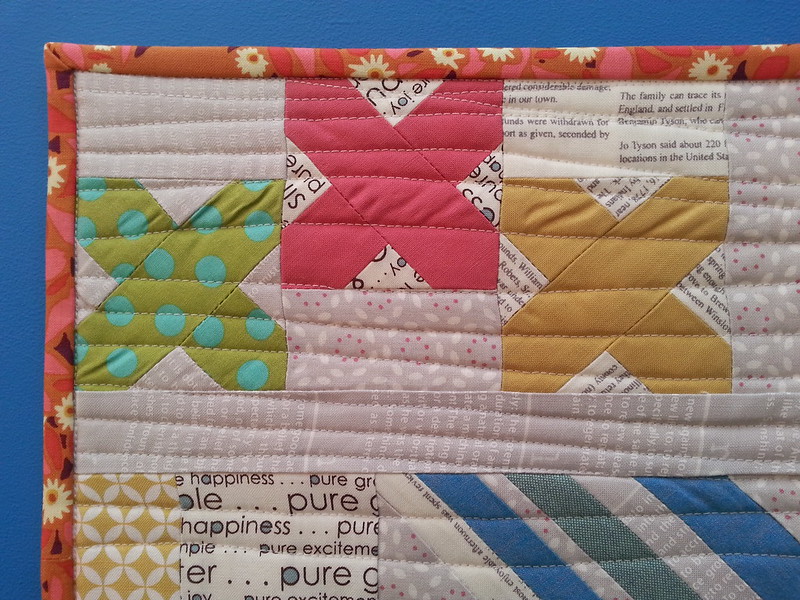
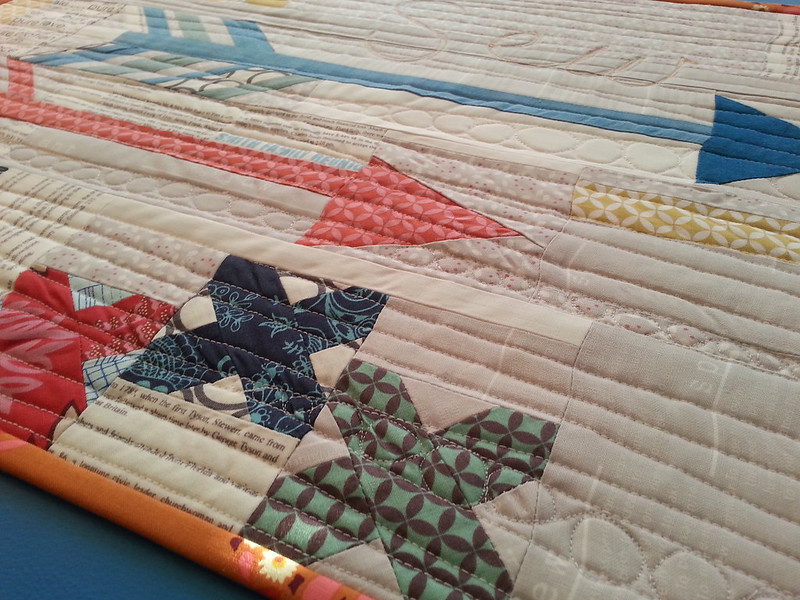
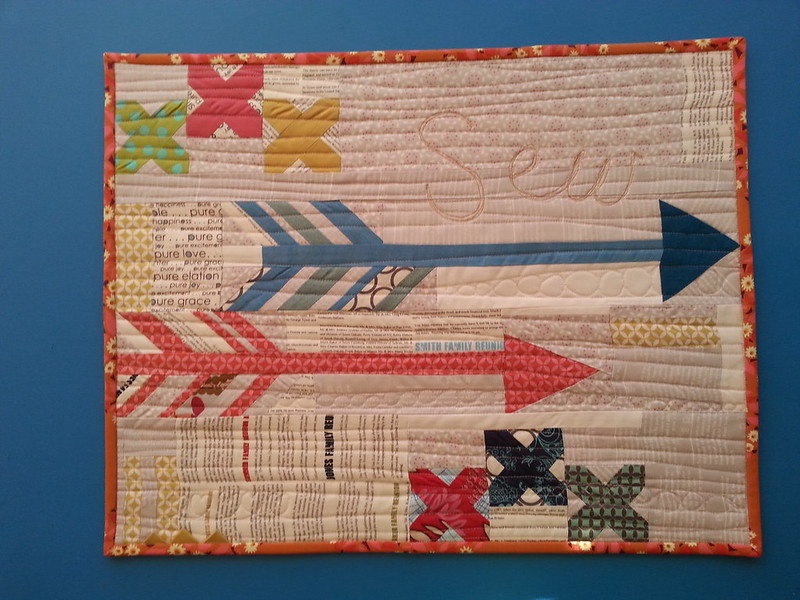
My sketches were all over the place but ultimately I went with this layout because I wanted to sew these blocks. I've been looking for an excuse to try these arrows.
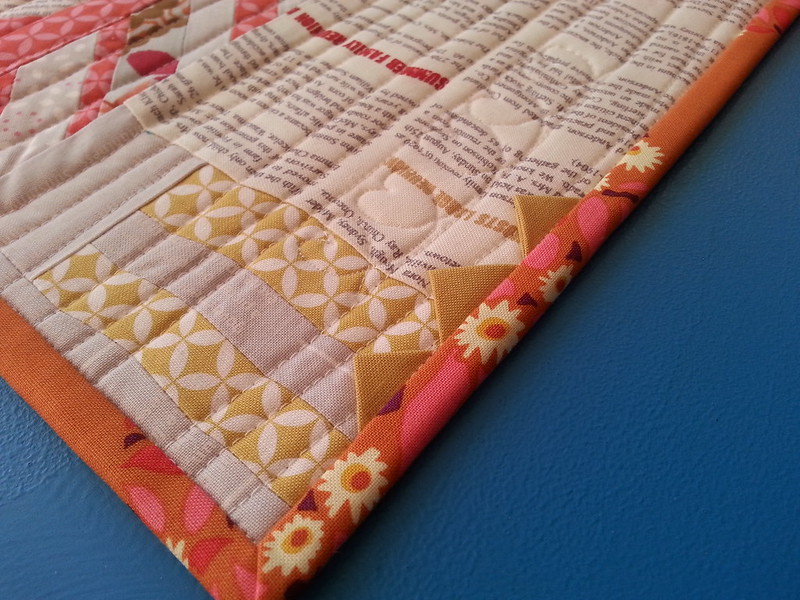
I used some favorite fabrics and I'm a little surprised that I managed to use so much of that Sweetwater newsprint fabric (it's OOP and I love it). I knew my partner would love it too though, so it's worth it!
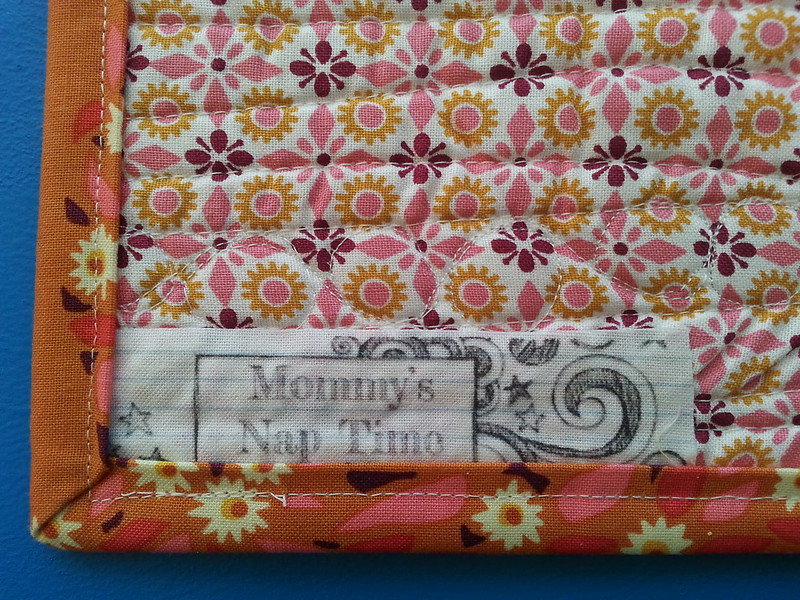
Now for the details. The cross stitch blocks were made following Alyssa / Pile O' Fabric's tutorial. They finished at 2". The arrows were pieced freely (no pattern, just playing around) they finished at 3.5" x 16". The total quilt measures 16" x 21".
I'm mailing this little quilt to my partner today and I sure hope she loves it!!
Friday, November 29, 2013
Priscilla's Quilt - Quilt-In-A-Weekend style.
 |
| These fabrics are so hard to photograph! The green looks too lime here, but not lime enough below! Also, shadows... Chicago fall/winter is the worst for photos! |
So life keeps moving forward. People are always having babies. This time I'm pretty ok with it. My cousin Jordan's girlfriend is pregnant - and due right after Christmas. The baby is a girl, and she will be named Priscilla. I got it into my head that I'd make her a quick little quilt.

I pulled the fabrics from my stash - based on the colors they have picked out for the nursery, green, teal, and orange. I think the colors are just great!
 |
| This is Priscilla's room - thanks to Facebook it's easy to keep in touch! |
I went straight to my pinterest boards for some quick inspiration -- knowing I wanted to do the wonky cross block - very minimal but lots of fun color. I pieced the wonky cross section in about an hour or so - on my day off, while Allie was at school. It took one stop at the quilt shop for some lime green linen (they were out of Kona Grass green), then it was finished in no time! I love quick little quilts like this.
 |
| There are prayers and my signature tucked under the binding. Wrapped in love! |
My dimensions were based on the package of crib quilt batting I had on hand. Finishing at about 40" x 40"
I sure hope Priscilla enjoys it - but first I'll need to mail it out to them. Sometimes it's hard living two states away!
 |
| I actually remembered to use one of my quilt labels! I used Wonder Under to fuse it onto the back and stitched around the sides. |
Friday, November 1, 2013
Free Motion Quilting Demo at the Chicago MQG

I was lucky enough to demo at the last Chicago MQG meeting. It was nice to have the chance to think about how and why I do what I do when I free motion quilt. I made an outline in preparation for the meeting - so why not share it here too? Here are my tips for FMQ.
 |
| lost your feed dog cover? make one out of template plastic or card stock! |
Equipment:
- Darning foot (cheap is ok, and feel free to alter yours with a rubber band)
- Feed dog cover - if yours don’t drop using a switch, cover them with template plastic, mik carton plastic, or card stock. Tape the cover in place using masking tape. Store bought covers work too but be aware of them if they move.
- Quilting gloves (I use Fons and Porter)
- Extension table – super helpful, but ultimately not necessary.
- Supreme Slider – I don’t use this but would love to!
- Extra tables / ironing board – don’t let your quilt hang onto the ground!
How to:
- Start with a well basted quilt.
- Roll your quilt with two vertical rolls toward the middle. Pin into place with safety pins if necessary.
- Use grippy gloves.
- Hold on to the rolls or over/under position – find what’s best for you.
- Stay within your “work triangle” – the area formed by the thumb and first fingers – always be aware of where the needle is in relation to your hands! Keep that “work triangle” flat with no puckers.
- Watch the needle and the area that is next to be quilted – don’t just watch your stitching or you’ll lose sight of were on the quilt you are!
- Foot fast, hands slow! Play around with balance between the speed of your foot petal and the speed of your hands. (If you’re getting messy curves on the back of the quilt move your hands slower around curves).

Problem
Solving
Thread
breaks what should you do?
(if your stitches were normal while quilting previously)
- Completely re-thread the top thread, then keep going.
If that doesn't fix it then:
- Re-thread the bobbin thread.
If that doesn't fix it:
- Change your needle.
If that doesn't fix it:
- Check to be sure that you’re not trying to sew over a particularly thick block intersection (sometimes this can cause your thread to shred). If you are then either quilt very close to the intersection without crossing over the bulk (avoid it!), or go slower over the intersection (even use your hand wheel to cross it).
If it’s not a bulky seam:
- Change your needle size up one – and be sure you’re using the right needle for the fabric / thread. (see chart below)
Make every
attempt to sort out tension issues before you’re working on your real quilt…
google to find tips for your specific machine
and find tips to test how balanced your tension is. It’s best to know
you’re starting at a basic good-stitch quality first! It’s easiest to know that
your tension is good and to consider the other possible problems.
 |
| This is how I roll a quilt to get it all in the arm of the machine. Quilt pieced by Emily and Sally. |
Resources:
(I learned to FMQ by reading the internet – the following websites helped)
Amanda Jean
(short video of FMQ stipples)

My pinterestboard for FMQ (tons and tons of good inspiration, some tutorials, some just
pictures)
Thread size Needle size
50 wt 75/11
40 wt 80/12
30 wt 90/14
Topstitch
needles have larger eyes and are fine for quilting
If your
thread is shredding move up a size needle!
The needle / thread chart
is care of Ebony Love – who wrote it in my notebook when I couldn't seem to
remember it!! I recommend taking a pic of the chart on your phone - then you can reference it when you're staring blankly at the notions wall wondering what needles you need!
There you have it. My tips. Nothing new, but served with the real encouragement - you CAN do this. FMQ is something you can do on your home machine. Keep trying and you'll get the hang of it!
Do you have any tips to add? Share them below! I'd love to hear from you!
Do you have any tips to add? Share them below! I'd love to hear from you!
Subscribe to:
Posts (Atom)