 |
| Aragon Bag!! |
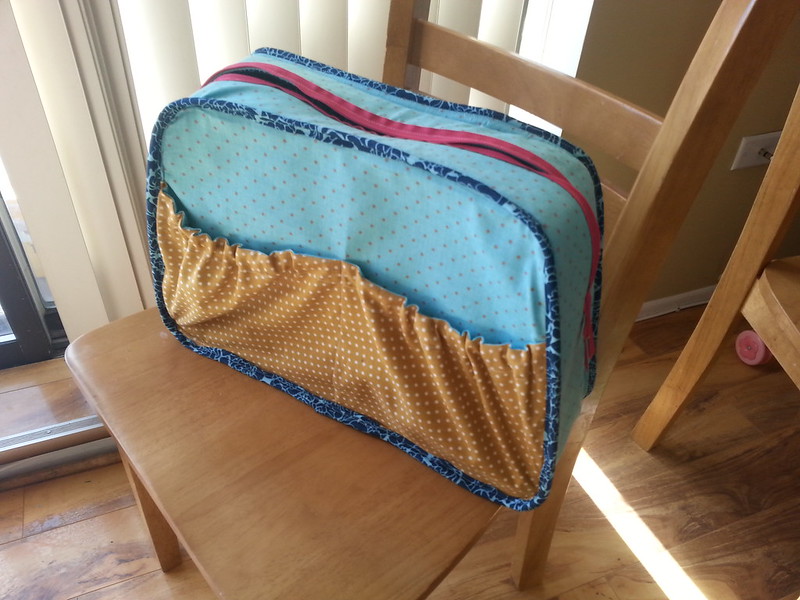
Last month my guild hosted Sara Lawson for a workshop on her Aragon Bag. It was a really fantastic workshop and I was lucky enough to be the guild appointed "helper" for the workshop. So I made my bag ahead of time and came to the meeting prepared to help wherever needed - fusing interfacing, assuring people that they did indeed have it put together right, etc. It was pretty fun!
Of course I made the Aragon bag ahead of time - and it came together so nicely! I can't even begin to tell you just how smoothly - I didn't swear or anything! I'm so proud of how polished this bag is! There were some major Aha! moments throughout - points where I read the step and couldn't imagine a better way to do the step - it all fit together so nicely - all the little details!
So, on to the bag. I had finished my bag before the workshop - all but the bias binding around the inside raw edges. Ugh. That part... I don't like hand sewing. My hands don't like hand sewing... so I devised a plan to not sew that by hand - and it worked!! Here's how:
Covered seam finishing mini tutorial:
Materials needed:
Fabric
Iron
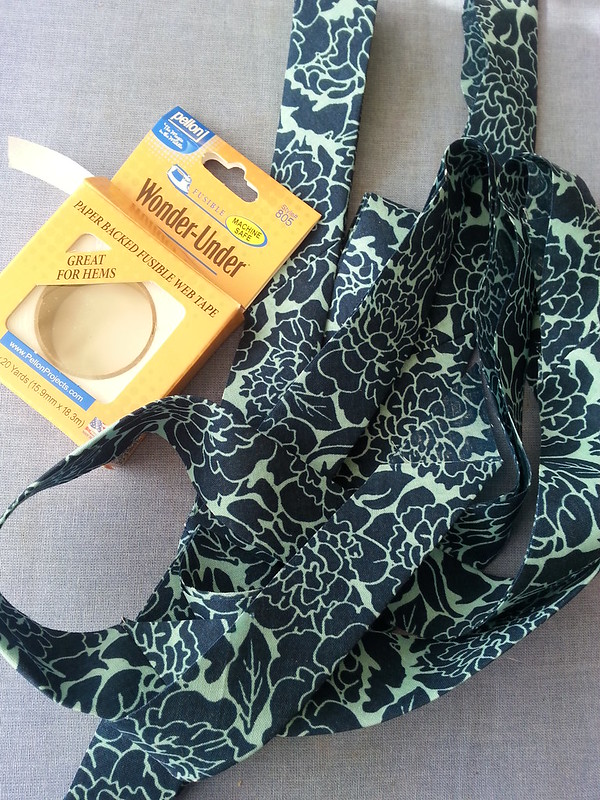 |
| Bias tape, folded in half. |
First make yourself some bias tape - it really does need to be on the bias!
Cut your strips 2 1/2" wide (cut as many yards as the pattern calls for).
Cut your strips 2 1/2" wide (cut as many yards as the pattern calls for).
Next press the strip in half right sides together.
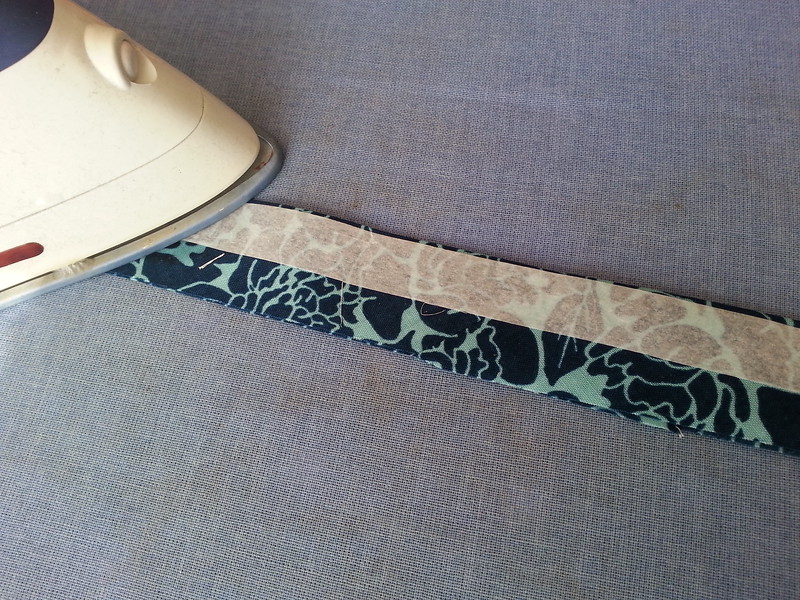 |
| Fuse the wonder under along the folded edge. |
Then lay the Wonder Under tape along the folded edge (on the right side of the fabric) and press it (according to the directions) along the entire length of the bias tape.
Leaving the paper in tact sew the raw edge (paper side up) along one side of your seam. I used a ton of clover binding clips to hold it in place.
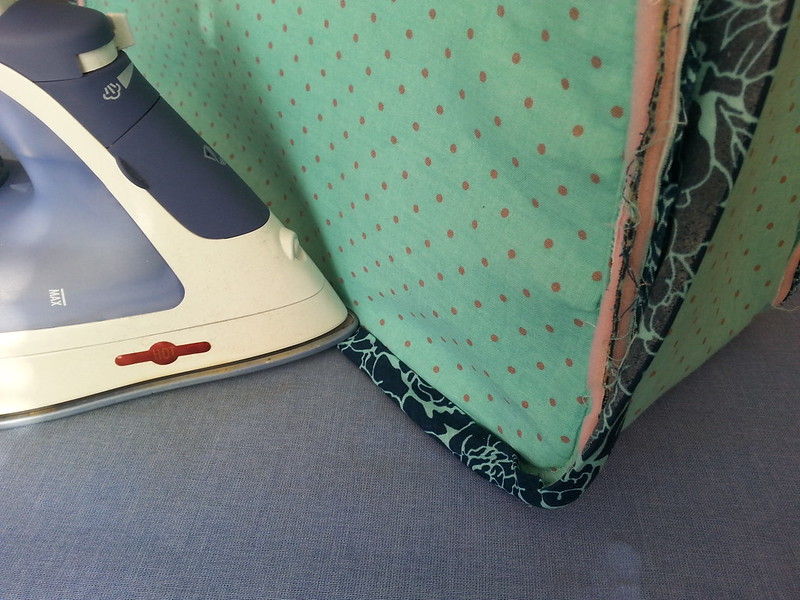 |
| Carefully press. |
Peel off the paper and carefully press the bias tape over and around the raw edge seam. Use an occasional clover binding clip to secure the binding to the edge long enough for the Wonder Under to cool. Be sure to pull the bias tape taught enough that it covers past the seam line. (tip, in a few places I found it necessary to trim the seam allowance down just a bit).
Carefully sew along the folded edge.
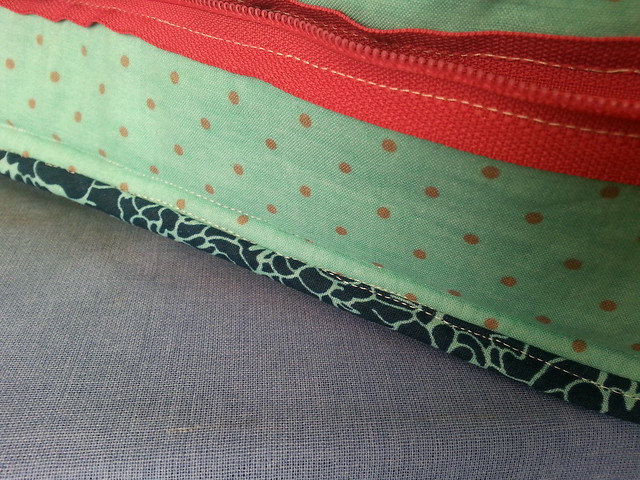 |
| Image from the opposite side. It doesn't matter much if your seams are perfect - covered is all you're looking for. |
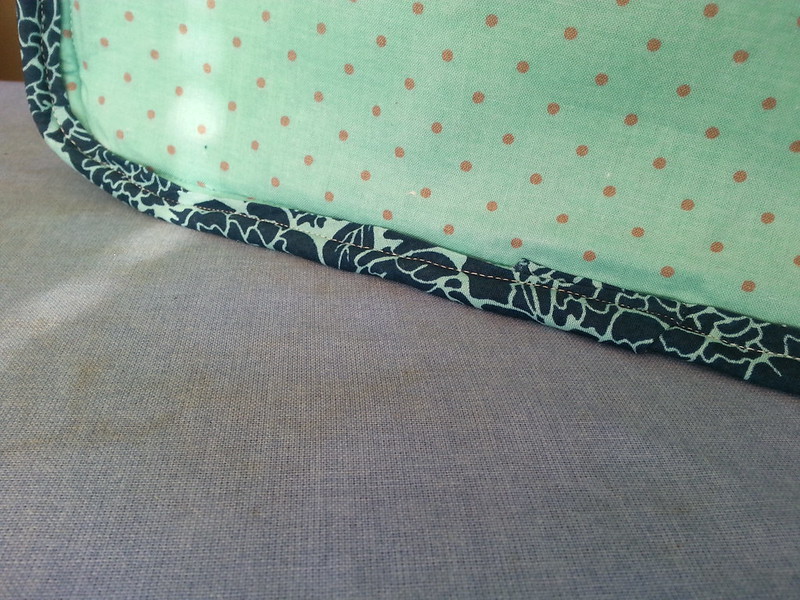
Tada! Completely machine sewn covered seams!
 |
| Completely covered in so little time! |
I really enjoyed sewing this Aragon Bag and now I'm able to say that all along I was making it for m mom! She came to visit last weekend and she had no idea that the bag was for her!! Happy early (early) mother's day Mom!!


awesome bag!
ReplyDeletethat's such a great tip! Thanks :-D
ReplyDeleteGreat idea! The finished bag looks fab:)
ReplyDeleteYou may have just convinced me to try making one her bags now. My biggest sticking point is the silly bias strips and hand sewing! Awesome job Em!
ReplyDeleteI struggled with this step, too. The wonder-under looks like a much easier way to add the binding. Thanks for sharing!
ReplyDeleteAwesome bag! Wish I'd read this post earlier- I just added a lining to a bag to avoid binding the raw edges. Guess that's less of a reason to not make my daughter a bag. Haha. Great tutorial- thanks for sharing!
ReplyDeleteGreat idea !!! Lovely bag
ReplyDeleteWhat a great idea - I made the Aragon bag too - and the only part I struggled with is the binding inside - I finally had to hand sew it - it was very difficult but so worth it - I like your idea better.
ReplyDeleteGreat tip and bag!! Thanks :) Cindy
ReplyDeleteThis is a great idea! Thanks for making and sharing your tutorial! I definitely don't like hand sewing things like this, so I would have just avoided such a pattern. Now, I don't have to :)
ReplyDelete