Friday, May 31, 2013

A Shout-out to My Sponsors!

Hello friends! I'd like to take a moment today to thank my awesomely supportive sponsors!

I've been blogging for quite some time now, and have only recently taken on sponsors, it helps me a lot to be able to continue bringing great new projects to the blog!


Sewing Patterns by Mrs H is owned by Samantha, and she sells some really great purse patterns, as well as all the hardware and accessories needed to make the patterns. Samantha's purses are clean and functional. I've had my eye on the Stella Pleated Handbag - if only I could find the time to put it together! :)


Pattern Crush is a new shop for crush worthy fabric. Pattern Crush is owned by a different Samantha (how funny is that - two Samanthas!). Samantha has a great eye for fabrics and is currently taking pre-orders for Heather Ross's new line Briar Rose.

I can't say enough about how much I appreciate my sponsors, they're really great people, with really great products to offer. I hope you'll go check them out!!

Tuesday, May 28, 2013

WIP Wednesday


Oh no! It's been a long time since I looked at my WIP's. Truthfully life has had a way of taking up all my time recently. I hope that drama dies down around here soon. Until then I'll look at my pretty WIP's!

Let's see... I have a zillion halfway done tutorials and pellon projects to finish. For many of these projects the sewing part is done, but the editing / photo editing / writing isn't done. I need to get going on that stuff.

I'm making one of these cozies for my RATZ swap!

I have a swap deadline looming too - the RATZ May swap is winding down and I need to finish (start) my swap item. For May we're swapping coffee cozies, and I'm going to make a customized coffee cup cozy using this tutorial. Bad Swap Mama here... lol. It's not late yet, and it's a quick project so hopefully I can put it together soon!

Let's see... I have a couple secret projects to finish by early June. I also have a few samples to prepare for a later project. These are all fairly small and quick finishes... but gah! I have been less than inspired to finish them. Soon soon.

Finally I have the bit of improv piecing to finish into a mini quilt. Simple, fun, and free. This is the project I feel like working on - the one with no deadline. lol.

Finished: 
This past week I finished my Sew Sew Modern swap package, and I finished a pattern test for a friend!

I hadn't realized until now that most of my WIP's are things I can't share! Crazy!!

Linked up at Freshly Pieced!

Friday, May 24, 2013

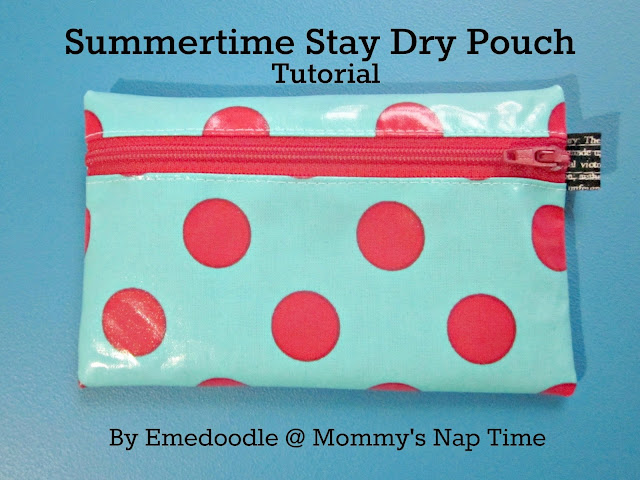
Summertime Stay Dry Pouch Tutorial

stay dry pouch


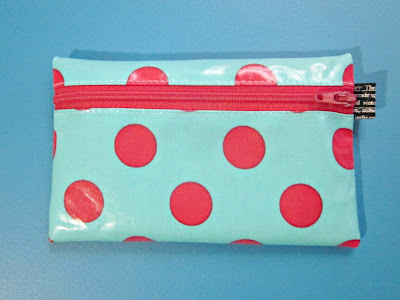
Summertime is on it's way (finally!). Of course my summer needs require a safe spot to stash my daughter's hearing aids while she runs through the sprinkler, or plays at the splash area at the local park. So, here you have a "splash proof" pouch. No it's not 100% water proof - but it's water resistant enough that your stuff won't get ruined if you throw a soggy towel on top of it. I've made this pouch to be roughly the size of an Iphone - I'll have to track down a tech savvy friend to see if it does indeed fit!


Final measurements: 5.75" x 3.5" (flat)


Supplied needed:
  • 7.5" x 6.5" Laminated cotton fabric (or oilcloth)
  • 7" (or longer) zipper
  • 2.5" x 2.5" cotton fabric for pull loop / key ring loop
Prepare key ring loop:
(essentially we're making a bit of binding tape here - feel free to use a leftover scrap from another project, or a bit of ribbon - otherwise prepare the loop as follows.)

Fold 2.5" x 2.5" fabric in half and press with an iron. 


Open up the fabric then fold each side down to the center fold and press. 


Re-fold the center fold and press. 


Sew 1/8" along both long sides to enclose the raw edges. 
(I opted to do double rows of stitching here)


Fold in half (short, raw edges together) and press.

Baste along the raw edges about 1/8" from the raw edge and set aside.

Assemble the pouch:

(Use your zipper foot attachment for the following steps)


lay the zipper along the 6.5" side of the laminated cotton fabric, right sides together, sew the zipper in place using a 1/4" seam allowance. (the zipper may slide around a bit, if you're having trouble keeping it all together use a bit of masking tape to hold it in place)

Fold the zipper back so that the seam allowances are away from the zipper. Finger press this fold (don't press with an iron, it'll melt your laminate fabric!)


Topstitch along the zipper 1/8" from the edge of the fabric.


Unzip the zipper and repeat these steps using the other 6.5" side of the fabric.

(Switch back to the regular presser foot for the rest of the project.)


Zip the zipper partway (leaving at least 3-4" open) and turn so that the wrong side is facing out.


Fold so that the top fold is about 3/4" from the zipper teeth. (finger press a crease at the top and bottom.) 

Insert pull tab under open end of the zipper.

Insert the zipper pull tab centered under the open end of the zipper. The fold of the pull tab will be on the inside of the pouch, and the raw / basted edge will be aligned with the raw edge of the side of the pouch. 

Baste pull tab into place using 1/4" seam allowances.

Sew along both open sizes of the pouch using a 1/4" seam allowance. Back stitch at the beginning and end of the seams, reinforce the ends of the zipper by sewing over that area twice.


Trim the excess length of the zipper, and clip corners.


Turn pouch right side out and enjoy!


Saturday, May 18, 2013

Blogger's Quilt Festival

Hello to all the visitors stopping by for the Blogger's Quilt Festival! I'm Emily and I love to sew. Check out my tutorials here, and my recent finishes here. I also love to make zip pouches, so you'll see a lot of those here too! Thanks for stopping by, and I hope to see you around!

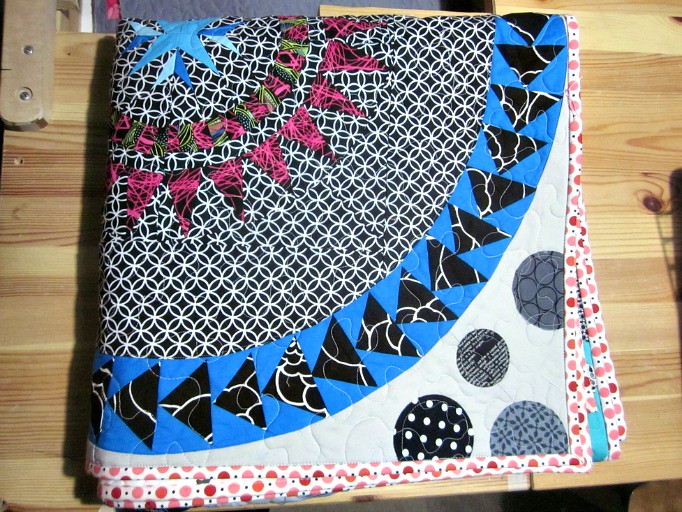
This year for my Blogger's Quilt Festival entry I'm sharing my Bella Quilt for Kathy.


This is my one of my most accomplished quilts ever, my most intense quilt.

The quilt was made for my Aunt Kathy, who has been a crafter for all my life. She's always had a project for us kids to work on, and shared her passion. She went through a quilting phase before finding her real love: polymer clay. For the past 10 or so years she's been passionately creating spectacular beads and necklaces - she's taught and written articles in magazines. She really is talented. 


Back to the story, when I was a kid Kathy gave me her old sewing machine. I was maybe 12? I started sewing and never stopped. So I guess I owe it all to her? So I made her a quilt to show my gratitude. 

So how does one make a quilt for an artist? I decided to work with black and white prints since they are a staple in Kathy's clay jewelry pieces. (it was a real stretch for me!). I started with a standard New York Beauty block and then drafted arcs of blocks to fit around it. Each border was drafted by hand, and nearly all of them are paper pieced. Each bit of this quilt took a lot of work psyching myself up to it. It was scary working on such a different and new to me style! 


In the end I absolutely love the quilt. It's really exciting to see it all together after all the planning and drafting! :) 

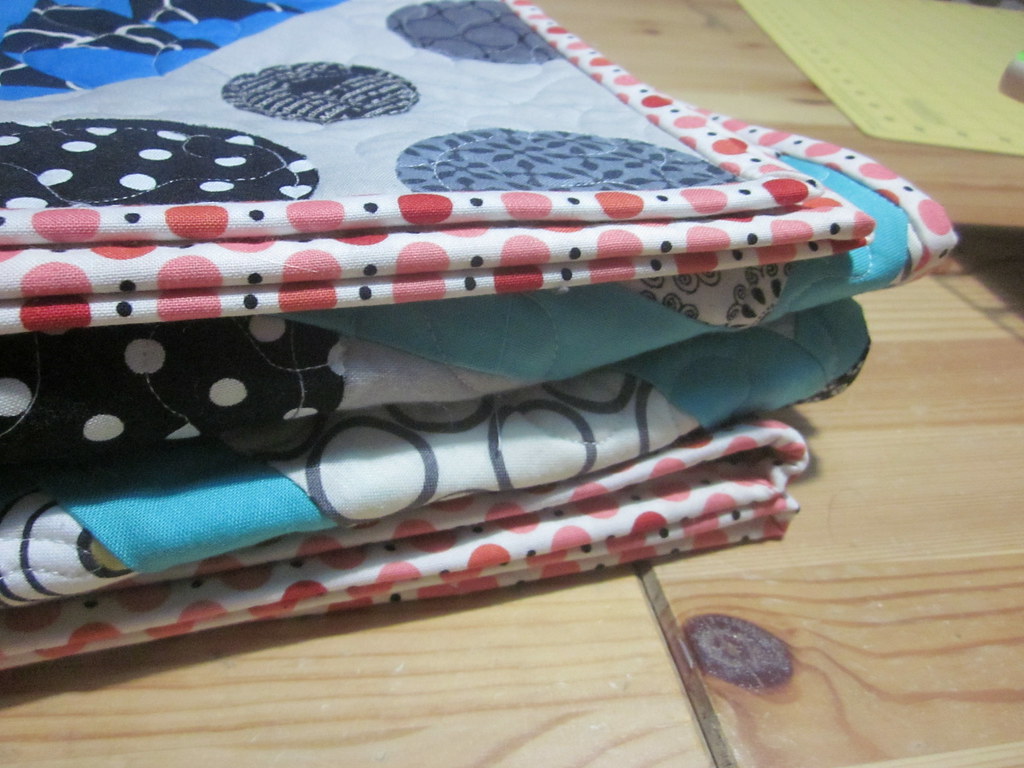
And the sweetest final touches? I added prayers written under the binding. Aunt Kathy will always be wrapped up in my love and prayers! 

Stats: 
Size: about 55" x 65"
Techniques: foundation paper piecing, hand drawn paper pattern, raw edge applique.
Quilting: meandering stipple with inclusions of "love," "hope," and hearts throughout. Quilted on my beloved Juki TL98E (Janice). 

If you're interested you can read all the details of the story / piecing here.

Now go ahead and check out all the other great quilts in the Blogger's Quilt Festival


Sunday, May 12, 2013

To do list:


  1. Take pictures of the Bubble Quilt - it's been finished for more than two weeks now!
  2. Edit pics and finalize tutorial for Bubble Quilt!
  3. Edit pics and finalize tutorial for Pillow Shams project - wanted these done for mother's day!
  4. Order fabric for Summer Quilt - ASAP!
  5. Focus on the mini quilt with a deadline! DO IT! 
Are those really sewing goals? Only one of those options includes sewing - notice how I did that? I need to let go of my fears and just decide on a design and go with it! I've been dragging my feet on this mini project because I just can't decide. Part of me wants to make something that would be well liked by others, but if I focus on that too much I loose sight of my own style, and ultimately the project is awesome-er if I LOVE it. 

There it is. It's Sunday night. I'd like to stick to this list throughout the week. I need to focus! :)

Mother's day is for moms, and for those who mother.


Happy Mother's day to all you mommy bloggers! I'm always a bit at a loss on mother's day. It's weird to be the mom on Mother's day, after living my whole life as a kid. :) Truth is, I'm pretty lucky. 


Mother's day is always a little odd for me in another way though. On holidays like this I'm really reminded about the kids that I want, that I wish for, that aren't here yet. As anyone who's spent any amount of time trying to conceive - the celebrations of motherhood are soured a little, by the loss of every passing month. Every missed chance. 

I'm entirely lucky to be blessed with Allie - as easy as it was for us to have her - she's perfectly mine. (Did I ever mention that she's got my attitude? For better or worse). It kills me that at this point she'll be 5 years older than any siblings (at the very least). She wants friends, and calls her friends "stisters" (adorable extra t's). 


There are so many deep feelings going on here. But I'll take them - each day is something new. 

I hope you all have great mother's days - give your mom a hug. Hug the strong women in your life - mother or not, let them know they're appreciated! 

Monday, May 6, 2013

SMS Giveaway Day!

Pencil Pouch - perfect for, well pencils, pens, and markers!

Welcome to the spring giveaway day hosted by Sew Mama Sew! 

Today I'm giving away your choice one tiny Pontoms Box Pouch (tutorial here), or one adorable pencil pouch. 

The items shown here are already spoken for so I'd like you to tell me what your favorite colors are   as well as which style pouch you'd like (pencil pouch, or pontoms), and I'll make one especially for you!

Pontoms Pouch - perfect for OB tampons, spare change, or any other tiny thing.
I'll keep it short and sweet here. If you'd like a chance to win (USA only please) leave a comment below telling me what color / shape you'd like. 

For a chance at extra entries you're welcome to follow me on any of these sources and leave a comment below (1 extra entry each).


There you go! Good luck!! 

(giveaway ends the evening of may10, 7pm CST)

****

Giveaway is now closed - Mr Random.org chose comment #60,

I love the pencil pouch in blue and pink!
I'll be contacting you soon Emily!

Wednesday, May 1, 2013

A Pretty New Cover for my Juki!


A few days ago my friend Jenna (the sewing student from this post) messaged me asking for tips / tutorials and general info on how to make a cover for he new sewing machine (I know, I know, it's so cool that she's really been sewing on her own!). So naturally I have a pinterest board for that. In my defense, I've been planning to sew a cover for another friend's machine recently - so I've been compiling links and inspiration.

Since Jenna was already planning on making one, I joined along (virtually of course, Jenna doesn't live nearby). I used this tutorial and it worked out just perfectly!

I omitted the side pockets, knowing that I wouldn't use them. Instead I added a bit of patchwork on the sides to look as if I had added the pockets. I used two layers of Pellon sheerweight fusible interfacing on the outer fabric (I would have used one layer of Shape Flex SF101 if I would have had it on hand) and it gave just enough body to the fabric for it to hold it's square shape.

My favorite part of this tutorial was the self binding bottom edge. Genius!

PS - It's super hard to photograph your sewing machine cover when your sewing room is a total mess... I should clean it, but I'd rather sew. Creativity is messy sometimes.