
 |
| Click here for more info about the QAL! |
I can't believe we're already nearing the halfway point of the Cathedral Window QAL! Here is my contribution, the Opposing Waves block!

I had a lot of fun putting together this block. I cut the pieces at a slight bias for extra curve, although that step isn't entirely necessary it will give your waves a more dramatic effect. The fabrics I used were Kona Curry, and Kaffe Fassett Shot Cotton in Lichen and Moor. The shot cottons look really amazing in this block, although it is hard to take pictures of that amazingness!
Block size: 12 ½ ” x 12 ½ ” unfinished
Fabric Requirements:
8” x 14” of three fabrics
5 ½ ” x 12 ½ ” of one fabric
 |
| The green fabric pictured here is 8" x 14" The purple fabric is where you would trim down to get your "bias cut" pieces. |
From each of the three 8” x 14” pieces cut a 5 ½ ” x 12 ½
” rectangle at an angle so that the corners of the ruler are on the edges of
the 8” x 14” piece. This will provide a slightly biased edge without wasting
too much fabric.

Take one bias cut 5 ½ ” x 12 ½ ” rectangle. Fold one 12 ½
” edge back 1” and press.
Repeat on the other two bias cut rectangles. Leave the straight cut 5 ½ ” x 12
½ ” rectangle flat; this will be the base fabric.

Lay one bias cut rectangle on top of the base fabric so
they overlap by 1” on the long side. Align the raw edges of the two pieces with
the fold of the bias rectangle on top.
Repeat using a second bias rectangle on the opposite side of
the base fabric.
Repeat again on the second side of one of the bias pieces.
 |
| All layers in order, marked, and stitched along the lines. |
Pin all layers together, and use a disappearing fabric pen to mark the following
horizontal lines across all the pieces:
·
¼” from bottom
·
4 ¼” from bottom
·
8 ¼” from bottom
·
¼” from top
Carefully sew along each of these marked lines.
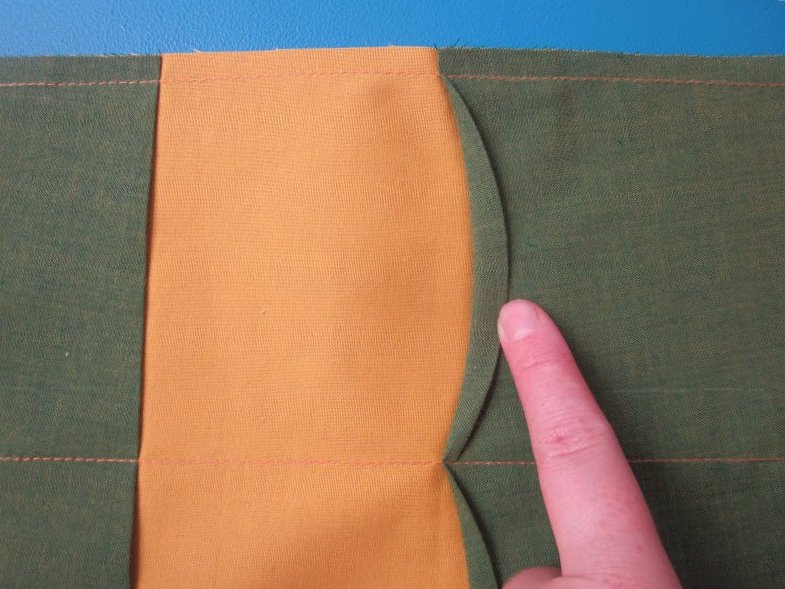
Press the vertical fold between each of the lines away
from the base fabric. The bias edge will curve gently. Each curve should be
approximately ½” at the widest part. Press the curve into place.

Press one vertical row then top-stitch the curve close to the
folded edge. Repeat for all
rows.

Trim block to 12 ½ “ x 12 ½ “

If you make one of these be sure to add it to the Cathedral Window QAL Flickr page and you may win one of the fabulous prizes! And as always, if you make a block using this tutorial I'd love to see it! Add it to my Flickr group too!
***
OH wow, you know what? I get it! I finally understand how a cathedral window is made!! thank you so much!
ReplyDeletecute! loving all your tutes lately!
ReplyDeleteThis is a great tutorial! Thanks for sharing...Judith, Texas
ReplyDelete